|
|
Rubicon
Express 3.5" Jeep TJ
Super Flex Suspension Lift
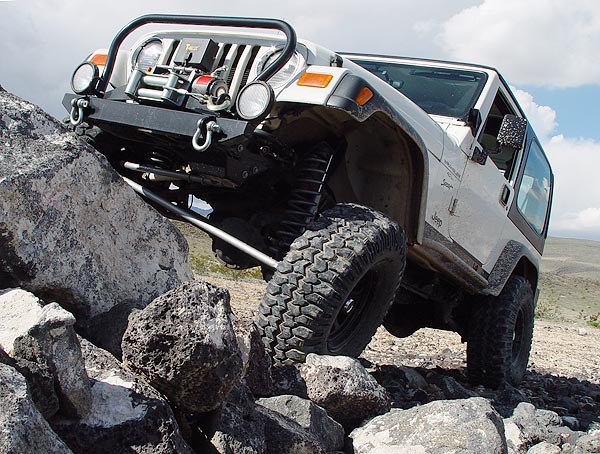
Looking to grow
your Jeep up and make it more capable on the trail but can't decide
on which lift kit to get? Well, I'd recommend getting a Rubicon Express
3.5" Super Flex Suspension Lift. With the exception of new and
longer shocks, this kit pretty much comes with everything you need
to get your Jeep lifted over 3". Also, Rubicon Express has a
long history of making great quality Jeep suspension products that
will give you piece of mind on the trail.
As complete as this kit is, I will say however that it's still a far
cry from everything you 'really' need to do a lift of this height
right. In addition to this kit, I would highly recommend picking up
an adjustable front track bar, better sway bar link disconnects and
most importantly, a Slip Yoke Eliminator (also known as an SYE), CV
Drive Shaft and adjustable rear upper control arms. Yes, you could
get away with just dropping your transfer case skid plate using the
drop kit supplied with the lift, but why would you want to loose all
that belly clearance that you just paid a bundle to lift? Something
you will have to answer for yourself.
UPDATE: Visitors of 4x4xplor.com can now save even more on purchases at Northridge4x4. Simply enter in the Discount Code: 4X4XPLOR-5D and receive a 5% Discount.
Installation
| |
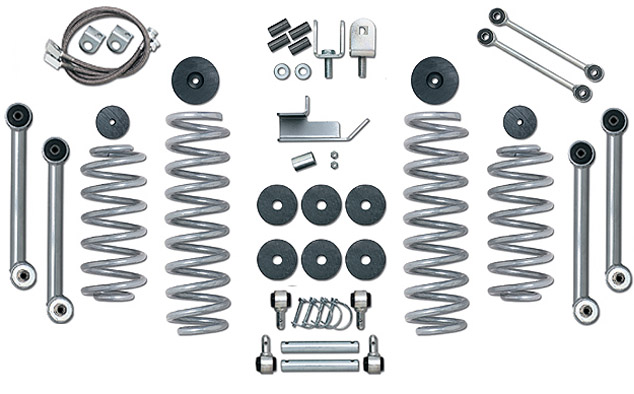
Here is a pic of all the parts you will
get when you purchase your Rubicon Express 3.5" TJ Super
Flex Suspension Lift. As silly as it sounds, one of the things
I really like about Rubicon Express components is the plain
metal or silver finish they have. |
 |
1. Begin this project by parking on level
ground and if you live in the rust belt of America, spray all
the bolts you will need to work on with some PB Blaster the
night before.
2. Put your Jeep in
gear, engage the emergency brake and chock your rear wheels.
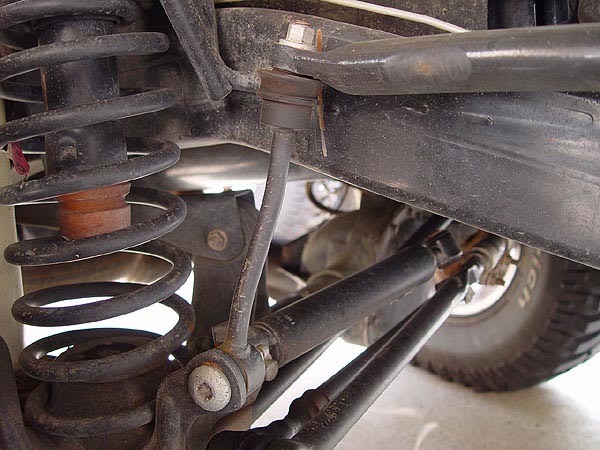
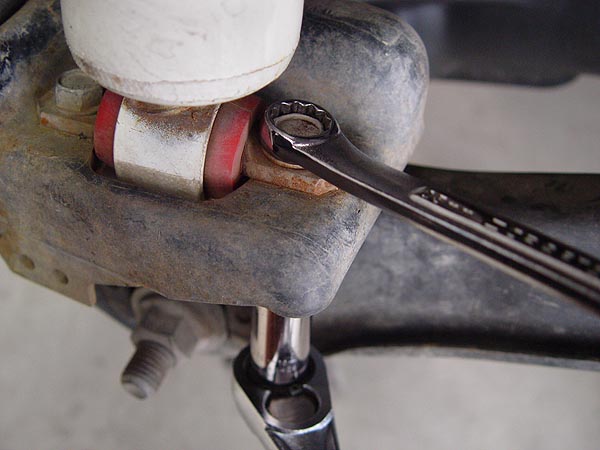
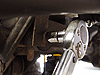
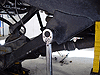
3. Disconnect your front sway bar links from
the axle using a Torx T-55 bit. The top part of the link is
attached to the swaybar itself by
a tapered stud. In other words, even after you remove the nut
securing this bolt, the darn link will still be stuck on the
swaybar and near impossible to remove. The easiest way I have
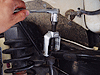
found to remove tapered studs is by using a tie-rod end puller
(see pic to the left). Simply slip it over the sway bar and
then proceed to ratchet it down until the link pops off. |
 |
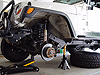
4. With the sway bar links off, loosen but
do not remove your front wheel lug nut, jack up the front end
of your Jeep from the axle and then set it back down on jack
stands placed behind the lower control arm mounts. Proceed to
remove your wheels and then place them behind the jack stands
underneath the frame rails for added protection. Continue to
support your front axle with the help of jack stands and/or
with floor jacks.
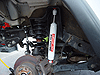
5. Unbolt your shocks from the axle using
a 13mm deep socket and wrench. Then, remove the nuts securing
the shock to the upper stud mount using a 9/16" wrench
(wrench size may vary depending on make). You may need a pair
of pliers to hold the stud in place while you unscrew the nuts. |
 |
6. Using a 13mm socket or wrench, remove
the front spring retaining clamp from the driver side of your
Jeep. With a very few exceptions of year or country, there should
be no retaining clamp on the passenger side.
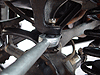
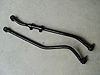
7. Now, remove your front track bar. You will need
a 15mm socket to remove the lower mount on the axle. Then,
using a pair of needle nose pliers, remove the cotter pin from
the ball joint stud connection where the track bar is attached
to the driver side frame rail.
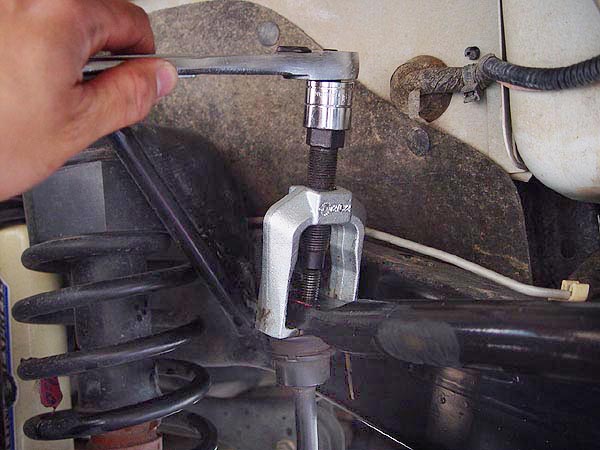
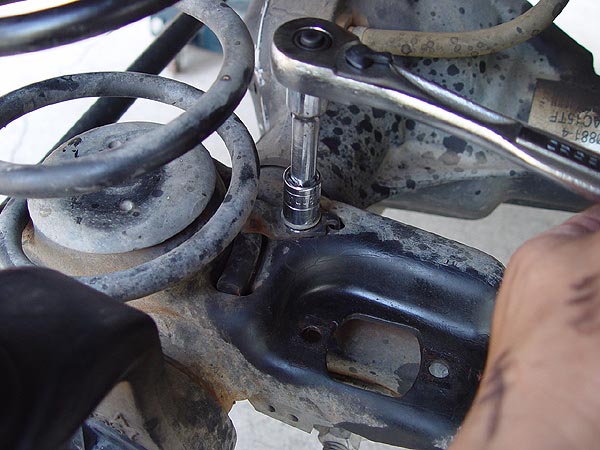
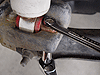
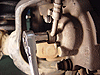
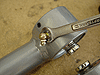
8. Loosen but
do not completely remove the castellated nut, insert the pickle
fork in between the frame rail bracket and the rubber ball joint
boot and then tap it with a 3 lb. hammer until the stud mount
pops loose as shown in the pic to the right. Leaving the nut
on the stud just prevents the whole track bar from falling once
it comes loose.
9. Remove the
castellated nut and then lower the track bar down. Now remove
the bolt and flag nut attaching the track bar to the axle and
pull the whole thing out. |

|
10. Remove your brake lines and install your
new extended stainless steel lines provided with the Rubicon
Express Super Flex Suspension Lift. I already had a set of
stainless steel brake lines on my Jeep and the installation
write-up for it can be seen here: Goodrich
Stainless Steel Brake Lines
11. Now, slowly lower your front axle as far as it
will go. If you're starting out with a stock height Jeep, your
springs should just about fall out at this point and time. If
you're starting out with taller springs like me, you will most
likely need the help of spring compressors to remove your front
coils.
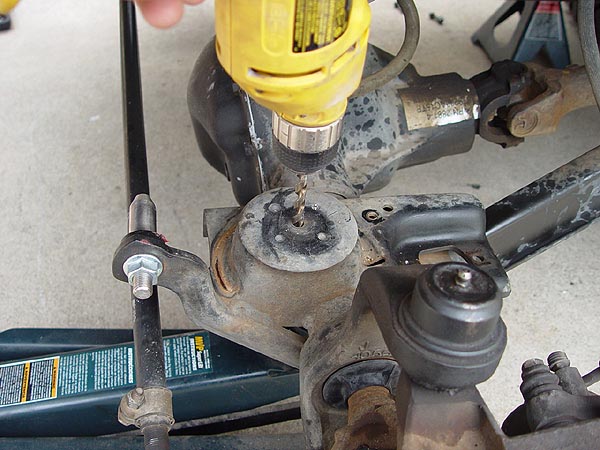
12. Drill
a hole through the center of the bottom spring perches using
the appropriate size drill bit (a tiny bit smaller in diameter
than the bolts you are using). Then, pre-thread
the holes you just drilled by ratcheting on the self-tapping
bolts. Make sure to do this slowly and back out often to create
clean threads. Do
not mount the bump stop extension at this time as it will make
installing your new coils very difficult. |
|
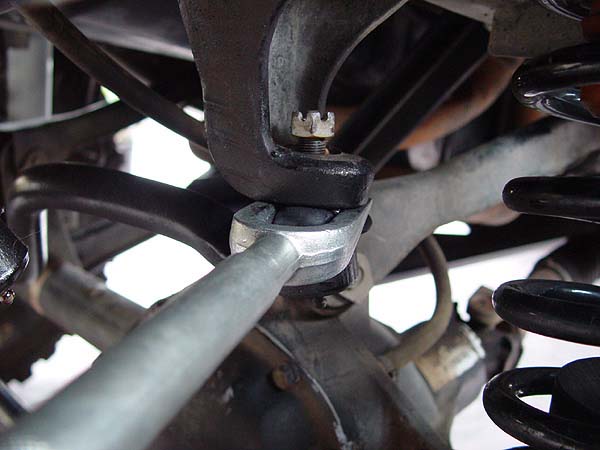
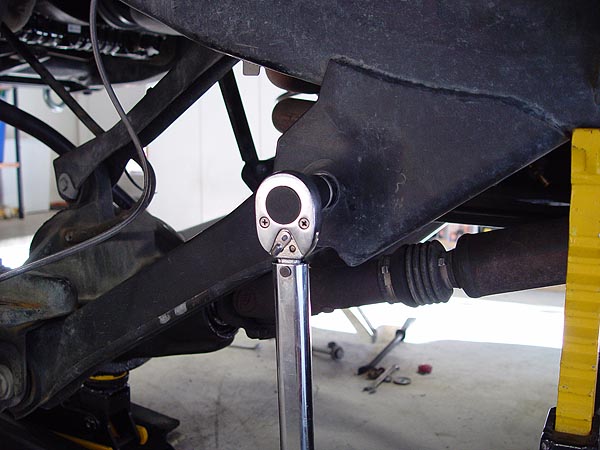
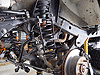
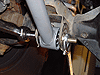
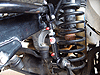
13. Jack up your front axle a bit and support
it with jack stands. Remove the lower control arms from the
frame rails and axle using a 21mm socket and a crescent wrench.
A breaker will come in handy here as the bolts are seriously
on tight.
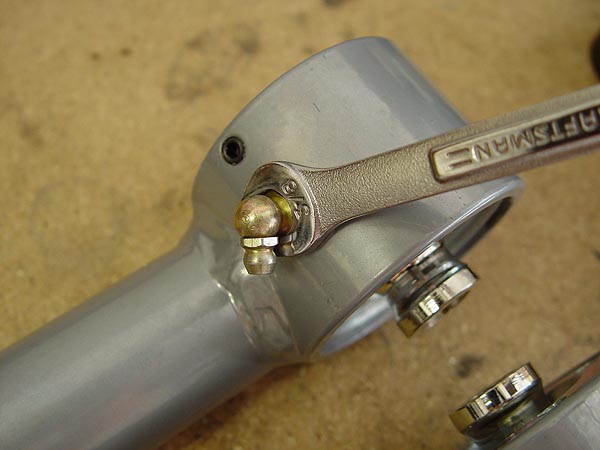
14. Back at your work bench, assemble the right angle
zerk nipples onto all the lower control arms using a 3/8"
wrench. Make sure that the zerk nipple is facing back towards
the length of the arm and pointing out just a bit for easier
access once it's installed on your Jeep.
15. Install your new lower control arms with
the rubber bushing at the frame and the zerk nipple facing up
at the axle mount. re-use the factory hardware at the frame
and the new grade 8 bolt, washer and lock nut supplied with
the Rubicon Express Super Flex kit on the axle end. Do not fully
tighten these bolts until your Jeep is back on the ground. |
|
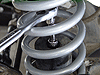
16.
Using
your spring compressors, compress your new coils enough to make
it easier to install. Slip the bump stop extension and your
new coils into place at the same time and then affix the bump
stop extensions to the spring perch using the self-tapping bolt
supplied as shown in the pic to the left.
Re-install the spring retaining clamp.
17. Install your new and longer shocks. I am running
Doetsch DT8000's and the installation write-up for them can
be found here:
Doetsch DT8000
Shocks |
 |
18. Install your new sway bar links according
to the instructions that come with them. I have a set of JKS
disconnects and the installation write-up for them can be found
here:
JKS Sway Bar Link Quicker
Disconnects |
|
19. The Rubicon Express Super Flex Lift instructions
say you should re-drill your front track bar axle mount 3/4"
towards the driver side of the Jeep and then re-install your
factory track bar, but I would recommend you buy and install
a new adjustable track bar instead. I have one made by TeraFlex
and the installation write-up can be found here:
TeraFlex
Adjustable Front Track Bar
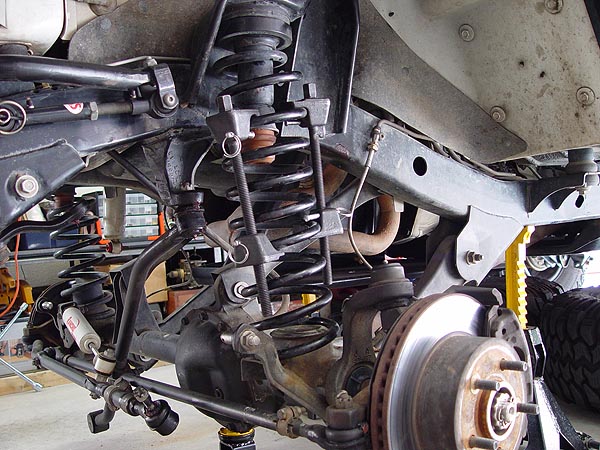
20. With your new front track bar on, re-install
your wheels, lower your Jeep back on to the ground, torque your
lug nuts to 95 ft. lbs., tighten the lower control arm frame
mount bolts to 130 ft. lbs. of torque and the axle mount to
85 ft. lbs. of torque. Chock your front wheels and then head
on over to the back of your Jeep. |
|
|
|