
Off Road Only
U-Turn Steering System |
|
|
|
What
You will Need
• ORO
U-Turn Steering System
• Aftermarket
Steering Stabilizer
• 15mm, 18mm Socket/Wrench
• 3/4" Socket
• 5/16" Wrench
• 13mm - 12 Point Socket
• Ratchet
• Torque Wrench - 90 ft. lb. Capacity
• 3/4" Crescent Wrench
• Pliers
• 2 lb. Hammer
• Floor Jack
• 2 - Jack Stands
• Tape Measure or Ruler
• Pitman Arm Puller or Pickle Fork
• Lock Tite
• Silicon Spray or Other Lubricant
• Grease Gun
• PB Blaster
What Comes with the
Off Road Only
U-Turn Steering System
3 - Right Tie Rod Ends
1 - Left Tie Rod End
1 - Right Hand Steering Hub (3 Holes)
1 - Left Hand Steering Hub (2 Holes)
1 - U-Turn Drag Link
1 - U-Turn Tie Rod
1 - Adjuster Sleeve
3 - Right Hand Jam Nuts
2 - Left Hand Jam Nuts
2 - Aluminum Bushings
2 - 1/2-20x2.5 Grade 8 Bolts
2 - 1/2-20 Top Lock Nuts
4 - Hardened Flat Washers
2 - 1/8x1 Cotter Pins
U-Turn Steering System
As Stated by Off Road Only
• A crossover steering design that eliminates steering toe
change from suspension height change.
• Drag link is 1.25" diameter 4130 chromoly, welded,
formed and heat treated for ultimate durability.
• Tie rod is 1.375" diameter 4130 chromoly, welded and
heat treated for ultimate durability.
• Tie rod and drag link painted with Rustoleum Hammerite for
easy touch up.
• Custom 1 1/4 hex thread insert bungs that are radially MIG
welded, for easy and proper jam nut tightening at each jam nut.
• A drag link connection at the passenger hub that allows
full turning radius lock to lock to match the steering box.
• A drag link design allows clearance for track bar bracket/sway
bar bracket. No bracket trimming is required after you lift your
Jeep.
• Custom hubs that bolt to your original steering knuckles,
machined and TIG welded for strength, tapered for tie rod end attachment.
• Improved steering feel, removing the "Dead Spot"
commonly associated with a lifted TJ steering.
• Minimallized "bump steer".
• U-Turn™ is fully compatible with a stock trackbar,
Rubicon Express Extreme Duty track bar, Full Traction Drop Bracket
and most others that relocate front track bar at the frame end.
• U-Turn™ requires a stock pitman arm.
• Steering stabilizer bracket included, it DOES require an
aftermarket or OEM replacement steering stabilizer, contact ORO
for details.
• Designed for TJs with up to 6" of lift. Stock height
TJs may have a slight interference during maximum compression, not
an issue during articulation.
• 100% bolt on application for TJ Dana 30/44 front axles without
ABS sensors installed. |
|
Off
Road Only (ORO) Jeep TJ
U-Turn Steering System Installation
When you're ready to upgrade your Jeep TJ's
steering system to something a lot more heavy duty, look no further
than to Off Road Only. The new Off Road Only or (ORO for short) U-Turn
Steering System comes with a 1.25" diameter drag link and a 1.375"
diameter tie rod, both of which are made of 4130 chromoly. The U-Turn
steering system also comes with custom hubs that bolts directly onto
your original steering knuckles. Also, the new passenger side hub
has a drag link connection that provides a full turning radius that
matches your steering box lock to lock. Other benefits include an
improved steering feel (no more "Dead Spot"), minimallized
"bump steer" and a crossover steering design that eliminates
changes to the toe-in alignment caused by suspension changes on your
Jeep.
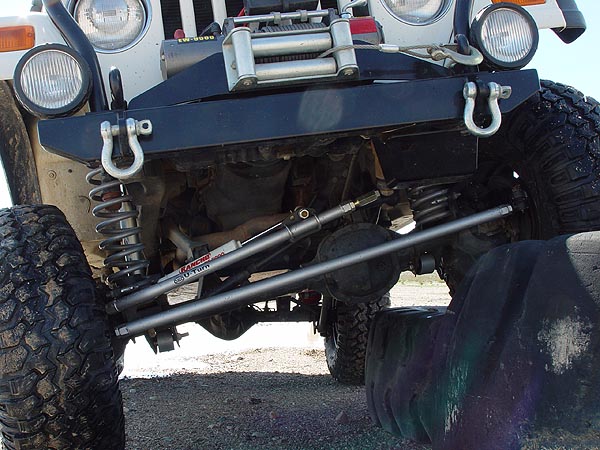
Installation
|
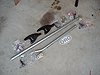
Here is a pic of all the parts you will
get with your new Off Road Only U-Turn Steering System. As
with any mod, please check to make sure you have all your
parts before starting your installation. |

|
1. Park your Jeep on a level surface, put
it in gear and engage the emergency brake.
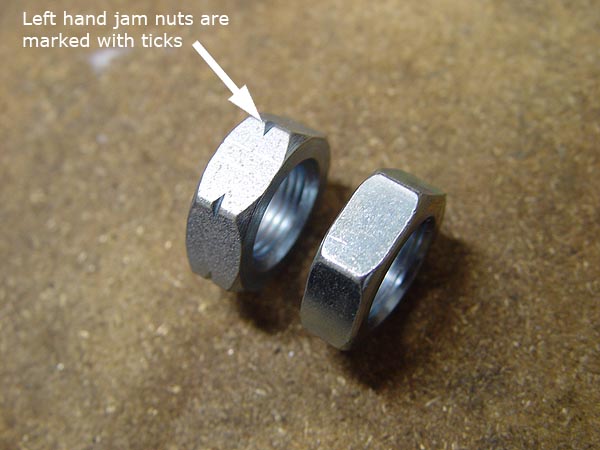
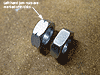
2.
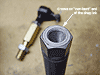
If you look through all the tie rod end bags, that come with
you ORO U-Turn Steering kit, you should find a total of 3 right
hand jam nuts and a total of 2 left hand jam nuts which are
marked with ticks as shown in the pic to the left.
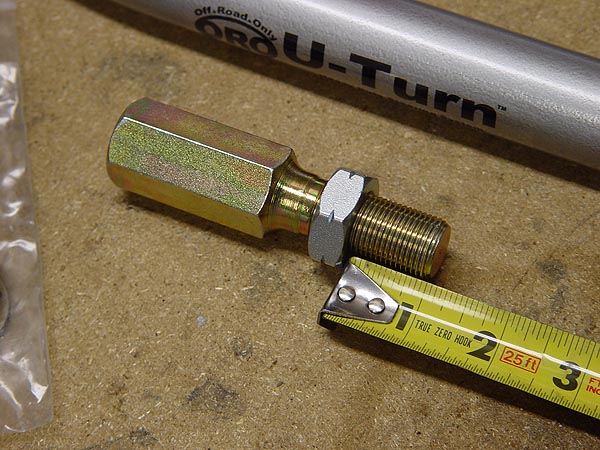
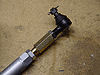
3. Grab the new ORO U-Turn drag link adjuster
sleeve and thread on one of the left hand jam nuts so that about
1" of thread is showing from the bottom edge of the jam
nut to the bottom of the adjuster sleeve (see pic to the left).
The threads on the adjuster sleeve have been rolled and it may
take some effort to get the jam nut to go on freely. A little
silicon spray and/or a tap on the side of the nut will help
out. |
 |
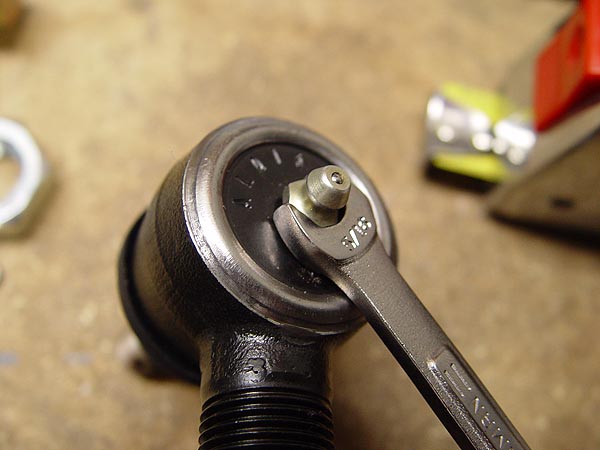
4. Using a 5/16" wrench, attach the
zerk nipple that come with your ORO U-Turn Steering System onto
all of the new right hand tie rod ends. You can grease these
joints now but I chose to wait until after everything was installed
so that I would have to work with greasy parts.
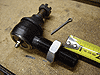
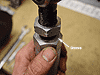
5.
Take a right hand jam nut and thread it onto one of the right
hand tie rod ends so that approximately 1" of thread is
showing from the bottom edge of the nut to the bottom of tie
rod end (see pic to the left). |
 |
6. Okay, now it's time to install the right
hand tie rod end that you've been working on, onto the drag
link adjuster sleeve. Thread it all the way on until the jam
nut makes contact with the adjuster sleeve (see pic to the left).
7. Now, install the new adjuster sleeve/tie
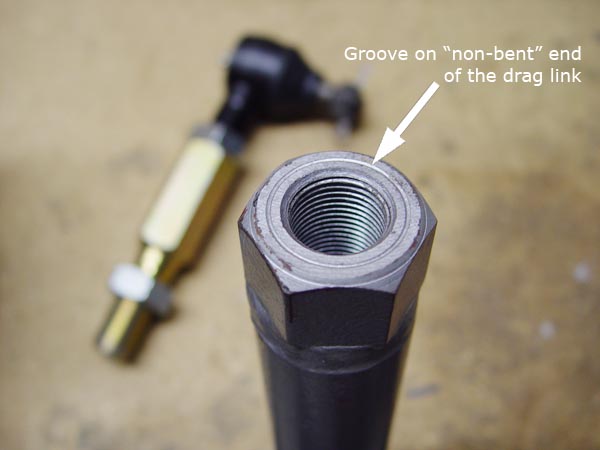
rod end assembly all the way onto the "non-bent" end
of your new ORO U-Turn Steering System drag link. This end of
the drag link might be marked with the letter "L"
(for left) on the face of the insert, but mine just had a groove
cut into it. |

|
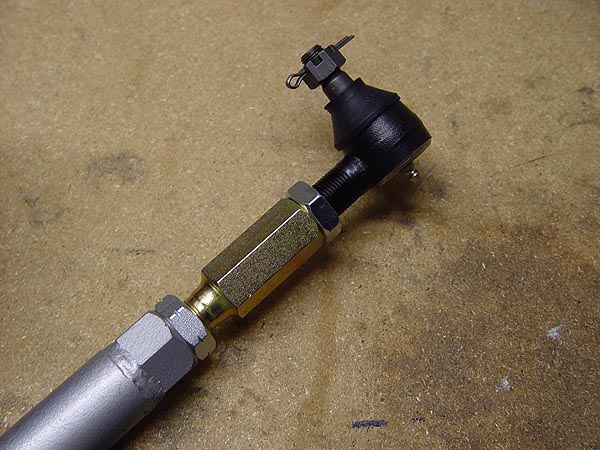
8. Grab another right hand tie rod end and
install a jam nut onto it. Unlike before, position this jam
nut all the on to the tie rod end until only 3/8" thread
is remaining between the top of the jam nut and the stopping
point of the threads (see pic to the left).
9.
Install this tie rod end all the way onto the "bent end"
of the drag link. Your new ORO U-Turn Steering System drag link
is now completely assembled and should already be very close
to being adjusted to the proper setting. |
 |
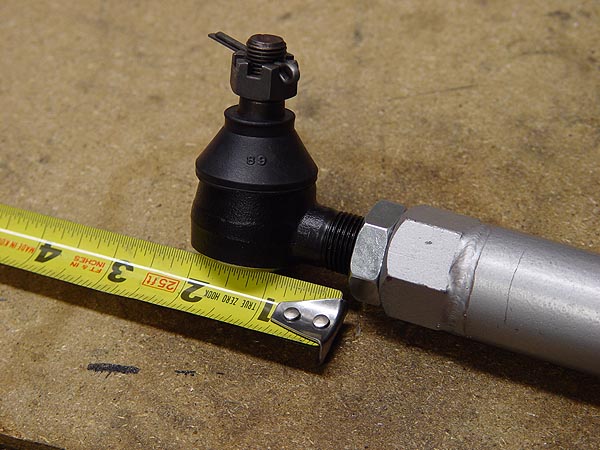
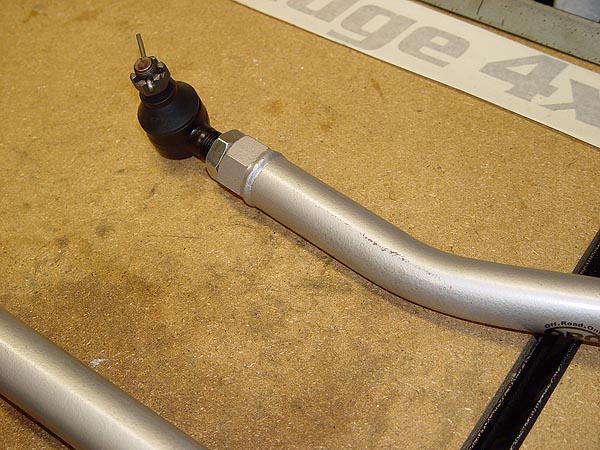
10. Take the remaining right and the only
left tie rod ends and loosely thread on the remaining two jam
nuts onto them.
11. Then, install
the right and left hand tie rod ends into your new ORO U-Turn
Steering System tie rod. As with the drag link, your tie rod
will be marked on one end with a groove cut into it indicating
where the left hand tie rod end should be installed (see pic
to the left).
12. Now, adjust the
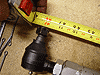
tie rod ends on the new ORO U-Turn Steering System so that the
remaining threads are equal on both side and that they measure
48" center to center. |


 |
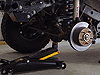
13. Go
back to your Jeep, chock your rear tires, jack up the front
axle, set it back down onto jack stands and then remove your
front wheels.
14. Time
to remove your steering stabilizer. Using a pair of needle nose
pliers, remove the cotter pin and then the castellated nut securing
the stabilizer to the drag link using a 3/4" socket. At
the time of this install, I already had an aftermarket steering
stabilizer. For more information on how to remove a factory
steering stabilizer, click on the link below to see my write-up:
Rancho Steering Stabilizer
Write-Up
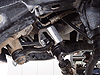
15. Onto
the pitman arm, use a pair of needle nose pliers and remove
the cotter pin and then castellated nut using a 3/4" socket.
Then, use a pitman arm puller or pickle fork to separate the
drag link from the pitman arm.
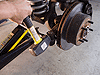
16. Now,
go to your factory tie rod ends and again, remove the cotter
pins. Then, loosen but do not completely remove the castellated
nuts using a pair of pliers and a 3/4" socket.
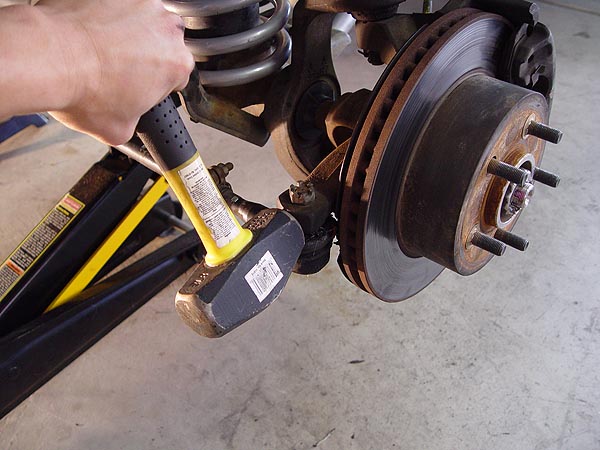
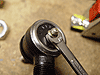
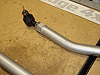
17. Here's
where I did things a little differently. Instead of using a
tie-rod end puller, I gave the tie rod shank a good smack with
a 2 lb. hammer as shown in the pic to the left. This impact
will cause the tie rod ends to simply pop out. Remove your old
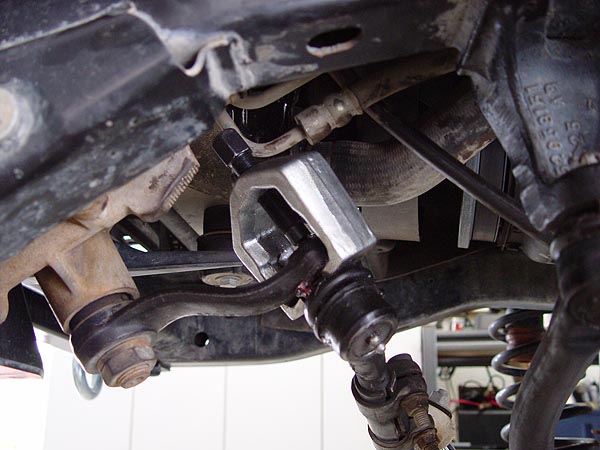
factory tie rod and drag link completely from your Jeep.
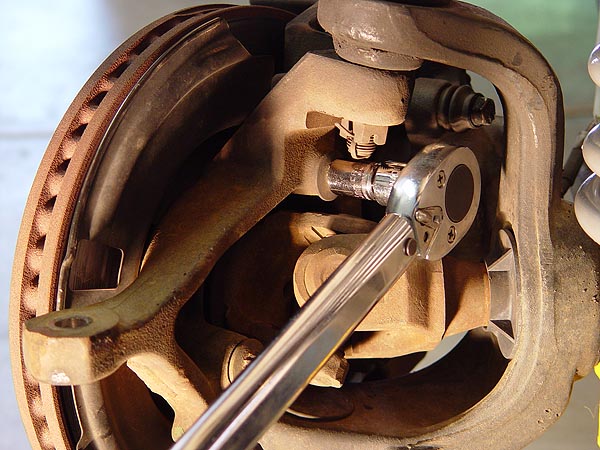
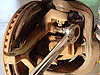
18. Remove the forward and top wheel bearing
retaining bolts from your spindle using a 13mm - 12 point socket
on both the passenger and driver side of your Jeep. If you live
within the rust belt of America, a little PB Blaster will help
to free these bolts. Just be careful not to get any of the PB
Blaster on the brake disc or pads. |
|
|
|