| |
Post
Installation Notes
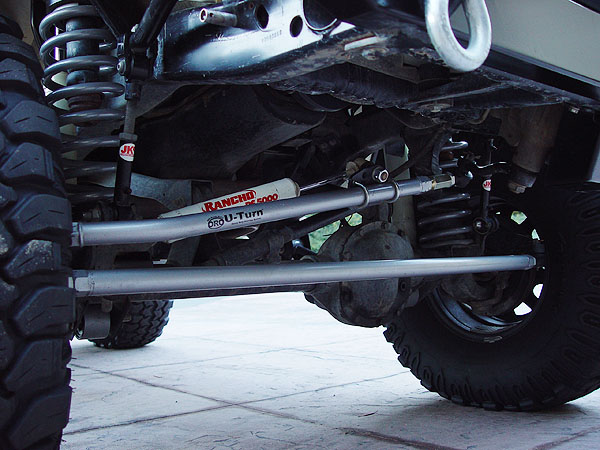
Of all the great benefits the Off Road Only U-Turn Steering System
has to offer (and there are a lot), the one thing I noticed right
off the bat was the elimination of the dead spot I used to have between
11 and 1 o'clock. I know that may sound stupid but it's the truth.
I am very pleased with the beefiness, quality and attention to detail
put into this steering system. If there is any drawback, it's the
price. I will however say that it is worth every penny.
I will be sure to write follow-ups to this mod as they come.
|
|
|
|
Off
Road Only (ORO) Jeep TJ
U-Turn Steering System Installation
<<
Back - Page 2

|
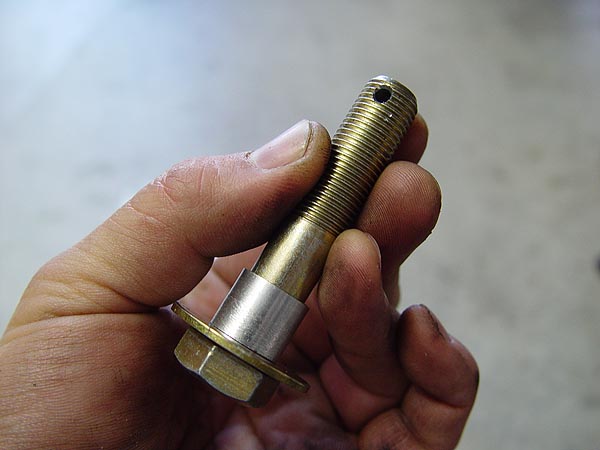
19.
You're
new ORO U-Turn Steering System should have come with a couple
of 1/2"-20 Grade 8x2.5" bolts that have a cross drilled
hole through the threads.
These bolts should already be pre-assembled with a lock nut,
2 washers and an aluminum bushing in between. Remove the top
lock nut and washer so that all you have is the bolt, bushing
and washer as shown in the pic to the left.
20. Take the new ORO U-Turn Steering System hub assembly
with the 3 holes and place it on top of your passenger side
steering knuckle so that the non-tapered hole is sitting over
the factory drag link attachment point.
21. Slip one of the 1/2"-20
Grade 8x2.5" bolts up through the the steering knuckle
and new hub so that about 1/8" of the aluminum bushing
remains below the factory steering knuckle. Place a washer over
the bolt and loosely thread on a lock nut.
22. Secure the new hub assembly to the spindle
using the 2 factory wheel bearing retaining bolts but do not
torque them down at this time.
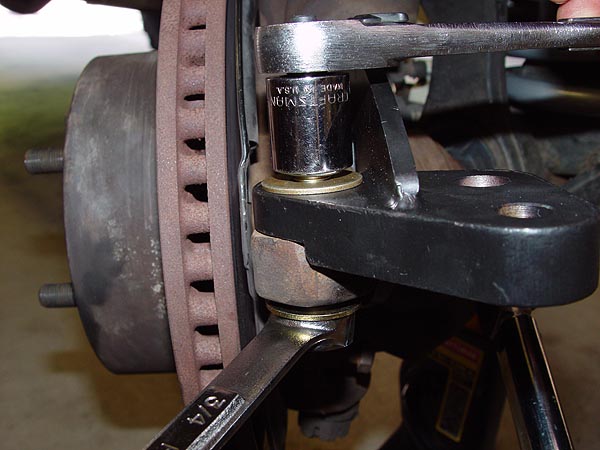
23. Using a 3/4" socket and wrench, tighten
the lock nut to 90 ft. lbs. of torque being careful not to let
the bolt rotate. As the lock nut tightens, the bolt below will
be pulled upward and wedge the aluminum bushing into the tapered
hole on the steering knuckle. This will provide a very tight
and rigid placement for the bolt.
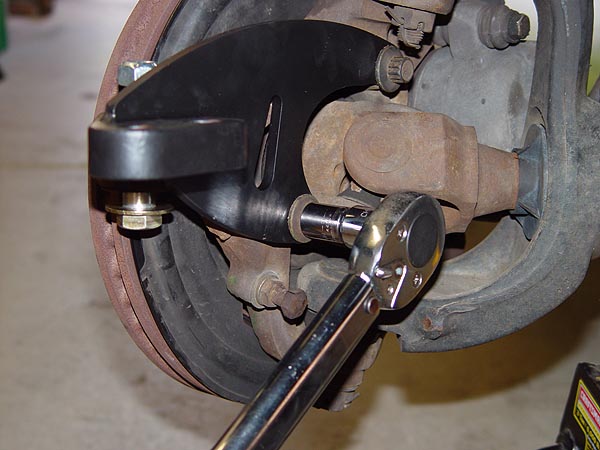
24. Now, tighten the wheel bearing retaining
bolts to 70 ft. lbs. of torque.
25. Repeat steps 19-24 on the driver side of
your Jeep. |

 |
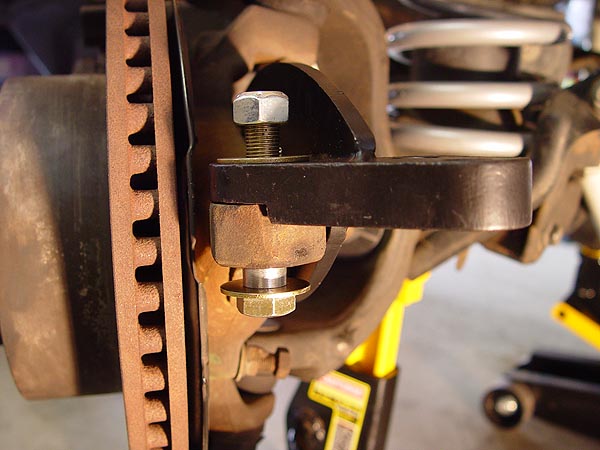
26. Time to install your new ORO U-Turn Steering
System drag link. To begin, make sure your steering wheel is
straight and position your passenger side front wheel so that
it's pointing straight ahead too.
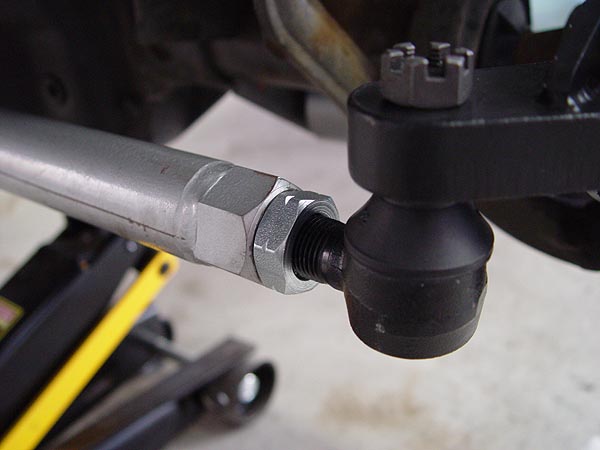
27. With the "ORO" sticker facing
forward and "bent end" of your new drag link pointing
towards the passenger side of your Jeep, loosely install the
adjuster sleeve/tie rod end onto the pitman arm (thread on a
castellated nut supplied with the kit to hang it there) and
then set the other side into the rear hole on the hub. As you
can see on the pic to the left, the tie rod end goes on top
of the hub.
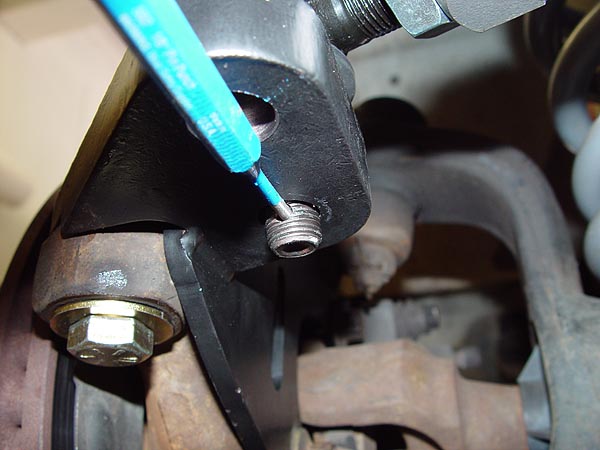
28.
To make things easier for you later, carefully rotate your tie
rod ends so that the cotter pin holes are parallel to your axle.
I used a metal punch to do this but a pair of pliers will do
the trick too.
29. Secure your drag
link to the pitman arm by tightening the castellated nut to
60 ft. lbs. of torque and then lock it in place using a cotter
pin. Then, secure your tie rod end onto the hub using one of
the castellated nut supplied with the kit, tightening it to
35 ft. lbs. of torque and then locking it in place with one
of the new cotter pins. |

|
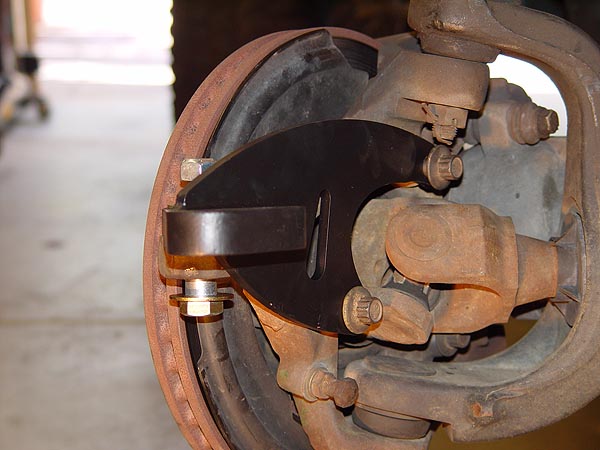
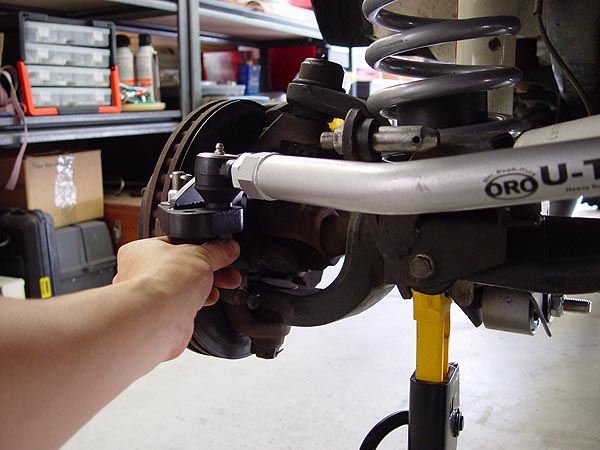
30. Attach your new ORO U-Turn Steering System
tie rod to the passenger side hub and then to the driver side
hub using the castellated nuts supplied with the kit. As you
can see in the pic to the left and unlike the drag link, the
tie rod need to be attached to the underside of the new hubs.
Tighten the castellated nuts to 35 ft. lbs. of torque and lock
them into place with the cotter pins. |
|
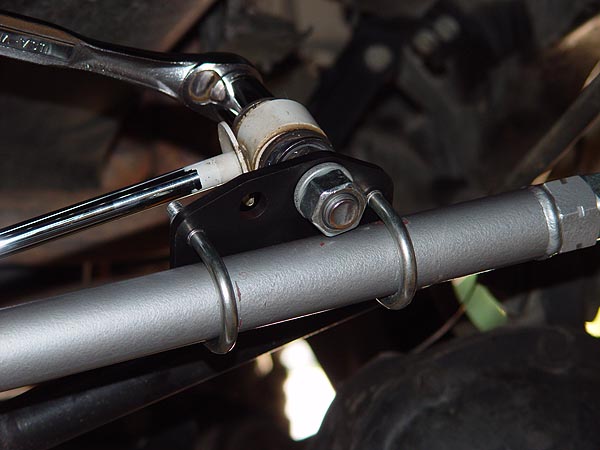
31. Attach your new steering stabilizer mounting
stud to the new ORO U-Turn Steering System mounting bracket.
Then, loosely attach the mounting bracket to the drag link using
the 2 U-bolts and nuts supplied with the kit. Your new steering
stabilizer should have about 8" of travel (measure the
actual length to know what the actual amount of travel) and
so you will more than likely need to mount this bracket close
to the pitman arm.
32. Check to make
sure your steering wheel is straight and then mount your new
steering stabilizer (can side) to the axle bracket using the
factory hardware.
33. Extend the shaft
of your new steering stabilizer so that only half its total
travel length is exposed. Then, slide the new ORO mounting bracket
on the drag link so that it's positioned accordingly, slip the
steering stabilizer onto the mounting stud and secure the U-bolts
just enough so that it stays in place but not completely locked
down.
34. Rotate the steering stabilizer
and mounting bracket on the drag link so that it doesn't come
into contact with the track bar or anything else. Secure the
mounting bracket by tightening the U-Bolts.
35.
Now, turn your steering wheel all the way lock to lock and make
sure both sides of your wheels are coming into contact with
the steer stops. If one side is off, readjust your steering
stabilizer until both sides are equal. |

|
36. Time to adjust your toe-in alignment.
To begin, remount your tires back on the front axle and leave
them hanging in the air.
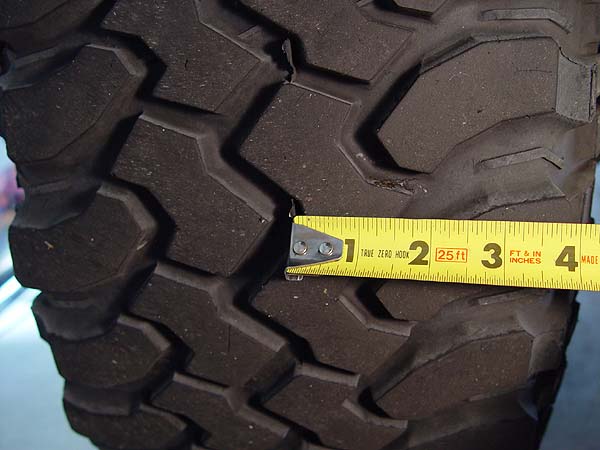
37. With
the help of a friend, measure the width
between the front of your front tires and then compare that
to the back of your front tires. It is important to use the
exact same measuring point front and back (such as the mold
seam in the middle of your tires) in order to get an accurate
reading.
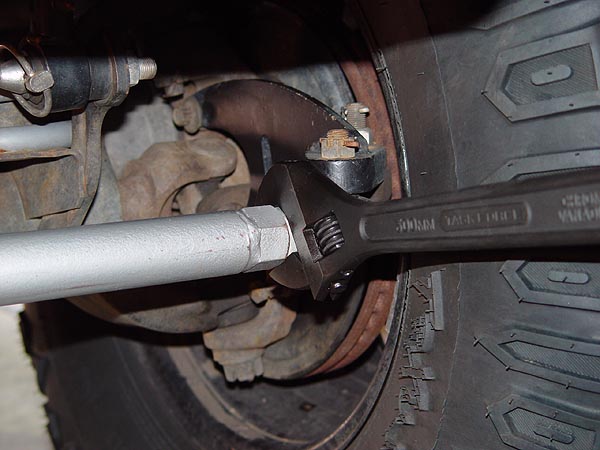
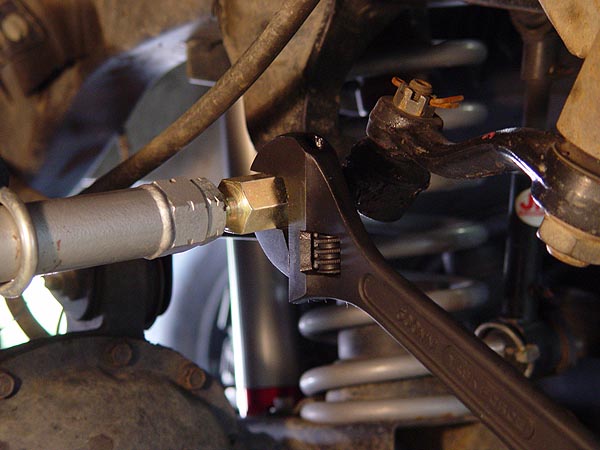
38. Using
a crescent
wrench, loosen the tie rod end jam nut and rotate the entire
tie rod a little bit at a time taking measurements along the
way. Continue this process until the width in the front is about
1/16" (but no more than 1/8") closer together than
the back.
39. Once your toe-in is set, re-tighten the
tie-rod end jam nuts and then lower your Jeep back to the ground.
Be sure to tighten your lug nuts to 90-100 ft. lbs. of torque.
40. Check to see if your steering wheel is
still straight. If needed, adjust it back to center by rotating
the drag link adjuster sleeve. Be sure to secure it with the
jam nut when done. Take your Jeep out for a spin and make additional
adjustments to your steering wheel as needed.
NOTE: Be sure
to re-torque
your wheel bearing retaining bolts after driving 50-100 miles. |
|
|
|