|
|
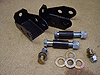
| Here's a pic of all the parts
you should get with your Currie shock extensions |
 |
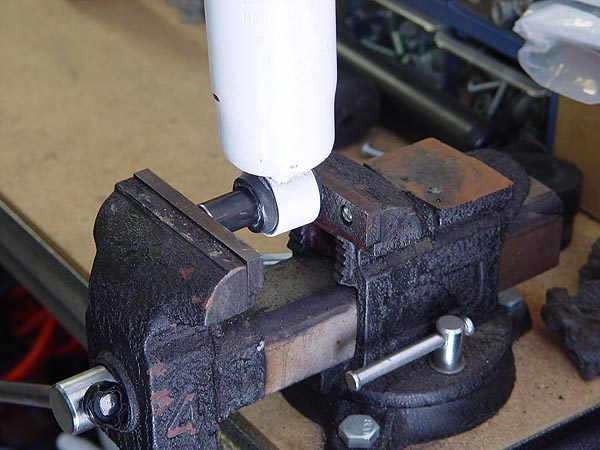
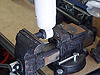
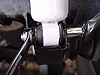
| Apply some white lithium grease to the
inside of the shock bushing, insert the metal sleeve and press it
in using a bench vice or C-clamp |
 |
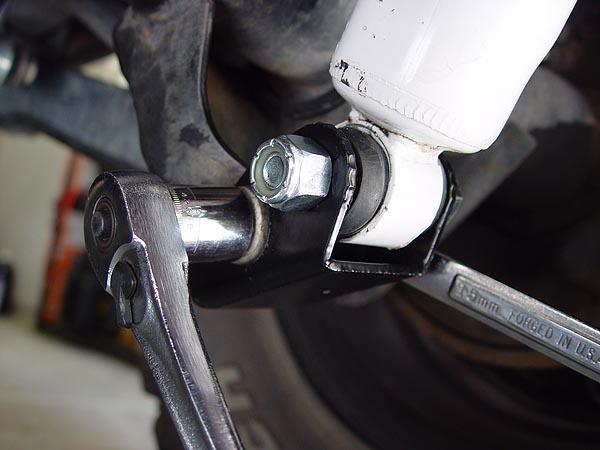
| Using a 9/16" wrench and socket
with extension, fasten the back side of the bracket to the factory
axle mount using the bolt, washers and nylock nut supplied with the
kit. |
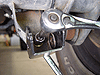 |
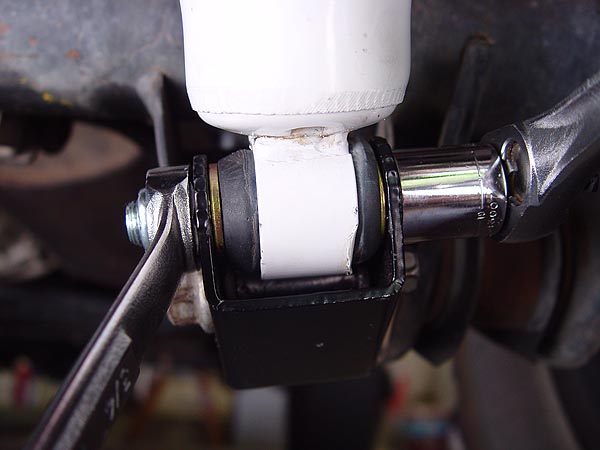
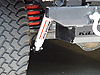
| Loosely attach the old factory shock
bolt, metal sleeve and nut through the middle holes on the bracket
and through the OEM axle bracket |
 |
| With the shock loosely attached to the
extension bracket, tighten up the factory shock bolt to the OEM axle
bracket using a 15mm wrench and 18mm socket |
 |
| Tighten up the new shock bolts using a
3/4" wrench and socket |
 |
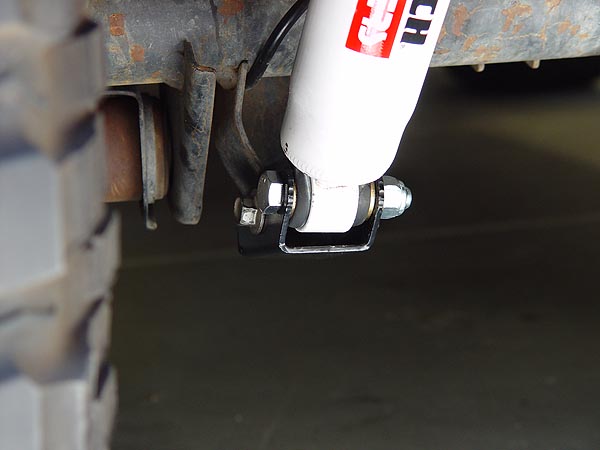
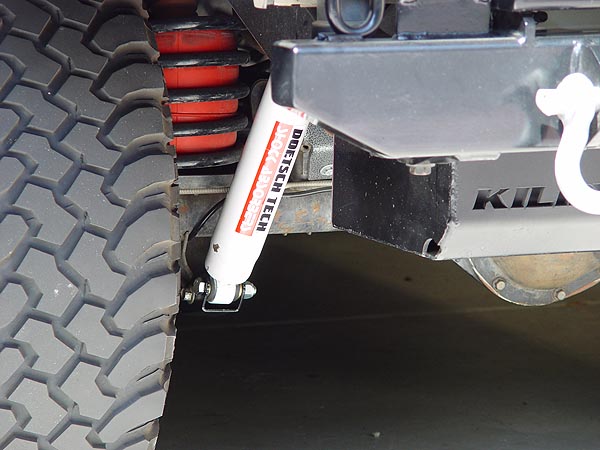
| Here's a shot of what everything should look like when done |
 |
| |
|
Currie
Rear Lower Jeep Shock Mount
Extension Brackets
After installing
a 3" lift or more on your Jeep, your rear axle will rotate a
bit causing the lower spring perch to make contact with your shock
can. On the trail, this contact can be sever enough to put a pretty
good size dent in the shock and damage proper valving. Sure you can
just install your shocks upside down, but over time, they will develop
a dead spot and no longer dampen as designed.... yes, this knowledge
is from first hand experience. The best solution to fix this problem
is to install Currie rear lower shock mount extension brackets. This
is a very complete kit, easy to install and considerably cheaper than
the brackets made by TeraFlex.
What You Will Need
• Currie
Part#CE-9601
• 13, 15, 18mm Sockets & Wrenches
• 9/16", 3/4" Sockets & Wrenches
• Ratchet
• Ratchet Extensions (long and short)
• White Lithium Grease
• Bench Vice or Large C-Clamp
Installation
1.
Whenever working on your Jeep, especially when you're going to be
under it, it's always a good idea to park on level ground, put it
in gear and engage the parking brake.
2. Remove your existing rear shocks. To do this,
you will need a 15mm and 18mm socket and wrench to remove the lower
axle bolt and a 13mm socket on a long ratchet extension to remove
the upper bolts that are attached to the frame cross member.
3. Sift through the parts that came with your kit
and locate the 2 metal bushing sleeves. Apply some white lithium grease
to the inside of your lower shock bushings and then insert the metal
sleeves into them as far as you can.
4. Press the metal sleeve all the way into the bushing
using a bench vice or C-clamp as shown in the pic to the left.
5. Now, climb under the rear passenger side of your
Jeep and then attach your new Currie shock extension bracket directly
to your factory axle mount using the Grade 8 bolt, washers and nylock
nut supplied with the kit. You will need a 9/16" socket on a
short extension and wrench to fasten the bolt and nut.
6. Loosely attach the old factory shock bolt and
nut through the middle holes on the bracket (with the original metal
sleeve in between if you have it) and through the factory axle mount
as shown in the pic to the left.
7. Grab a shock and attach it to the upper mount
located on the frame cross member (tighten bolts to 23 ft. lbs. of
torque) and then attach the bottom end of your shock into the new
Currie shock extension using the new bolt, Grade 8 washers and nylock
nut supplied with the kit. NOTE:
Make sure the washers go in between the shock bushing and the new
extension bracket as shown in the pic to the left.
8. Tighten up the factory bolt and nut securing the
new extension bracket to the factory axle mount using a 15mm and 18mm
socket and wrench. Then tighten up the new shock mount bolt and nylock
nut using a 3/4" socket and wrench. Torque both bolts/nuts to
74 ft. lbs.
9. Repeat process on the driver side of your Jeep.
That should be it! Please let me know if you have any questions. |
|
|