|
|
JKS
Swaybar Quick Disconnects
Disconnecting
your Jeep swaybars by removing the links is something that all Jeepers
do when you hit the trail. While swaybars do a great job of stabilizing
your ride on pavment, they can severely limit the amout of wheel travel
you have when off-roading and that's not good. The more your axle
can articulate, the more all four of your tires will make contact
with the groud and consequently, the more traction/stability you will
have. After riding on homemade disconnects for years, I finally decided
to get a real set from JKS. These are by far the nicest QD's I've
seen and I'm extreamly pleased with my purchase. They were easy to
install and are even easier to use, far easier than any other QD on
the market that I've seen anyway.
What
You Will Need
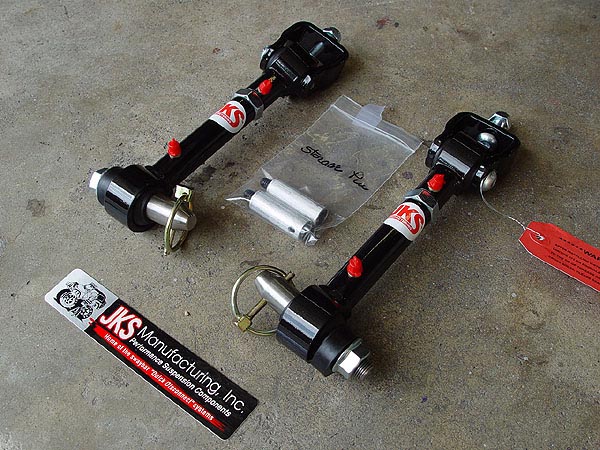
•
JKS Quick Disconnect Kit
• Socket Set (Metric)
• Box Wrench (Metric)
• Allen Wrench Set (Metric)
• Torx Bit Set
• Torque Wrench
• Red Locktite
• Tie-Rod End Remover or Pickle Fork
• Hand Drill
• Center Punch
• "F" Size Drill Bit & 5/16"X18 Tap
• PB Blaster
• Breaker Bar
• Grease Gun
Installation
1.
Do yourself a favor and be sure that you have everything listed above
before you start. If you live in a rust belt zone, be sure to spray
all the bolts you will be working on with PB Blaster a couple of days
before you start this project.
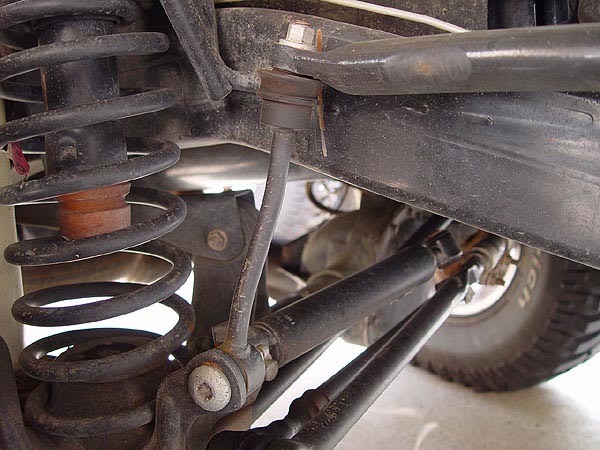
2. Begin by removing
your stock swaybar links from your swaybar. The bottom bolt that is
attached to your axle will require a T-55 Torx Bit and the top bolt
is a tappered stud. In other words, even after you remove the nut
securing this bolt, the darn link will still be stuck on the swaybar
and near impossible to remove. I have heard of a lot of neat ways
to get these things off (including banging it with a BIG Friggen Hammer),
but all you need to do is go down to your local Autozone and borrow
a Tie-rod End Puller. It is completely free (so long as you return
the tool of course) and will save you a lot of grief.
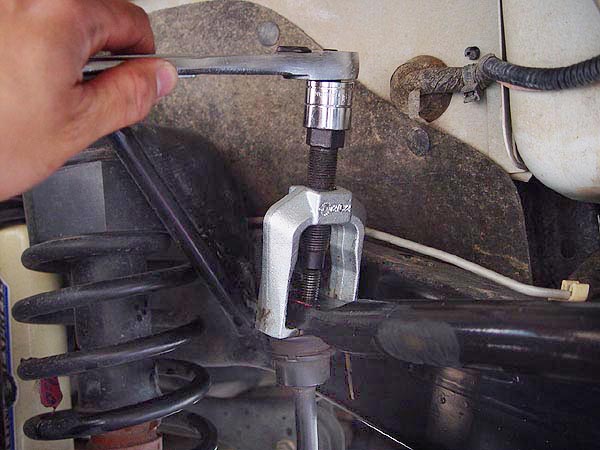
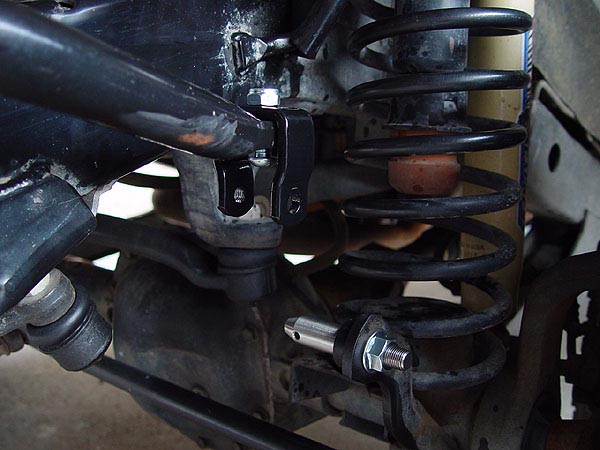
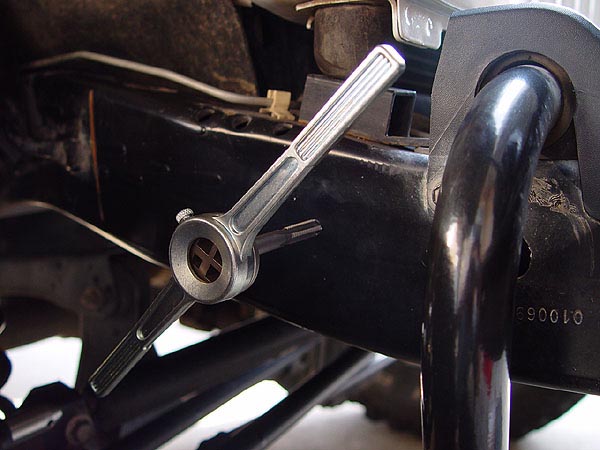
With your trusty tie-rod end puller in hand, simply slip it over your
swaybar and locate it over the top of the tappered stud as shown in
the image to the left. Then, slowly start cranking down the tool with
a socket wrench until the link pops off.
3. Okay, now dissasemble
the U-Strap from the quick disconnects by removing the button head
bolt (these button head bolts will require a Metric Allen Wrench)
and then mount the U-Strap ON TOP
of the swaybar.
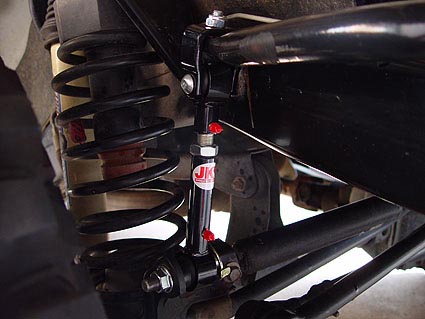
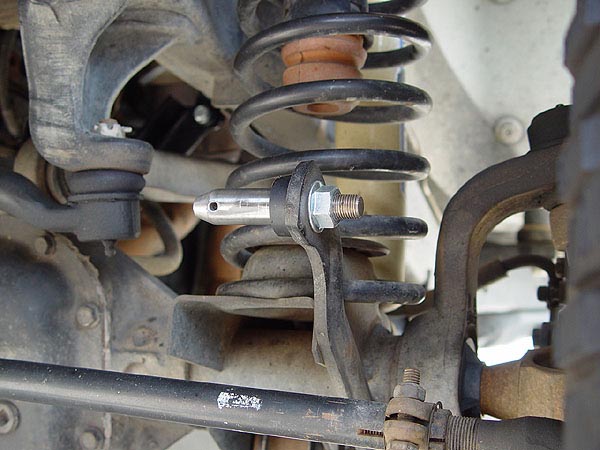
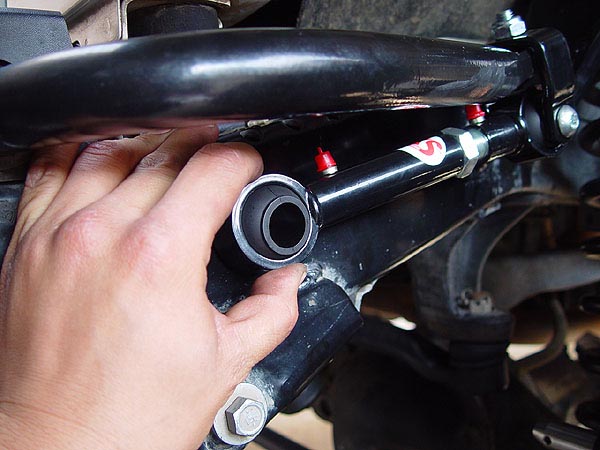
4. Install the new stainless
steel pin to the lower axle bracket as shown in the pic to the right.
Be sure to leave the plastic spacer on and keep the hole for the click
pin as horizontal to the ground as possible. Torque this bolt to 65ft/lb.
5. The JKS kit will
come with a nifty chart (which you can see to the right) that shows
you how to determine what the length of your new swaybar links should
be. Optimum setting is + or - 3° from 13° above horizontal.
Adjust them accordingly and tighten the jam nut with both ends of
the disconnect on a flat surface.
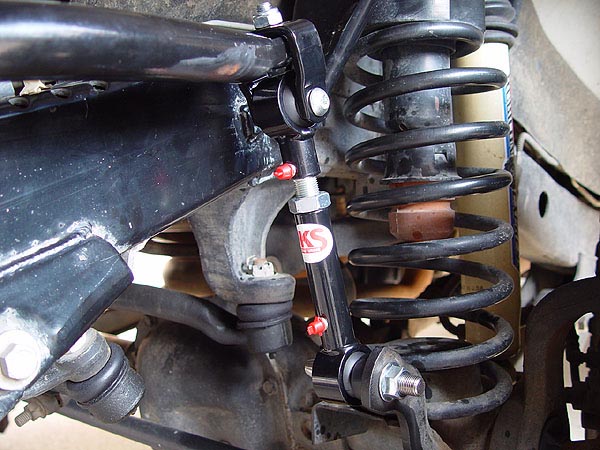
6. Re-assemble the disconnect
links to the U-Strap you installed on the swaybar. Make sure you use
RED LOCKTITE on the
bolt threads to make sure it does not come loose. Torque this bolt
to 40ft/lb.
7. Slide the bottom
bushing of the swaybar link on to the lower mounting pin you installed
earlier and insert the click pin provided with the kit.
8. If your Jeep does
not sit level after both disconnects have been installed, rock your
Jeep from side to side and check again. If it still isn't sitting
level, adjust swaybar links by extending or shortening one or the
other.
9. Now it's time to
install the storage pins. These are used retain your disconnected
swaybar links up and out of the way while on the trail. Begin by rotating
your disconneted link up to your frame rail, mark where you will drill
your hole and then tap that point with a center punch. Drill this
point using an "F" size drill bit which can be found at
most auto part stores or Sears. It is very important to use the correct
size drill bit as an incorrect size will make it near impossible to
tap correctly.
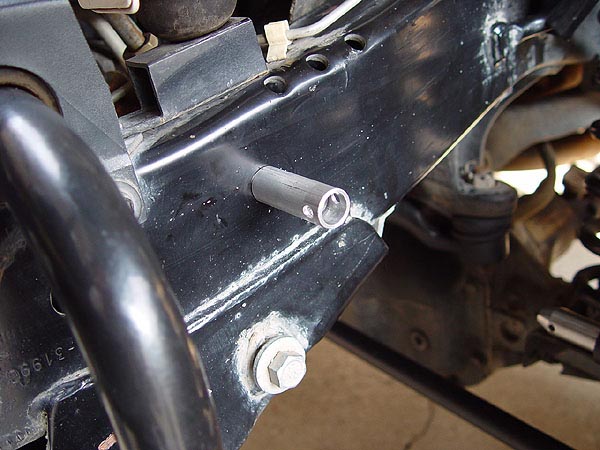
10. Tap the hole you
just drilled using a 5/16"x18 thread hole tap and then install
the storage pins with the click pin holes as horizontal to the ground
as possible.
11. These swaybar disconnects
come equiped with zerk nipples which will need to be greased often.
Be sure to do this before you start driving your Jeep around.
That should be it. Please let me know if you have any questions. |
|
|