|
|
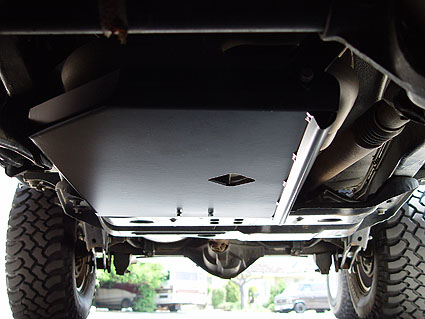
Skid
Row Jeep Engine Skid Plate
Boy
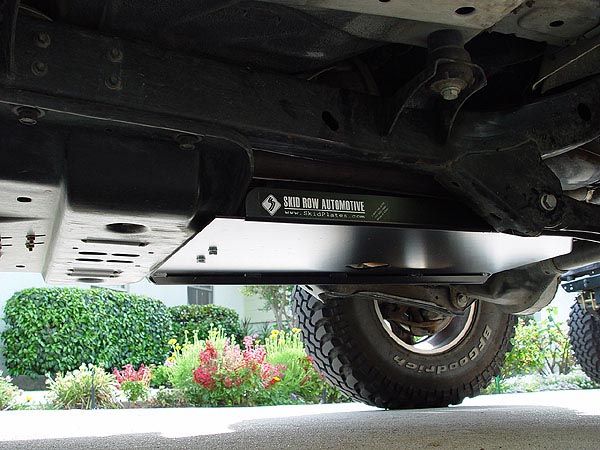
it sure is hard to justify buying something as mundane as a skid plate.
but every now and then you wonder how in the heck you made it back
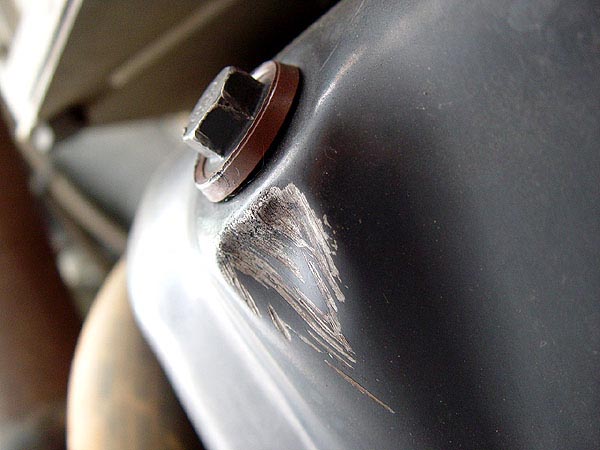
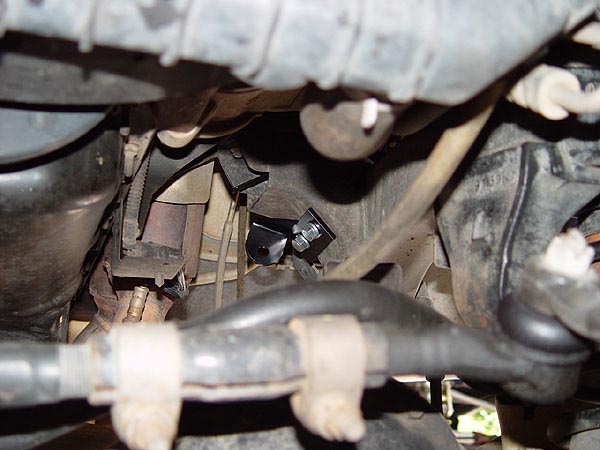
from a hard day on the trail without one. As you can see in the first
pic to the right, I got my oil pan tagged by a large rock just in
front of the drain bolt. This could have easily turned into disaster
on the trail and could have easily been avoided if I had the right
kind of protection. Needless to say, after doing some research on-line,
I decided to get me a Skid Row Engine Skid plate. This is a very easy
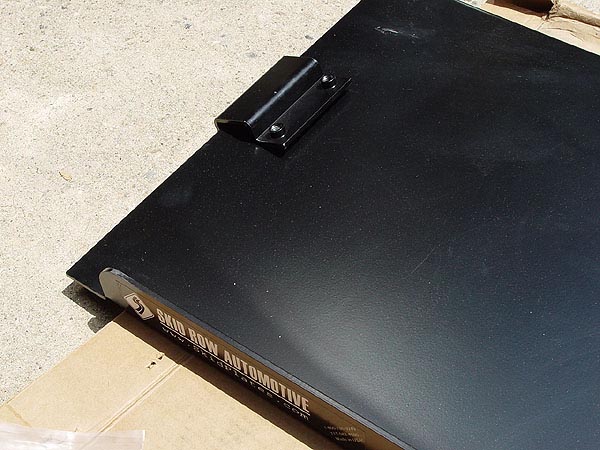
install and bolts right up without and drilling. As you can see in
the pic above, this thing is extremely beefy and consequently heavy.
Although I installed it by myself, an extra pair of hands would have
been real nice.
What
You Will Need
•
Skid Row Engine Skid plate.
• 9/16" Socket & Wrench, 21mm Socket
• Crecent Wrench
• Torque Wrench (up to 130 ft. lbs.)
• Breaker Bar
• Floor Jack
• Jack Stands
• Pry Bar
• PB Blaster
Installation
1.
As with any job I undertake (no pun intended) that requires me to
work underneath my Jeep, I hose down the entire underside as good
as I can the day before I start. There's nothing worse then getting
dirt and small pebbles in your eyes, nose and mouth especially when
it can be prevented. Also, if you live in the rust belt, be sure to
douse the passenger side bolt attaching the lower control arm to your
frame the night before.
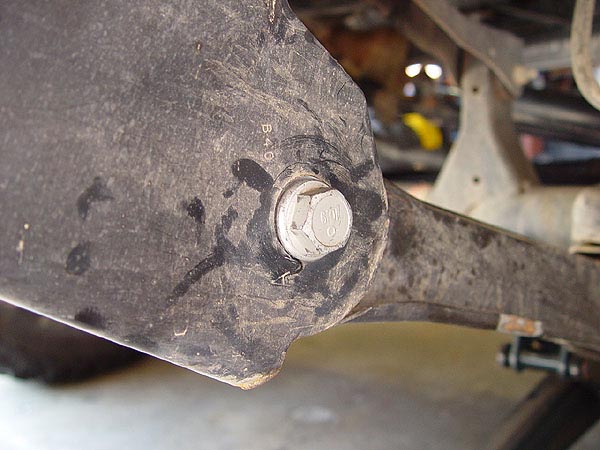
2. First things first.
On most Jeeps, the threaded portion of the bolt attaching your lower
control arm to the frame will be pointing towards the out side as
shown in the pic to the right. This will need to be reversed. To do
this, loosen the control arm bolt using a 21mm socket and crecent
wrench, chock your rear wheels, loosen the lug nuts on the front passenger
side wheel, jack up your Jeep from the front axle and then set your
frame rail back down on a jack stand just behind the lower control
arm bracket but leave the floor jack under the axle.
3. Remove your tire
and place it under the frame rail just behind your jack stand as a
safety precaution. Now, lower your floor jack until the axle will
droop no more and then bring it back up just a hair. This will relieve
most of the weight off the lower control arm bolt making it easier
to remove.
4. Remove bolt and then
re-insert it with the threads pointing towards the center of your
Jeep. A pry bar may be necessary to help you jiggle the bolt through.
Leave the nut off at this time.
5. Okay, now we can
finally start installing stuff. If you look through the parts that
came with your kit, you should find a "T" shaped nut plate
with two integral nuts on it. Take the longer tab part of this plate
and bend it just a bit into an arch with the nuts on the top side.
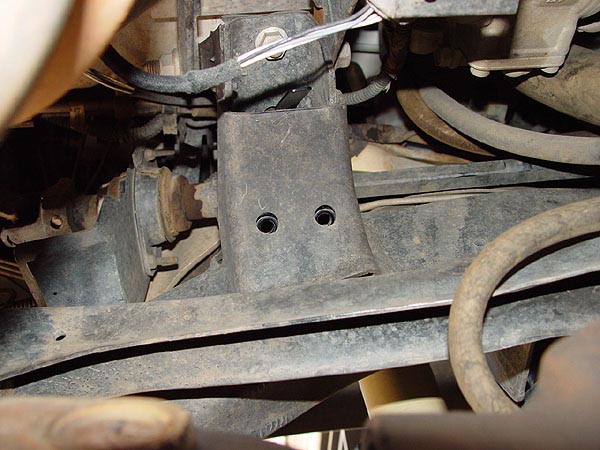
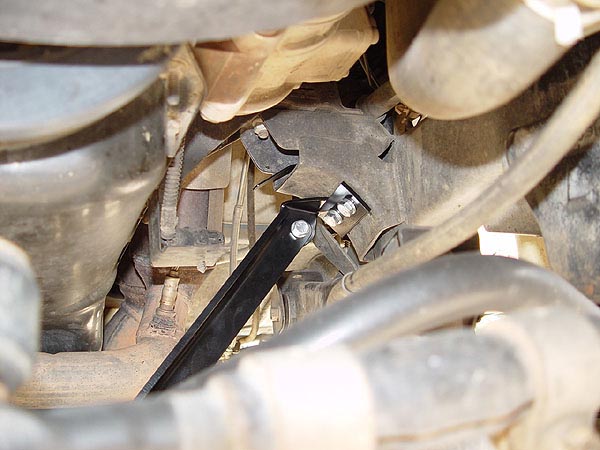
6. Climb under your
Jeep from the driver side, scoot yourself toward the front a bit and
then look up between the frame rail and your engine block. Here you
should see a large bracket with two holes holding your motor mount
(see pic to the left). Take your arched "T" nut plate and
slip it through the top opening of this bracket until you can align
the nuts with the holes. Fold the tab over a bit to hold it in place.
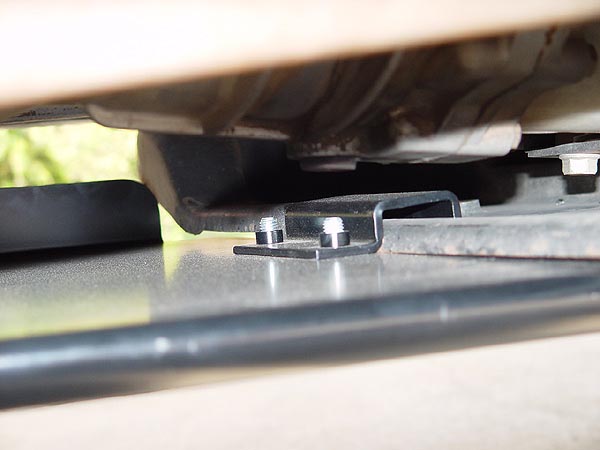
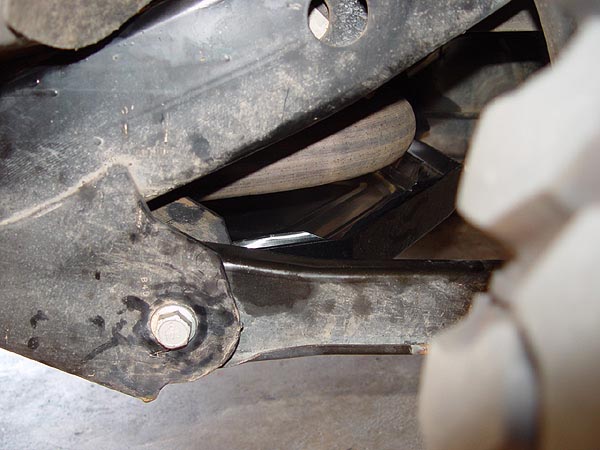
7. Now, attach the mounting
plate to the base of your motor mount bracket using the bolts and
lock washers provided with the kit as shown in the pic to your left.
Make sure the flange with the hole is facing towards the rear of your
Jeep.
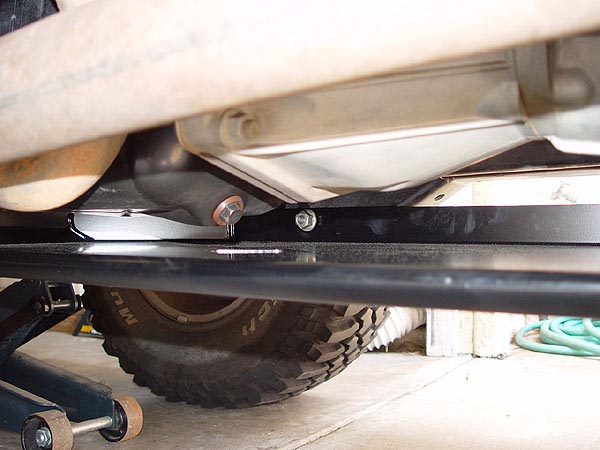
8. Loosely attach the
transfer case skid plate. clamp to your new skid plate using the bolts
and lock nuts supplied (see pic to the left). Remember not tighten
the bolt at this time as you will need to manipulate this clamp up
and over your transfer case skid plate.
9. If you can find some
help, now would be the time to call them over. I did this part by
myself using a creeper but I'm sure you could always just inch-worm
your way under your Jeep on your back too. Lying down on your back,
place your new skid plate. on your chest with the loose clamp in front
of your face. Scoot under your Jeep so that you are looking up at
your transmission. Lift up your new skid plate. and hook the clamp
on to the front lip of the transfer case skid plate. Now rotate the
opposite end and slip it on to your lower control arm bolt that you
reversed earlier. Install the lower control arm nut.
10. The last piece left
in your kit should be the strut rod. Take in and install it to the
mounting plate and the front of your skid plate using the bolts, lock
washers and nuts supplied. The angled end of the strut rod should
attach to the mounting plate.
11. Now tighten up all
the nuts and bolts. It is very important to make sure you torque your
lower control arm bolt to factory specs. On a 2000 TJ, this is 130ft/lb. |
How
to Change Your Oil
Without Making a Mess
Although there
is an appature for you to access the oilpan drain bolt, there are
no provisions made to deal with oil dripping from your filter as you
remove it.... I found this out the hard way. Well, after cleaning
up the mess I made (which is a real PITA, let me tell you), I decided
there must be a better way to address this problem and this is what
I did... made myself a drip-pan.
What You Will Need
• Disposable
aluminum half-sheet (Cost = .49¢)
• Pair of Scissors
• Fumoto Drain Valve
What to Do
1.
If you don't already have one, do yourself a favor and buy a Fumoto
Drain Valve (click on the red link to see my write-up).
2. Using a pair of scissors, cut the lip and a corner
off (45° angle) one end of the half-sheet as shown in the pic
to the left. Then fold up the edges a bit so that oil will not spill
out.
3. The half inch lip
around the rest of the pan will still be a bit too tall to slide in
between your skid so flatten out the edges so that they are at a shallow
angle.
4. Slide your new drip-pan
on top of your skidplate and remove your filter. All the oil drippings
should collect on it.
5. Be sure to wipe down
your engine and/or anything else oil dripped on, carefully remove
your drip-pan, wipe it down and store it for future use.
That should be it. Please let me know if you have any questions. |
|
|