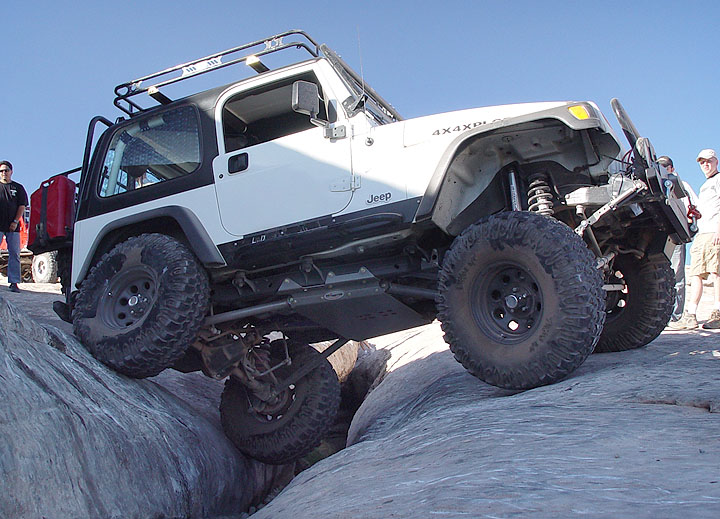
| PLEASE NOTE: I have tried my best to do this write-up from the perspective of a stock Jeep TJ. Unfortunately, my Jeep had already been modified quite a bit by the time I installed this suspension lift and so some of the photos you will see have been recycled from previous write-ups in order to illustrate what needs to be done. |
 |
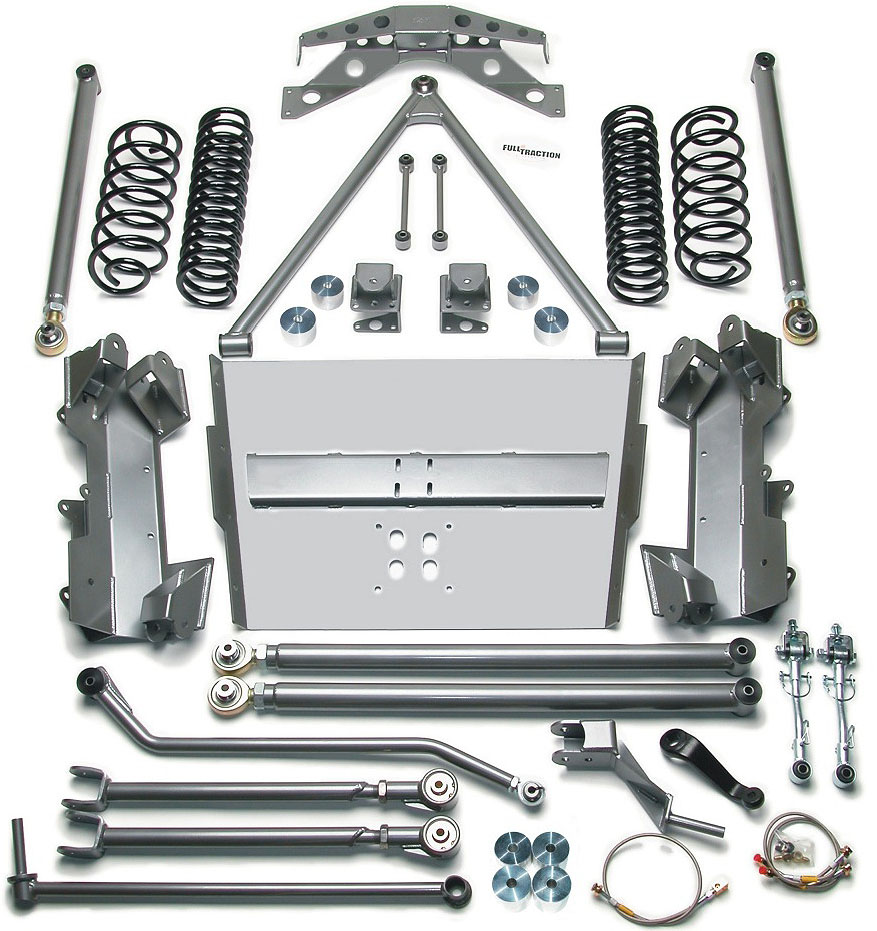
This is a pic from the Full Traction Suspension website and it shows all the parts you should get with your lift kit (minus the hardware). Take the time and make sure you have all the parts shown here and all the tools listed to the left before starting this project. |
| |
1. To begin this project, park your Jeep on a level surface and somewhere you can leave it for a few days without having to move it. |
 |
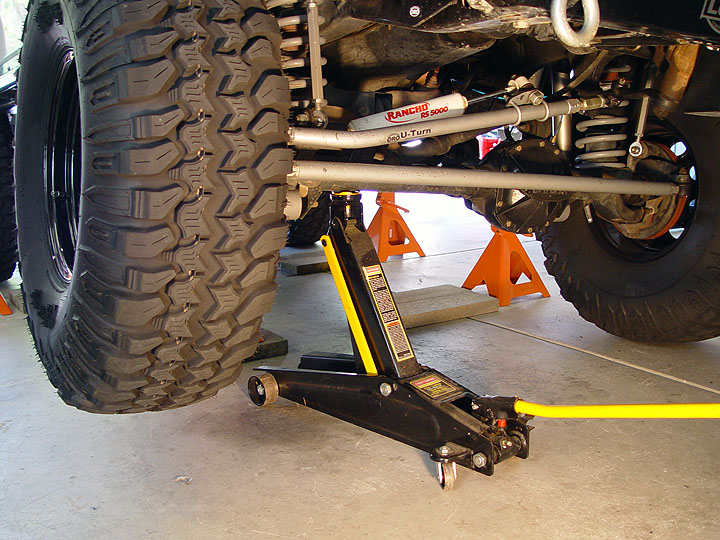
2. Using a floor jack, raise the entire rear end of your Jeep from the axle so that the wheels are completely off the ground. Position a tall jack stand underneath each of the frame rails just in front of the lower control arm mounts. Slowly lower your Jeep back down making sure that the jack stands make good contact with the frame rails and are safely supporting the weigh of your Jeep. Place a small jack stand on either side of your axle so that the whole thing is supported with the wheels off the ground and then lower your floor jack to the ground. Repeat this process on the front end of your Jeep. Your entire Jeep should now be supported on jack stands. |
 |
4. Remove the wheels off of your Jeep's axles using a 19mm tire-iron or impact wrench. Set them aside and out of the way.
5. Put your Jeep in gear, engage the emergency brake and then shift your transfer case to 4WD Low. |
 |
 |
 |
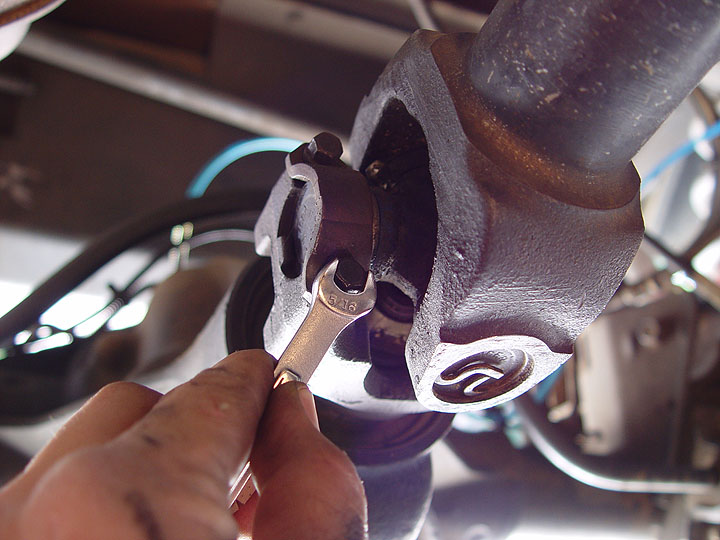
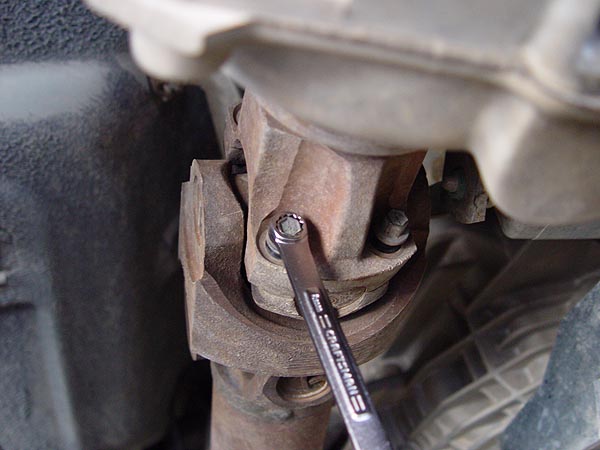
| 6. Remove the 4 bolts and 2 yoke straps securing the drive
shaft to the rear axle using a 5/16" socket or wrench. |
7. Grab the drive shaft with one hand and then give it a tap with
a rubber mallet to free it from the pinion shaft. Loosely re-attach
the U joint bolts and strap on to the pinion shaft for safe
keeping. |
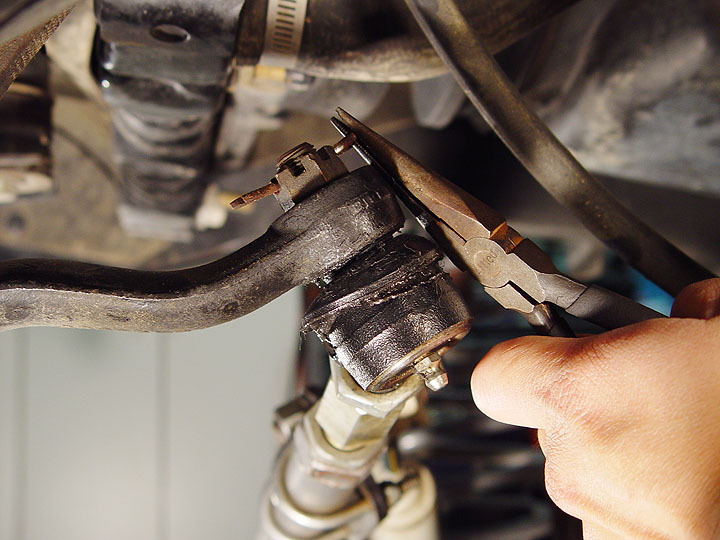
8. Remove the 2 metal band securing both ends of the rubber boot on the transfer case output shaft using a pair of pliers. You can now remove the
drive shaft from your transfer case by simply pulling it toward
the rear of your Jeep. |
 |
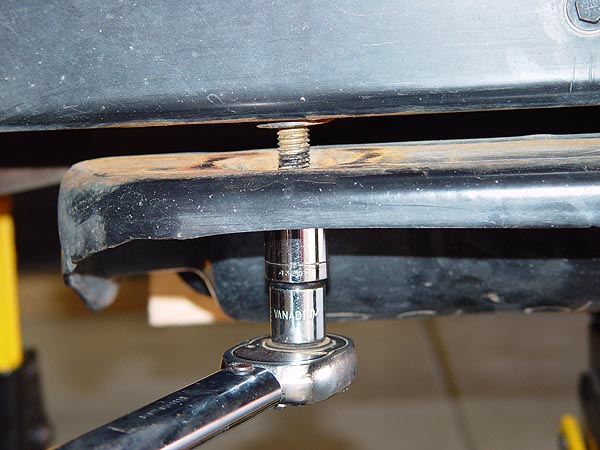
9. Using a 1/2" socket, remove the 4 nuts securing your transmission mount to the center of the transfer case skid plate. Save the nuts as they will be reused. |
 |
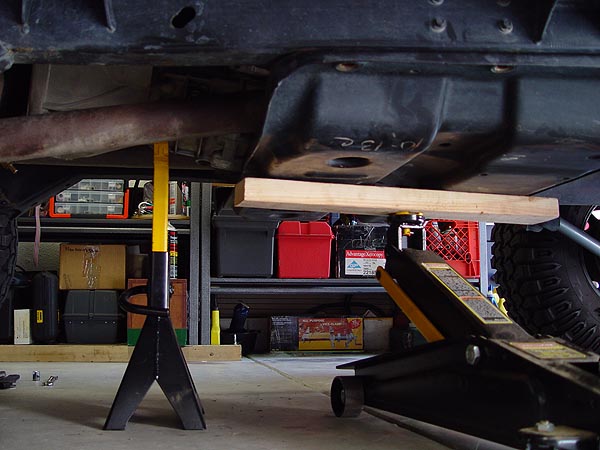
10. Place a jack stand underneath the bell housing of your transmission and then slide a floor jack under the center of your transfer case skid plate and raise it up until it puts a little pressure on it. As you can see in the pic to the left, I also used a short 2x4 piece of wood to help distribute the load. |
 |
11. Remove the 6 bolts securing your transfer case skid plate to your Jeep's frame rails. On a 1997-2002 Jeep TJ, you will need a 3/4" socket. 2003+ TJ's use a metric bolt that is similar in size but I do not know what it is. A breaker bar will come in handy here and if you live in the rust belt of America, some PB Blaster on the bolts will help out a lot. |
 |
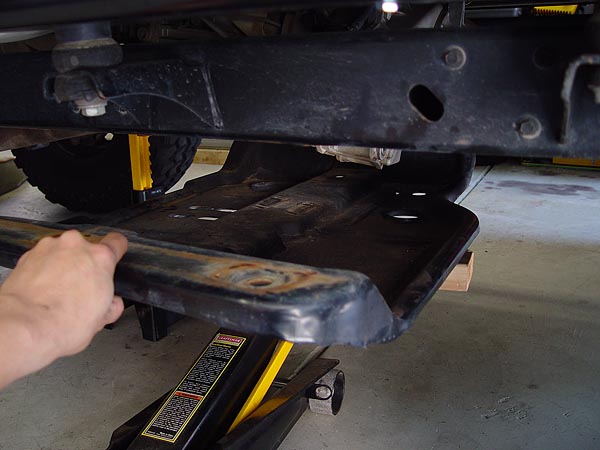
12. With the bolts remove, slowly lower your floor jack just a little and make sure that your transmission is now resting on top of the jack stand you place under the bell housing. Then, grab the lip of the transfer case skid plate and roll the whole thing out from under your Jeep. |
 |
13. Make a couple of reference marks on your Jeep's front drive shaft and pinion yoke. Then remove the bolts and U-straps securing the drive shaft to the axle using a 5/16" wrench. Carefully lower the drive shaft to ground. |
 |
14. Now, remove the 4 bolts attaching your front drive shaft to the transfer case output shaft using a 5/16" wrench. With the drive shaft completely free of your Jeep, set it aside and out of the way. |
 |
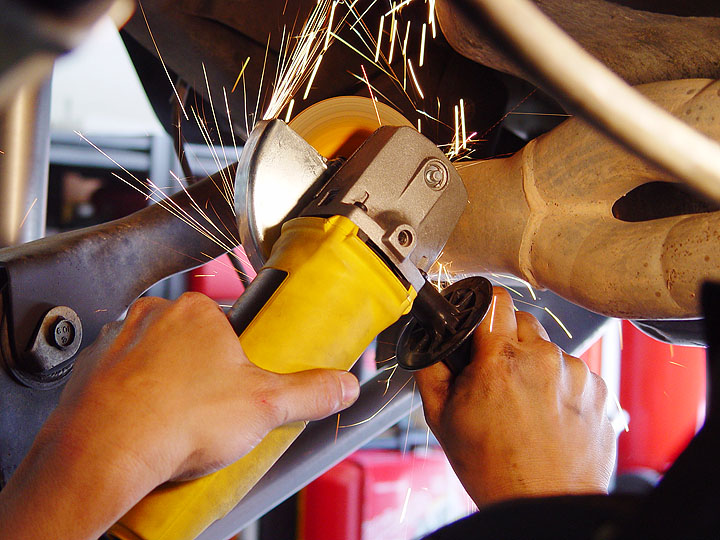
15. Using an electric grinder with a cut off wheel or a reciprocating saw, cut your exhaust just past the point where the two tubes become one and makes its turn around the front of your Jeep's oil pan. |
 |
16. Remove the entire exhaust system from where you made your cut to the tail pipe. You may find it necessary to unbolt the exhaust hanger located next to the passenger side rear coil to make this job easier but if you do, make sure to replace it when done. |
 |
 |
 |
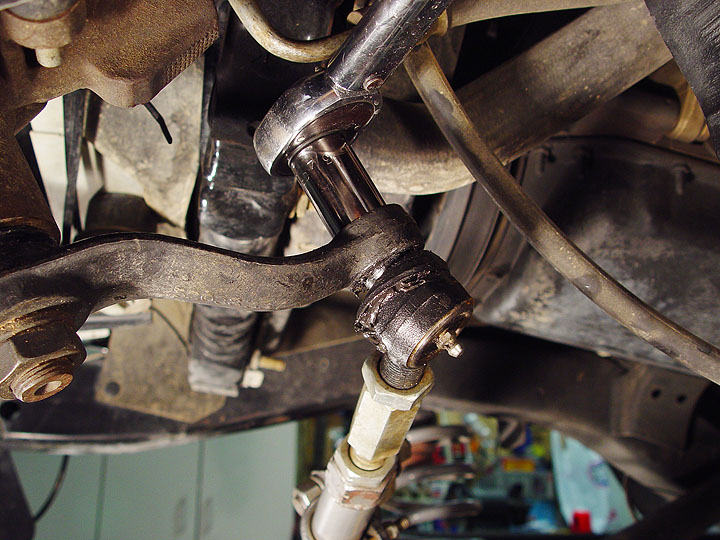
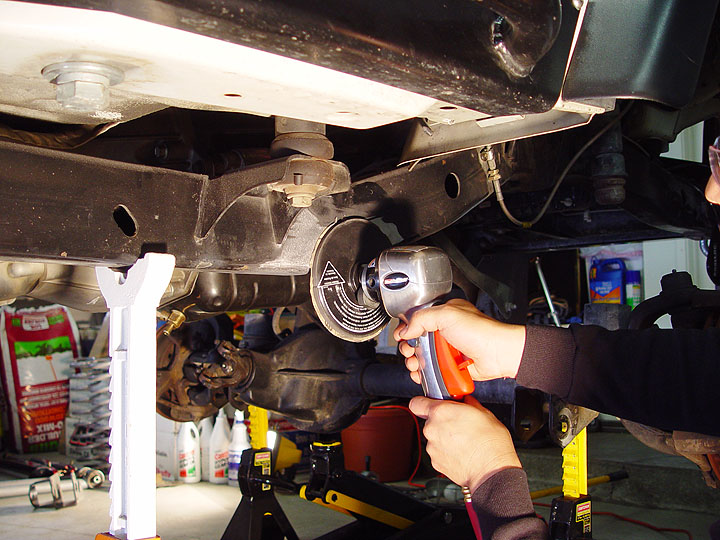
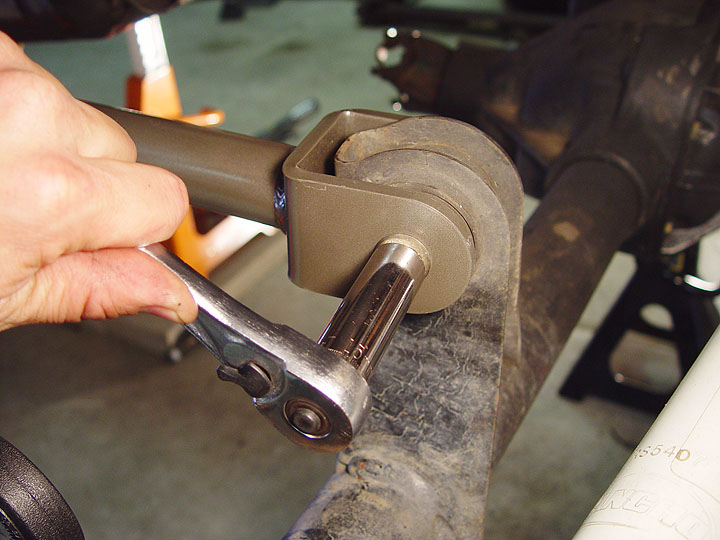
| 17. Remove the cotter pin from the track bar frame mount stud using a pair of needle nose pliers. |
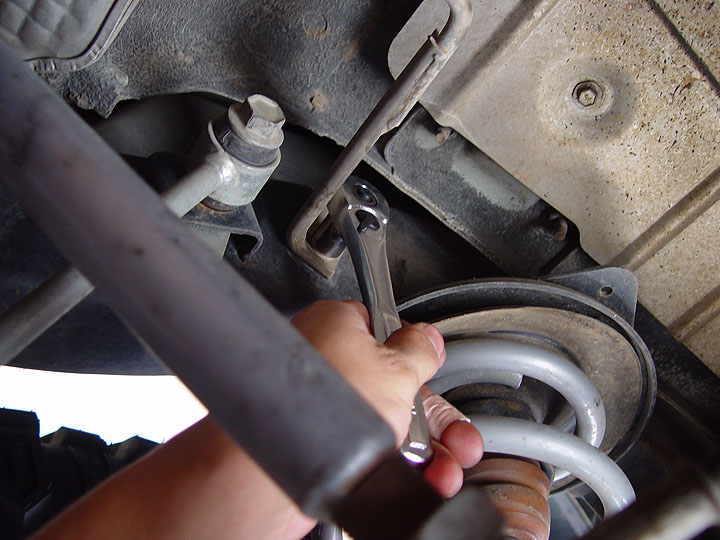
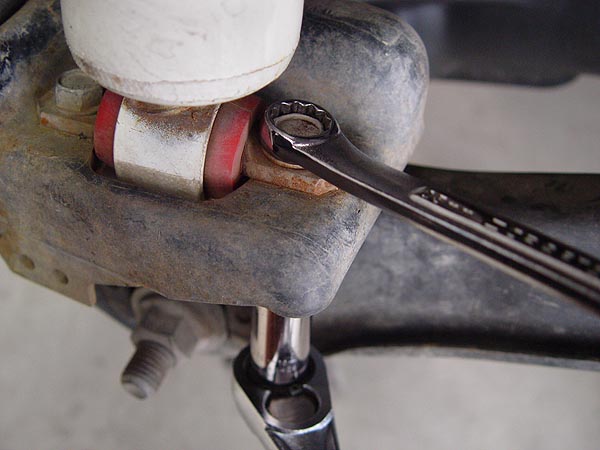
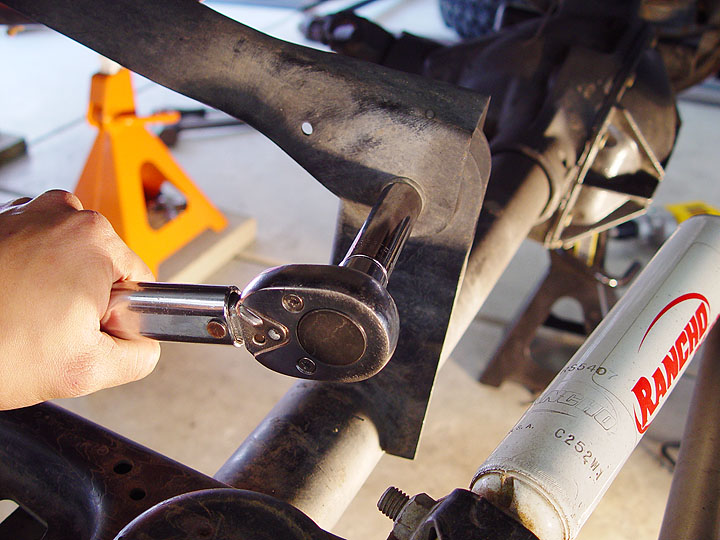
18. Using a 3/4" socket, loosen the castellated nut securing the track bar to the frame mount but do not completely remove it at this time. |
19. To release the track bar's stud, give the frame mount a couple of good whacks with a 3 lb. hammer. This should be enough to ring out the grip of the mount and your track bar's stud should simply drop out. |
 |
20. Remove the bolt and flag nut securing your track bar to the axle mount using a 15mm socket. Pull the whole thing out from under your Jeep. |
 |
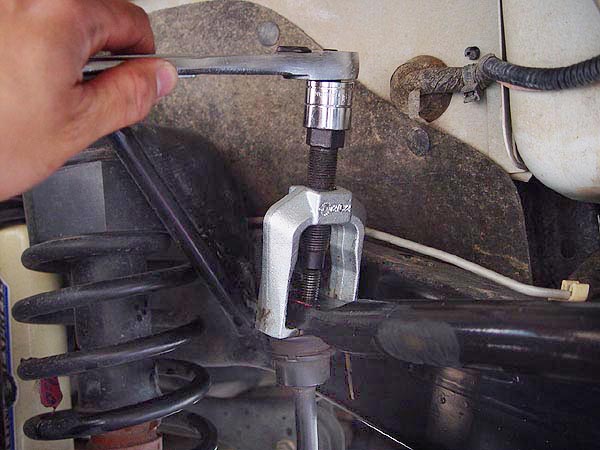
21. Remove the lower sway bar link bolts and nuts using a Torx T-55 Bit and 18mm socket. The upper nut can be removed using a 17mm socket but separating the links tapered stud from the sway bar will require the use of a tie-rod end puller like the one shown in the pic to the left. Simply slip it over your sway bar, locate the bolt over the top of the tapered stud and then proceed to slowly ratchet down the tool with a wrench until the links pops off. |
 |
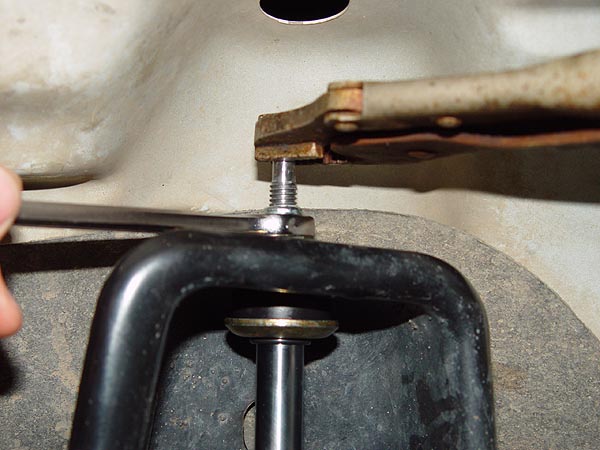
22. The front shocks on your Jeep are mounted with a stud mount on top and it will need to be held with a wrench or vice grips while unscrewing the nut with a 9/16" wrench. |
 |
23. Using a 13mm wrench and a 13mm deep socket, remove the bolts and nuts securing your Jeep's front shock to the axle. |
 |
 |
 |
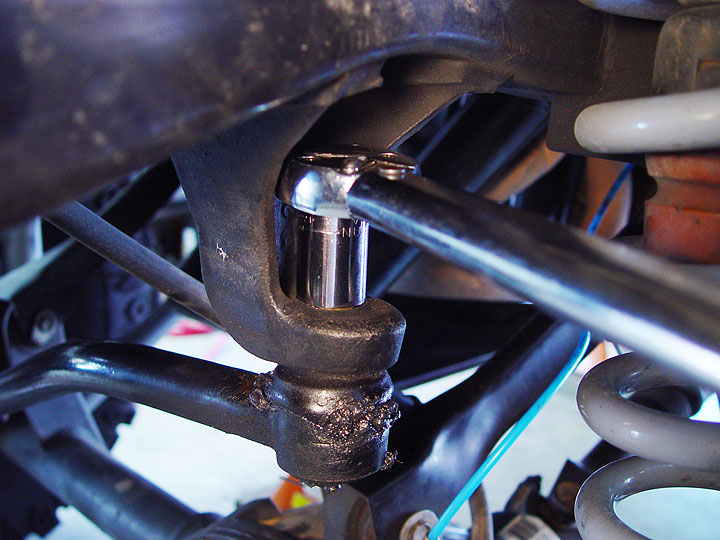
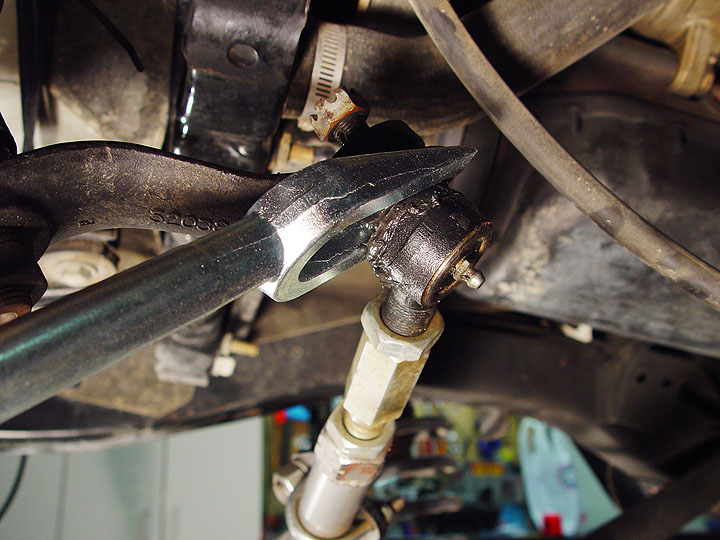
| 24. Use a pair of needle nose pliers to remove the cotter pin from your drag link mounting stud at the pitman arm. |
25. Now, loosen but do not completely remove the castellated nut on the drag link mounting stud using a 3/4" socket. |
26. Slip a ball joint separator or pickle fork between your drag link and pitman arm and then give the end of it a couple of good whacks with a 3 lb. hammer until it separates the two. |
 |
27. Remove the Torx bolt and retaining clip securing your brake line to the frame using a T-40 Torx Bit. Or, if you already have extended brake lines, simply remove the caliper bolts using a 1/2" socket and then place the caliper itself on top of the spring perch. With the brake lines free from the frame, you should be able to drop your axle down far enough to remove your coils springs. |
 |
28. Using a 13mm socket or wrench, remove
the front spring retaining clamp from the driver side of your
Jeep. With a very few exceptions of year or country, there should
be no retaining clamp on the passenger side. |
 |
29. Using a floor jack, slowly lower one side of your front axle as far as it
will go. If you're Jeep is up high enough, your
coil springs should just about fall out at this point and time. If
not, you may need the help of spring compressors to remove your front
coil springs. Raise and support your axle back on a jack stand and then repeat this process on the other side of your Jeep. |
 |
30. Remove your Jeep's front lower control arms from the frame rail mounts using a 21mm socket and a crescent wrench. A breaker may be needed as the bolts are on quite tight. |
 |
31. Now, remove your Jeep's front lower control arms from the front axle mounts using a 21mm socket and a crescent wrench. Again, a breaker may be needed as the bolts are on quite tight. Be sure to save the factory hardware as they will be reused. |
 |
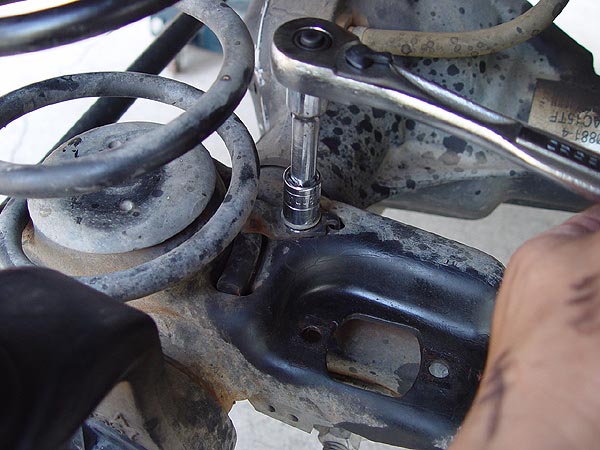
32. Make sure your axle is securely supported and will not rotate or pivot. Then, using a 15mm socket, remove the bolt securing your Jeep's upper control arm to the front axle mount. Keep the factory hardware as you will need to reuse them |
 |
33. Again, using a 15mm socket, remove the bolt securing your Jeep's upper control arm mount to the frame rail. Keep the factory hardware as you will need to reuse them |
 |
34. Cut off the bulk of your Jeep's upper control arm frame mount using a reciprocating saw. This is needed to prevent your new Full Traction upper control arms from making contact with them. |
 |
 |
 |
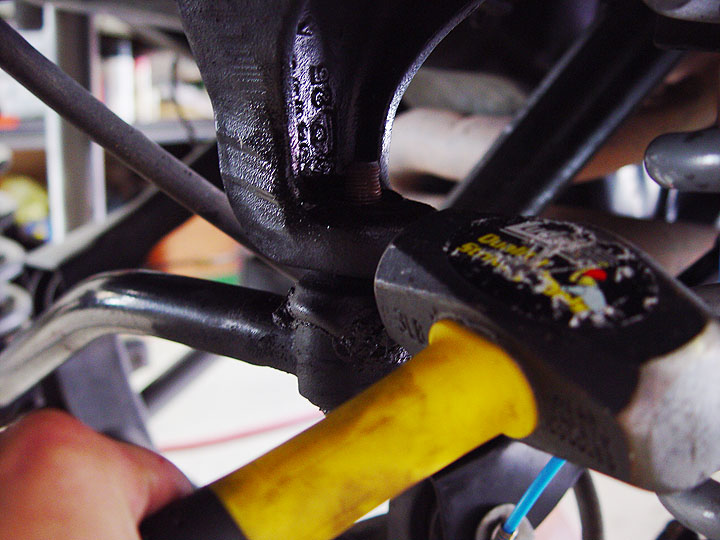
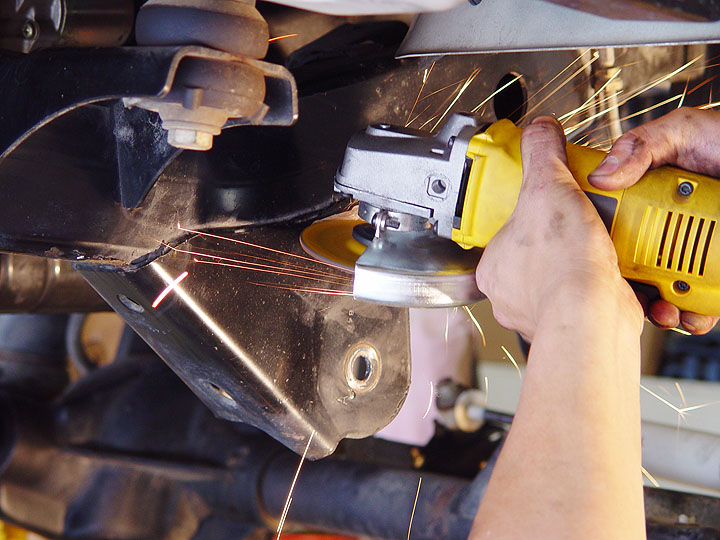
| 35. Using an electric grinder, begin removing your Jeep's lower control arm frame mount by creating a deep score all the way around the mount just beneath the weld as shown. |
36. Cut through the base of your Jeep's lower control arm frame mount all the way up to the score you created earlier using an electric grinder with a cut off wheel or reciprocating saw. |
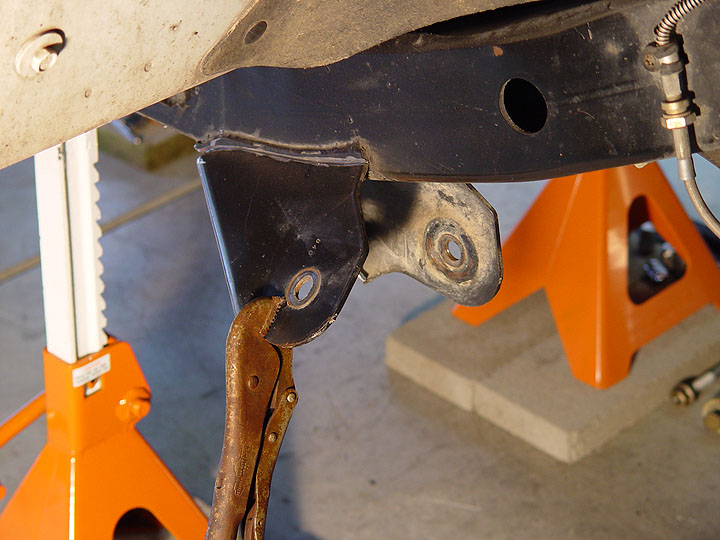
37. Clamp the base of your Jeep's lower control arm frame mount with a pair of vice-grips and then work it back and forth until it breaks off at the score. Repeat this process with the inside half of the mount. |
 |
 |
 |
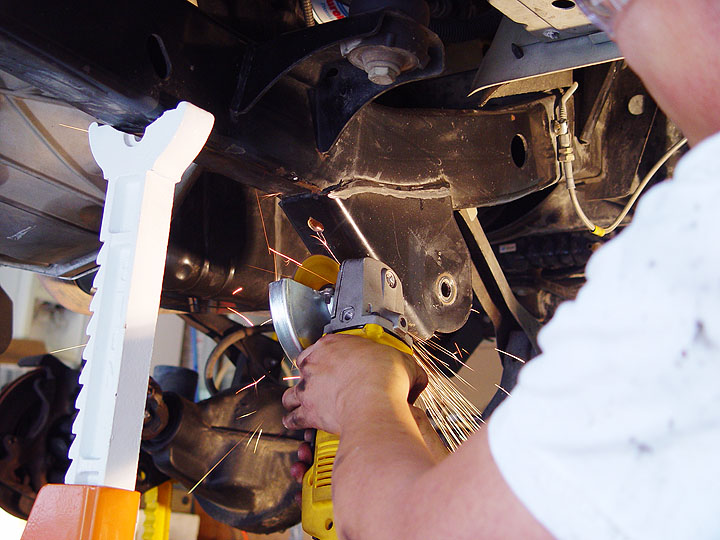
| 38. Remove all the remaining welds and steel from the factory control arm brackets on both sides of the frame rails as well as underneath it using an electric grinder. |
39. Smooth out the frame rails using a dual action sander. For the best results, start with a rough grit sand paper, move up to a medium grit and then finish up with a very fine grit. |
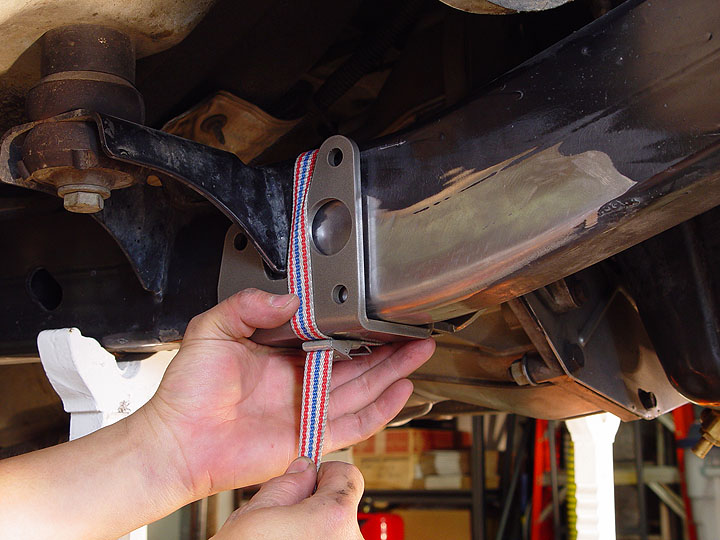
40. Starting on the passenger side of your Jeep, locate the appropriate side Full Traction Suspension upper control arm support bracket and position it on the frame rail so that the forward edge of the body mount is centered in between the "V" of the bracket. Temporarily secure it in place with a small tie-down strap. |
 |
41. Using the large hole in your Jeep's frame rail as a reference point, measure and make a note of where the Full Traction Suspension upper control arm bracket is located in relationship to it. This will help you to locate the driver side upper control arm bracket at the same distance. |
 |
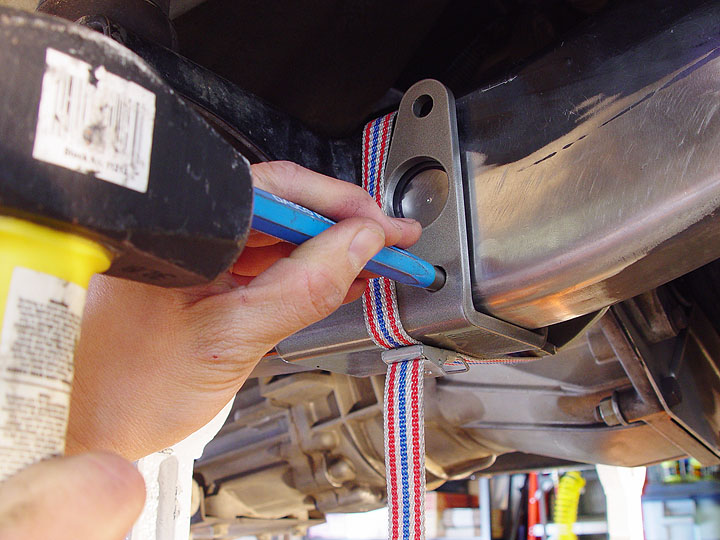
42. Using the Full Traction Suspension upper control arm bracket as a template, locate and mark the (1) large access hole and (3) smaller holes you will need to drill on the outside of your Jeep's frame rail with a center punch and hammer. Then, locate and mark off the holes on the inside of your Jeep's frame rail. |
 |
43. In order to have enough room to drill the hole furthest to the rear of your Jeep, you will need to remove your Jeep's body mount bolt. You will need to use a 3/4" socket to do this. |
 |
 |
 |
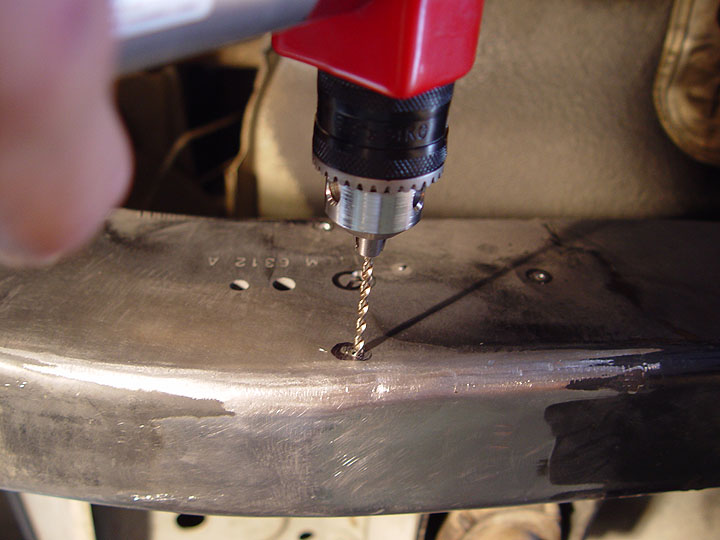
| 44. Remove the Full Traction Suspension upper control arm bracket and drill out the (3) smaller holes using a 7/16" bit. Drill only through the outside wall of your frame rail. |
45. Using a 1/4" bit, drill a pilot hole through the center of where your large access hole will be. Drill only through the outside wall of your frame rail. |
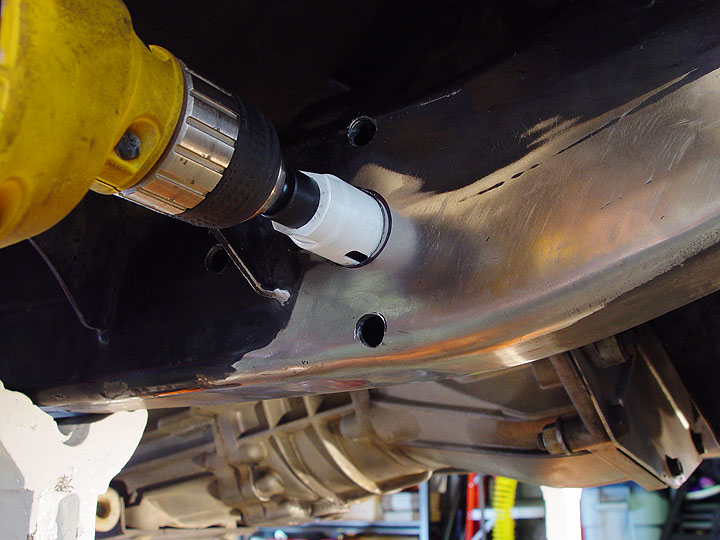
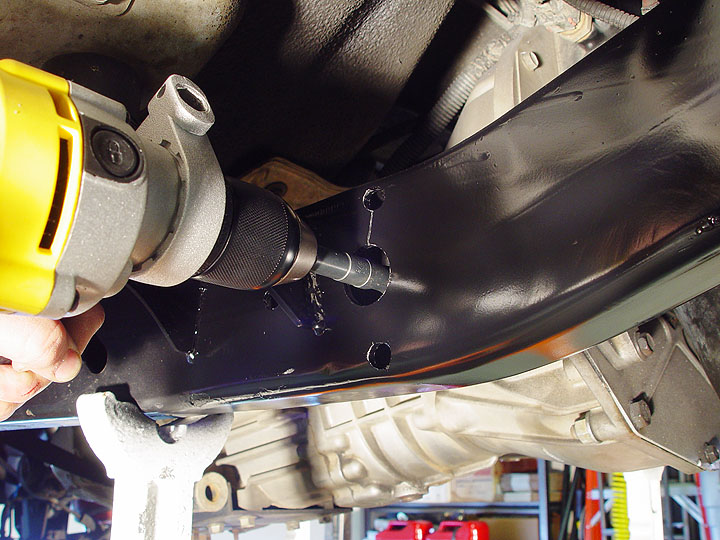
46. Using a 1-1/8" metal cutting hole saw, carefully drill out the access hole through the outside wall of your frame rail only. |
 |
47. Now, climb underneath your Jeep so that you can work on the inside wall of your frame rail. Using a 90° side angle drill and a 1/8" bit, drill a pilot hole where each of the (3) smaller holes and center of the large access hole will come through. |
 |
48. Back on the outside of your Jeep, continue drilling the (3) 7/16" holes all the way through the pilot holes you just created on the inside wall of the frame rail.
49. Looking through the 1-1/8" access hole you created earlier on the outside frame rail, locate the pilot hole you made on the inside wall and drill it out using a 9/16" bit.
50. Prime and paint your frame rails semi-gloss black.
|
 |
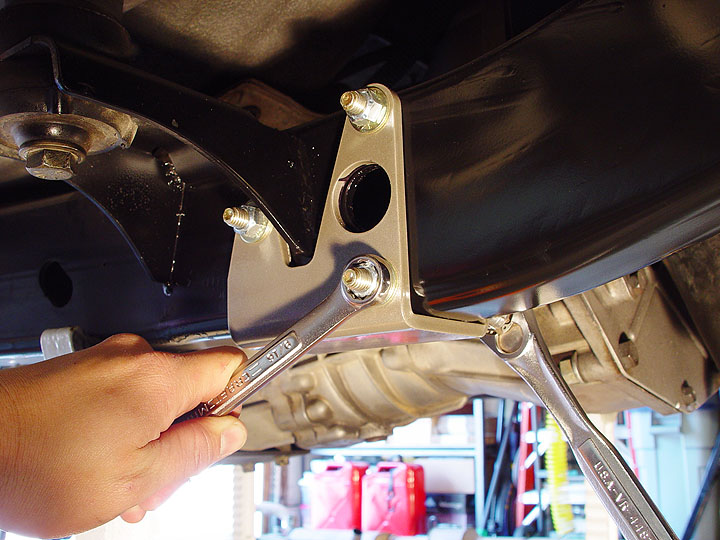
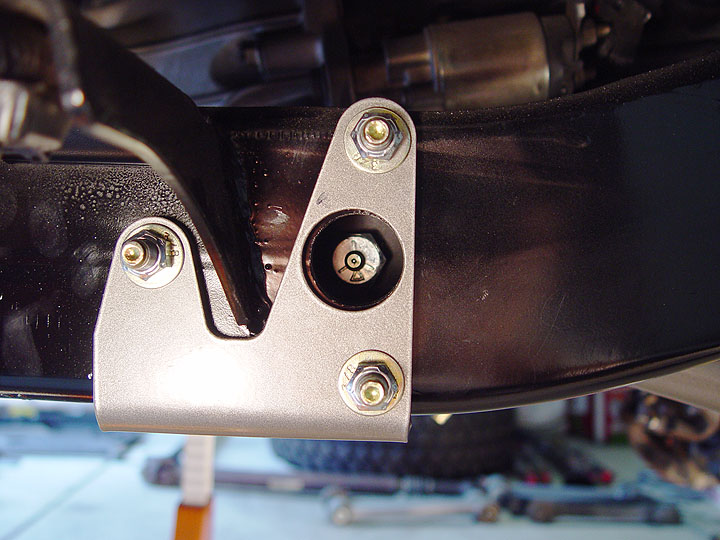
51. Attach the Full Traction Suspension upper control arm mount bracket using (3) of the 3/8"x3.5" grade 8 bolts, washers and lock nuts supplied with the kit. Make sure that the bolt heads are located on the inside of your Jeep's frame rails. You will need a 9/16" socket and wrench to fasten the hardware. |
 |
52. Climb under the driver side of your Jeep and remove the plastic tab from the frame rail securing a hard line.
53. Repeat steps 37-47 on the driver side of your Jeep. |
 |
54. Locate the (2) 9/16"x4" greasable bolts, matching washers and lock nuts that should have come with your Full Traction Suspension Long Arm Kit. |
 |
55. The Full Traction Suspension front upper control arms come pre-assembled with axle mount joints that are angled inward. Verify that both upper control arms are the same length and install them onto the frame rail brackets using the (2) 9/16"x4" greasable bolts, washers and lock nuts. |
 |
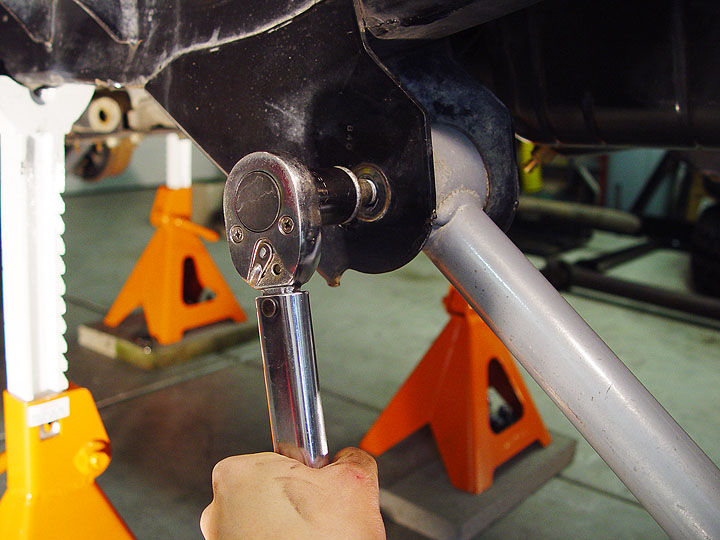
56. Using a 13/16" socket and 7/8" wrench, tighten the greasable bolts to 85 ft. lbs. of torque. Leave the jam nut hand tight for now as you will most likely need to adjust the upper control arm lengths later to correct your Jeep's pinion angle. |
 |
57. Using a 15mm socket and a pair of vice-grips, install the Full Traction Suspension upper control arms onto your Jeep's front axle mounts using the factory hardware. Tighten the bolts to 55 ft. lbs. of torque.
Reinstall
your Jeep's body mount bolt using a 3/4" socket and continue to page 2. |
|