|
|
|
Special Thanks
& Notable Mentions
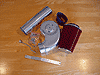
I really need to give special thanks to the wonderful "Master"
John Strenk. Without his help and sincere generosity, my CJ would
still be sitting in my garage collecting dust. As you know, I failed
my first smog test due to very petty reasons, one of which was that
my charcoal canister was cracked and I had fixed it with some JB
Weld. As it turns out, "this is not an acceptable fix even
if it works." Well, as luck would have it, finding a new canister
is very difficult in my neck of the woods and believe me, I really
looked hard for one. After posting my experience on JeepsUnlimited's
bulletin board, John came to my rescue and offered to send me one
for FREE!! Truly, it's guys like John that make owning a Jeep the
wonderful thing that it is.
Other notable mentions need to go to Kevin (ChiliPepperTJ) for offering
to help me out with a canister if John couldn't and NCal and riskeacj5
for helping me out with all the great Air Intake solutions.
Thanks Guys!!
|
|
Post Installation Notes
Smog Test Results
01/31/05
Well, today was my smog test and my CJ passed the snif test with
flying colors.... but the smog nazis still failed me. Why you might
ask? Well, after about an hour of close scrutiny and interogating,
this is what i was told (and i'm not making any of this up):
1. my check engine light was not properly labled
"check engine" (just so you know, i reused my old factory
"check carb" lamp on the dash).
2. there was a vacuum plug on the last port of
the CTO that was supposed to be open to atmosphere. (i simply forgot
to remove it)
3. the hose connecting my PCV breather to the air
intake was a radiator hose and not a fuel line hose.
4. my charcoal canister had a crack on one of the
ports that i fixed with a little JB weld to which they said "gluing
a port is not an acceptable repair even if it works."
5. my idle was running at about 950-1000 RPM and needed
to be at 750 RPM.
Thanks to the help of John Strenk, all these have now been fixed
and I will go in for another appointment on 02/15/05. Wish me luck.
Smog Test Results
02/15/05
Well, I went in for my smog re-test today
at 7am. Worried about being late, i left early in the morning and
i unfortunatly showed up about 10 min too early. Worse still, the
nazis ended up being 10 mins late. It was in the upper 40's this
morning and my engine got a whole 20 mins to cool off anyway, the
chief nazi remembers my CJ, pisses and moans about badly my exhaust
smelled at an idle the last time around and that it was a surprise
how well my engine cleaned up under load. Anyway, he has his new
student fire up the engine and then goes for a walk to who knows
where. No joke, about 10 mins later he comes back talking on the
phone to God know who and for what reason but in the mean time,
my engine is chugging along. 15 mins now have gone by and unconvinced
that my TBI is really doing it's job, he decided to plug his DLP
reader up to the ECM and do some checking. Low and behold, my engine
all of a sudden throws a check engine light... imagine that?! Well,
right there and then, the jackoff cuts the engine and tells me that
i failed my inspection. When I asked him what the error code was,
he tells me that my engine is running too rich. So the student fires
her back up, pulls it out of the garage and goes to park it when
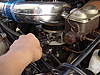
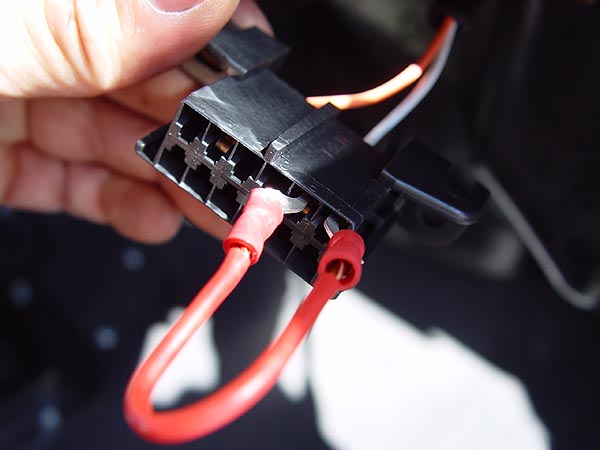
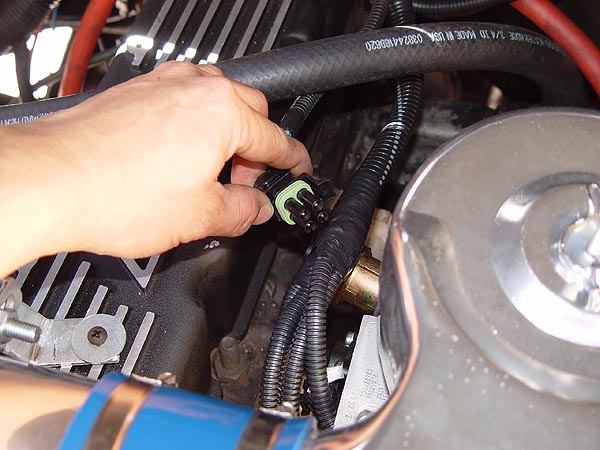
I noticed that the check engine light is now off. Seeing this, I
ask if I could be tested again now that the light is off and he
tells me that it's no good and that the computer already has me
down with a check engine light and the best he could do is void
my test allowing me another chance.By this time, I'm really pissed
off but don't have a clue as to what to do.....
Anyway, so I head back home which is over an hour away in bumper
to bumper traffic when it hits me.... try to get my Jeep smogged
at a regular check station. Show the paper work from the time before
and say that you missed your re-test appointment and can I just
get it done here. Need I say, that's exactly what I did and after
a little persuading..... I passed smog with flying colors.... again!
|
|
Howell
Throttle Body Fuel Injection (TBI)
for a Jeep CJ - 258 California Emissions Engine
<<
Back - Page 3
 |
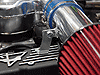
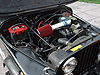
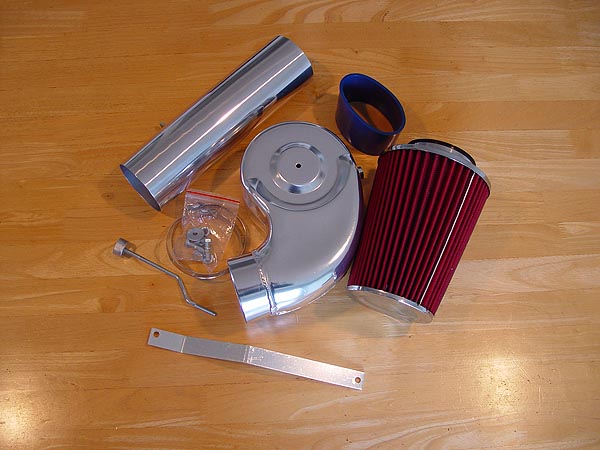
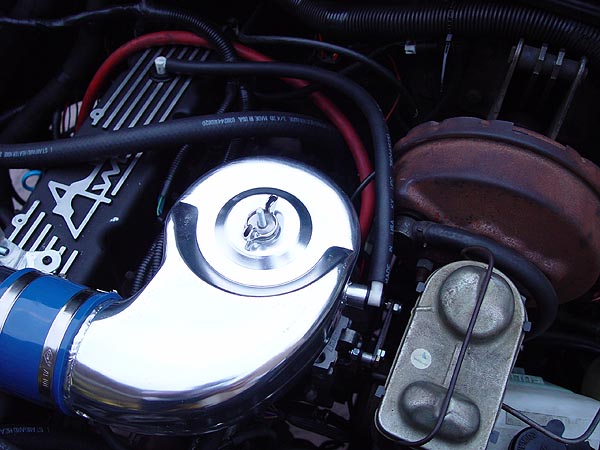
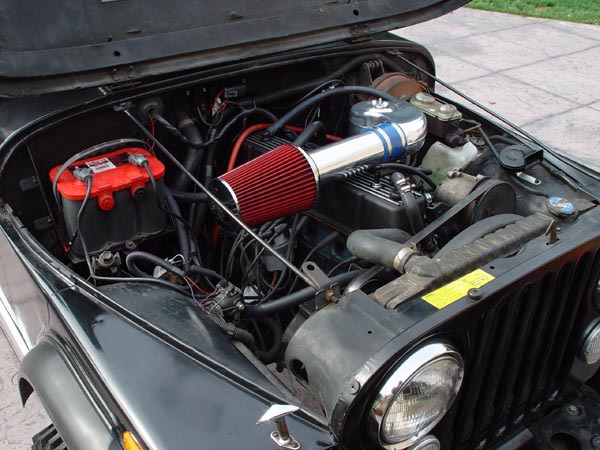
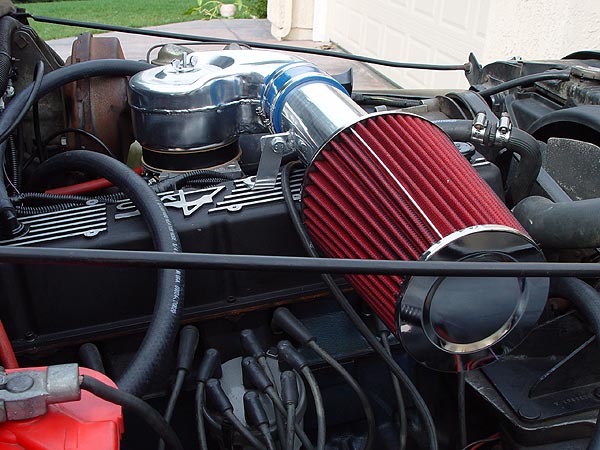
49. This is a shot of the air intake system
I purchased from Redline Motorsport. Basically, it's a K&N
clone but it was cheap, looks good and does the job. Make sure
you have all the parts you will need to install this onto your
Howell TBI. Remember, you will need 2 gaskets and a air intake
spacer to install it. |


|
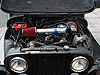
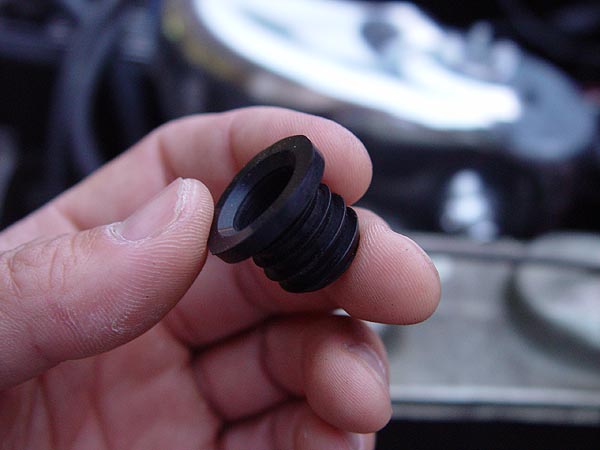
50. The air intake system comes with a
port on the side of it for you to connect a CCV breather.
You will need to pick up and use a breather grommet (I found
mine at PepBoys) like the one shown in the pic to the left
in order to attach an emissions elbow to the outside housing
of the air intake.
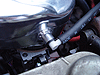
51. Use a second emmissions grommet and plug
it into the rear breather hole on your valve cover. Then,
connect another emissions elbow to it.
52. Connect the emissions elbow on your air
intake system to the one on your valve cover using a length
of fuel line.
53. Attach the threaded S-bolt that came
with the air intake system on to the Howell TBI.
54. Place 1 gasket on the Howell TBI, place
the Specter air intake spacer on top of it, place a gasket
on top of the spacer and then the new air intake system on
top of it. Secure everything to the Howell TBI using the wingnut
supplied with either kit.
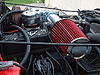
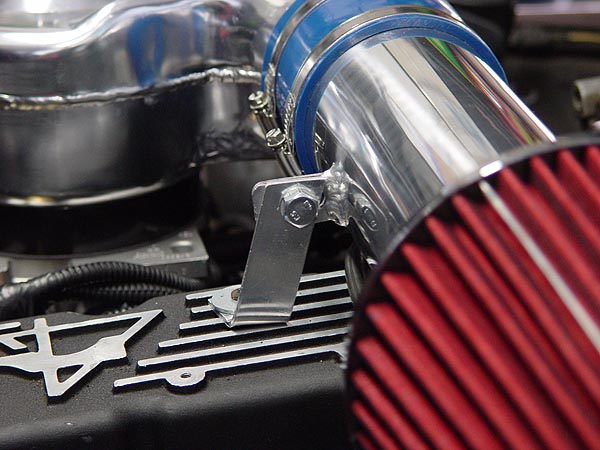
55. The aluminum support bracket that comes
with the air intake system will not work on a Jeep as it was
made for a Chevy Tahoe. I took the support bracket and fashioned
my own bracket and attached it to the valve cover as shown
in the photo to the left. |
 |
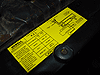
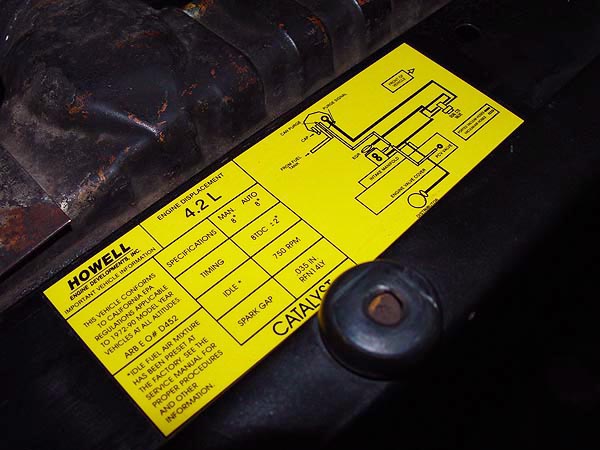
56. Affix your new Howell TBI sticker on
top of the old vacuum diagram. Double check all your connections,
tidy up all your wiring with zip ties, conduit and/or electrical
tape. Also, make sure there are no tools left in the engine
compartment.
57. Tighten your serpentine belt (for now,
I just left my old air pump on), refill your radiator as needed
and Reconnect the negative lead back onto the battery.
58. Climb into the drive seat, put the key
in the ignition and turn it to the on position ONLY. The check
light should come on and stay on and you should hear the fuel
pump activate.
59. Back outside, thoroughly check all your
fuel lines again for leaks. I found that my fuel pump started
to leak ever so slightly where the brass fitting connects to
the foward end of it).
60. Now, climb back in your Jeep and try to
start up the engine. This may take a few tries to purge all
the air in the new fuel lines but keep cranking, DO NOT pump
the gas pedal and do not get discouraged. Make sure to look
at your new "check enging" light. Does it go off when
cranking? If it does, you have selected an incorrect power source.
61. Once the engine starts, re-check all your
fuel lines for leaks.
62. Adjust your throttle linkage as necessary. |


|
63. Time to set your idle. To begin, start
your engine and let it warm up to normal operating temperature.
Then, turn your key to the off position and stop your engine.
64. Go to your Howell TBI ALDL diagnostic terminal
and place a jumper between the A and B connections. I just made
my own jumper using a piece of wire and some solderless connectors.
65. Turn your key to the "ON" position
but DO NOT start your engine. You should hear
the Howell TBI stepping motor clicking as it reaches the end
of its travel.
66. Climb back under your hood and disconnect
the 4 conductor cable plugged into the idle air control stepping
motor on the passenger side of the Howell TBI (see pic)
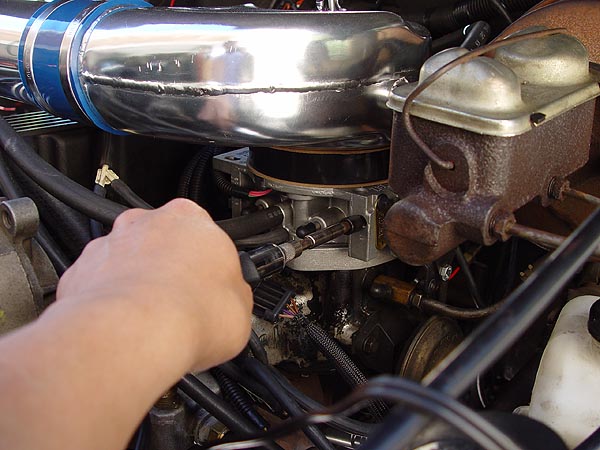
67. Remove the jumper from the ALDL diagnostic
terminal, hook up a tachometer to engine and then start it up.
Using a Torx T-20 Bit, adjust the idle speed screw (which is
located on the front of the Howell TBI right next to the throttle
control) until the low idle speed is at 750 RPM as stated by
the manual.
68. Turn your key to the off position and stop
your engine. Plug the connector back into the idle air stepping
motor on your Howell TBI. Your engine should now start, run
and idle properly under the control of the ECM. |
|
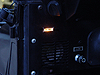
Post Smog Inspection Fixes
Here is a pic of my new "check engine" light that
I made using some acetate and my home ink jet printer. I just
removed and replaced the lens on the "check carb"
lamp. |
That Should be it. Please let me know if you have any questions. I'd
be more than willing to help out where I can.
|
|
|


