|
|
Problems
I Ran Into
Along the Way
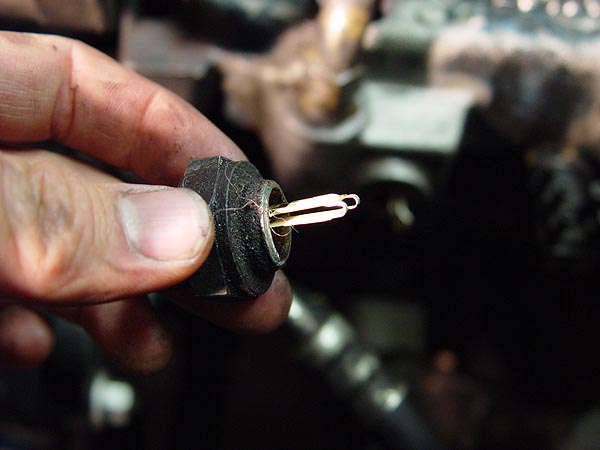
Of all the dumb things, I ended up breaking my factory coolant temperature
switch with a majority of it still inside the intake manifold. At
this point, I really though game over for me and was ready to put
the TBI on hold while I extracted the intake/exhaust manifolds.
As lazyness would have it, I decided to attempt to extract the remaining
switch with the intake manifold still on the engine. Using a Dremel
and a cutting bit, I worked off what I could try very hard not to
damage any of the manifold threads. This action seemd to work well
but also caused the back end of the switch to fall into the water
jacket. Argh!! After about an hour of working with a coat hanger
and tweezers, I was finally able to get all the pieces out.
In the end, I was able remove the broke switch with minimal damage
to the threads (nothing a little RTV couldn't fix) on the intake
manifold and I was able to continue with the installation of the
Howell TBI.
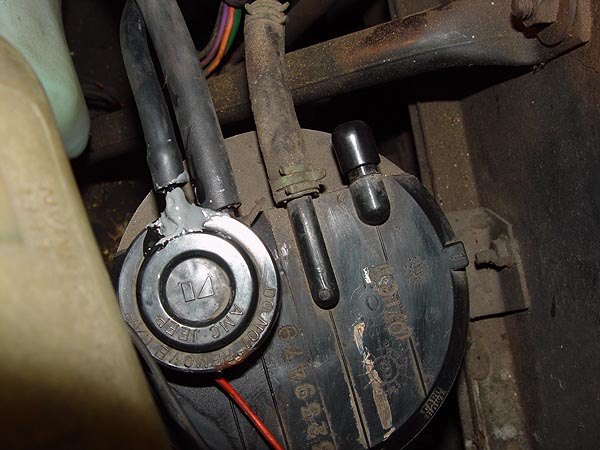
Another problem I encountered was that I accidentally broke a plastic
nipple on the charcoal canister while attempting to remove a vacuum
line. (Note to self: never pull on a rubber hose connected to a
plactic nipple. Just cut it off with a razor!!) A touch of Zap-A-Gap,
some JB Weld and a day later, the nipple was usable again.
|
|
|
|
Troubleshooting Tips
The number one reason why your engine won't start after installing
the Howell TBI is that the 12V source you chose to power your ECM
is incorrect. The ECM power wire needs to have an un-interrupted
12V supply when the key is in the ON position and while cranking.
If the ECM light turns off when cranking the engine, you have picked
an accessories lead. The ECM light should not turn off while cranking
the engine.
If you cannot locate a 12V power source, you may want to consider
hooking up a direct lead to the battery with a toggle switch in
between.
The Howell TBI instructions come with all the other troubleshooting
information you might encounter. |
|
Howell
Throttle Body Fuel Injection (TBI)
for a Jeep CJ - 258 California Emissions Engine
<< Back
- Page 2 - Next>>
|
24. Remove your glove box from the dash board.
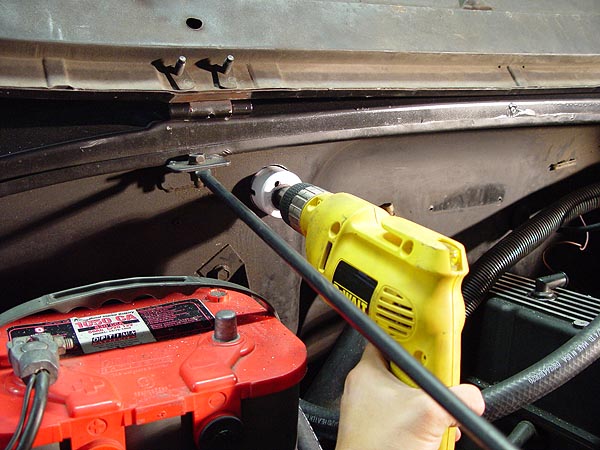
25. If your Jeep doesn't have an ECM behind
the glove box like mine, you will have to drill a large hole
through the firewall for the new wiring harness. The Howell
TBI kit comes with a large rubber grommet to help patch up the
hole once the wiring harness is through. I used a 1-3/4"
metal drilling hole saw to accomplish this task. Make sure nothing
will get damaged by the hole saw prior to drilling away.
26. Lay your new Howell TBI wiring harness
on top of your engine, drill and then mount the relays (show
in the image to the left) onto the firewall using self-tapping
metal screws. You will see that every other connection on the
wiring harness will extend correctly from this point.
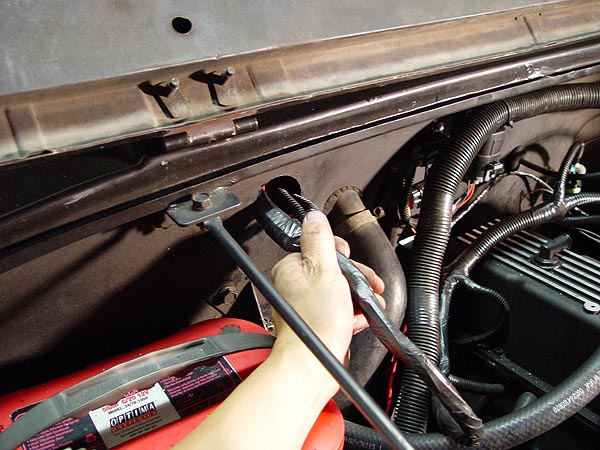
27. Carefully feed the ECM connections through
the new hole in the firewall you made and then seal off the
hole using the large rubber grommet supplied with the kit. I
used some black RTV to insure the grommet stayed in place and
was sealed off good. |
|
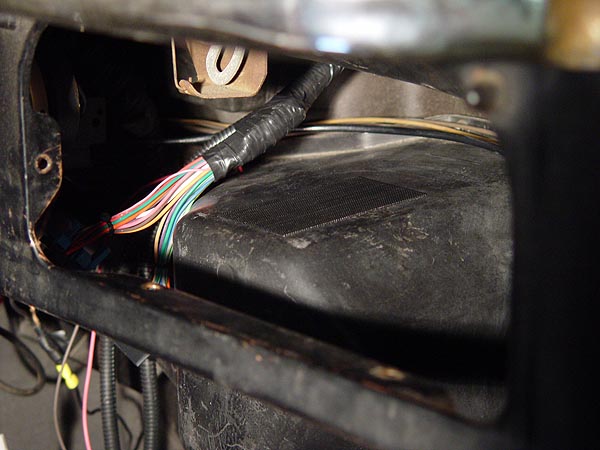
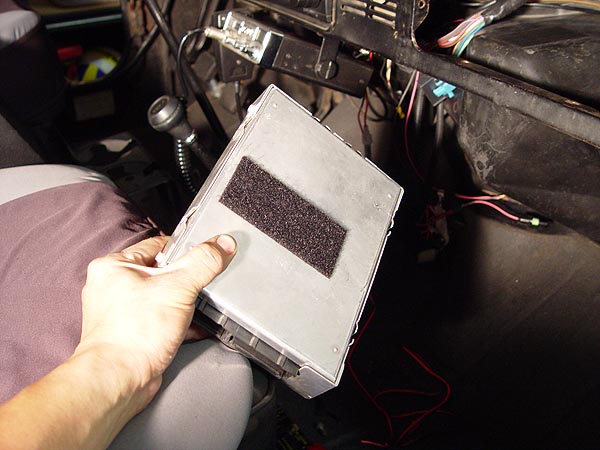
28. Thoroughly clean the top of your heater
box. Use some alcohol to insure there is no grease on the surface.
29. Apply one half of a strip of velcro
tape to the top surface of the heater box and the other half
to the bottom of your new Howell ECM.
30.
Through the glove box opening, insert and affix the new Howell
ECM to the top of the heater box and then plug the 2 wiring
harness connections into it.
31. Using
more velcro tape, affix the new fuse block and diagnostics terminal
to the side of the heater box.
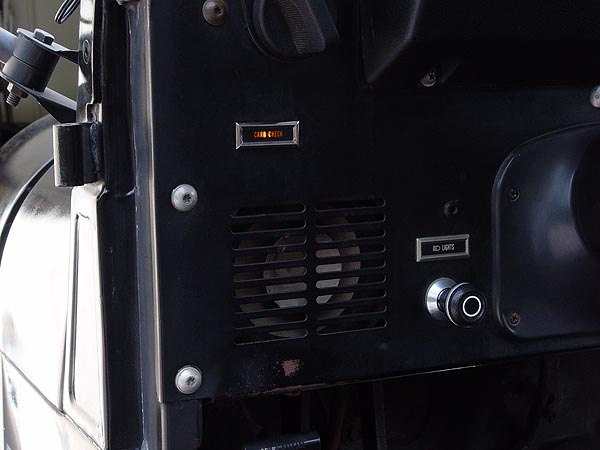
32.
My Jeep was built for California and so it had a "Check
Carb" indicator lamp mounted on the dash board just to
the left of the steering wheel. I decided to recycle this lamp
and attached the new "Check Engine" light wiring to
it. If your Jeep does not have this lamp, you will need to purchase
and attach an indicator light to your dash board so that you
can see error codes or be alerted to any problems the system
may experience in the future.
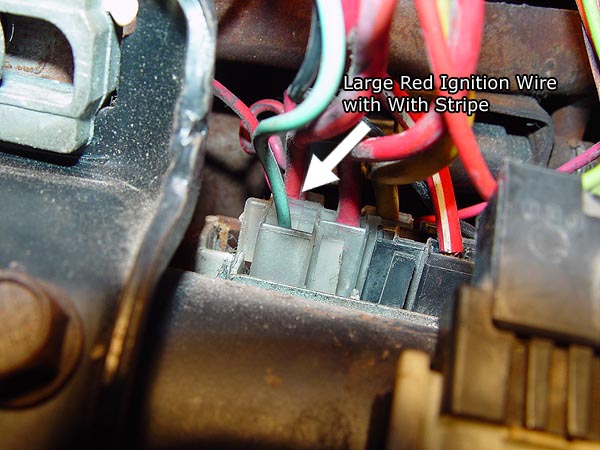
33.
The new Howell ECM needs to be powered by a 12V source that
has current when the ignition key is in BOTH THE CRANK
AND RUN position. I found and used an ignition wire
that was located on the steering column under the dash. It is
the thick red wire with a white stripe as indicated in the photo
to the left. |

|
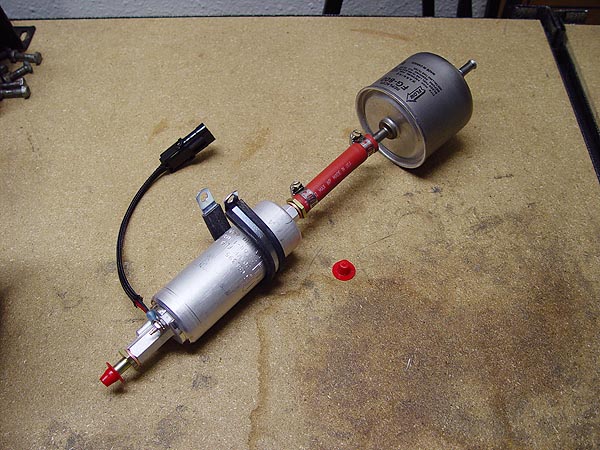
34. Back at the work bench, assemble your
new electric fuel pump to the fuel filter using a piece of the
high pressure fuel line and hose clamps supplied with the Howell
TBI kit (see photo to the left). Both the fuel pump and filter
indicate the fuel flow direction and should be assembled accordingly.
Leave the red cap on the fuel pump end but remove the one attached
to the fuel filter for later use.
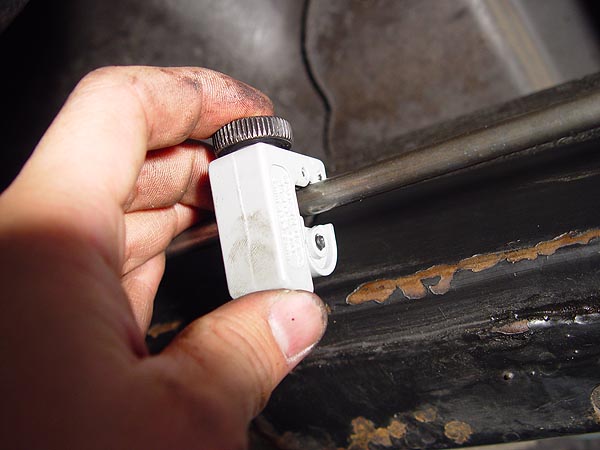
35. Now, climb under the passenger side of
your Jeep just behind the transfer case skid plate. Look up
on the frame rail and using a small tube cutter, cut the hard
fuel line a few inches back from the skid plate. Make sure your
face is not directly under the fuel line as gasoline will pour
out and soak you. Use the red cap that you removed earlier from
the end of the fuel filter to cap off the fuel line after cutting
it. It's a pretty good idea to keep a fire extinguisher handy
during this part of the project.
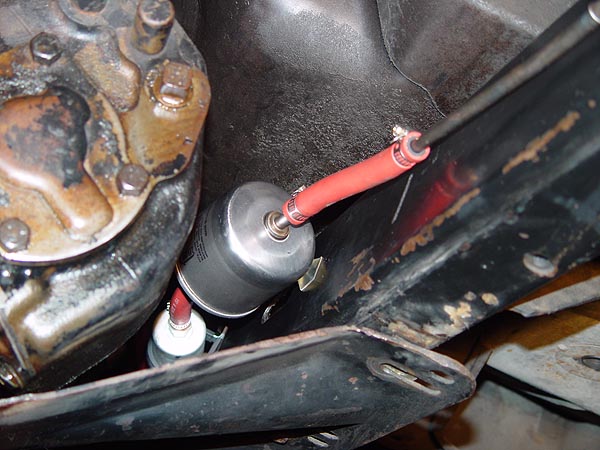
36. Cut
off another piece of high pressure fuel line and attach it to
the end of the fuel filter and hard line along the frame rail
using hose clamps provided with the Howell TBI kit.
37. Secure the fuel pump to the frame rail
using the strap provided with the Howell TBI kit. I attached
the strap to the frame rail using one of the bolts from the
old hard line mounts.
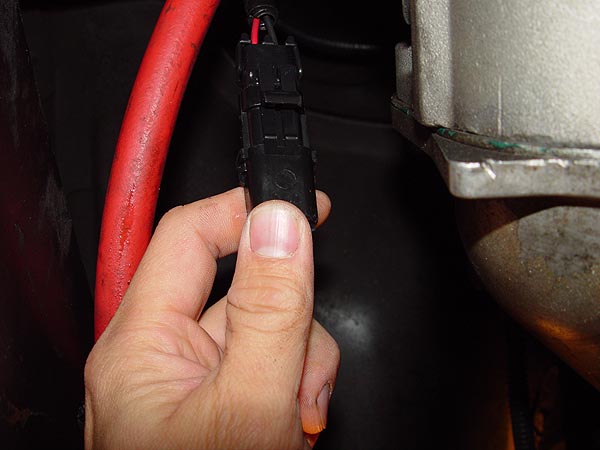
38. Connect
the fuel pump power lead to the wiring harness.
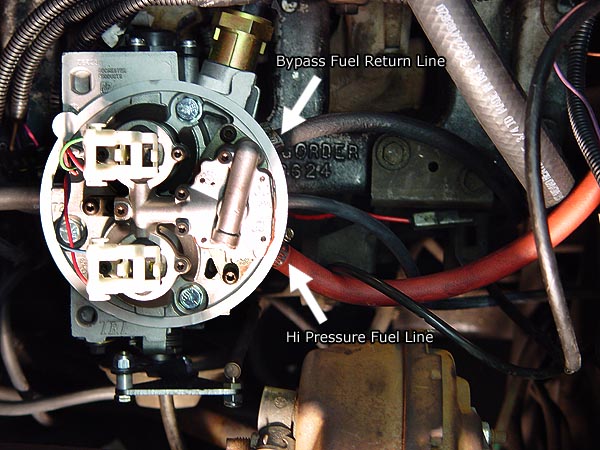
39.
Attach the rest of the high pressure fuel line to the fuel pump,
run it up the firewall, over the engine and attach it to the
fuel port on the Howell TBI on the driver side of your Jeep
using hose clamps provided with the kit. The other port is where
you will need to hook up the bypass fuel return line. |

|
40. Connect all the vacuum lines to the Howell
TBI unit, CTO, distributor and charcoal canister using the diagram
provided in your instructions and engine sticker. In a nut shell,
all you have to do is connect the PCV valve line to the top
port and then 'T' it with the large line running down to the
charcoal canister. The port below needs a 'T' that connects
the distributor's vacuum advance and to 2 points over on the
CTO valve. The EGR valve needs to get connected to a third port
on the CTO and the fourth port on the CTO is connected to the
charcoal canister's purge control port. Plug all the remaining
ports.
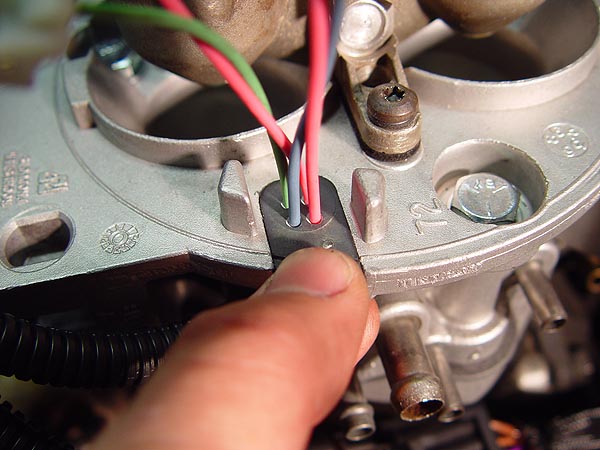
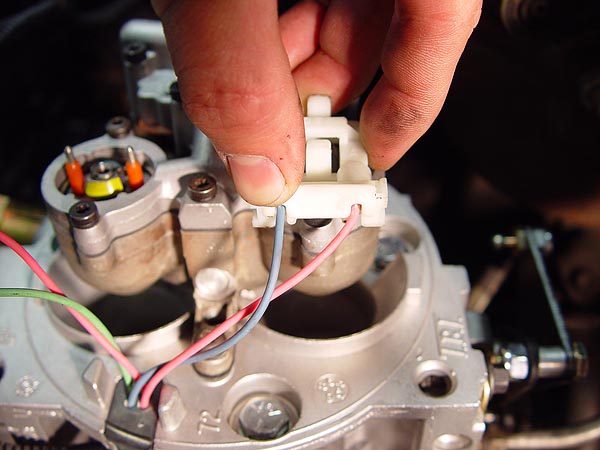
41. Slide the form fitted rubber grommet onto
the edge of the Howell TBI unit and then plug in the fuel injector
electrical connectors as shown in the images to the left.
42.
Attach your new Manifold Absolute Pressure (MAP) sensor above
the base plate of the Howell TBI unit. I decided to attach this
sensor to the wiring harness next to the brake booster. Once
in place, connect the MAP sensor to the vacuum port located
on the back of the Howell TBI unit between the fuel and bypass
return lines.
43. Start hooking up the electrical connections
from wiring harness to the various points on the Howell TBI
unit. Each connector will only fit on its specific port and
so you won't be able to screw this up. There should be a place
to hook up the ground wire to the firewall near the engine.
Also, be sure to hook up the coolant temperature switch, O2
sensor and throttle linkage back onto the Howell TBI unit at
this time.
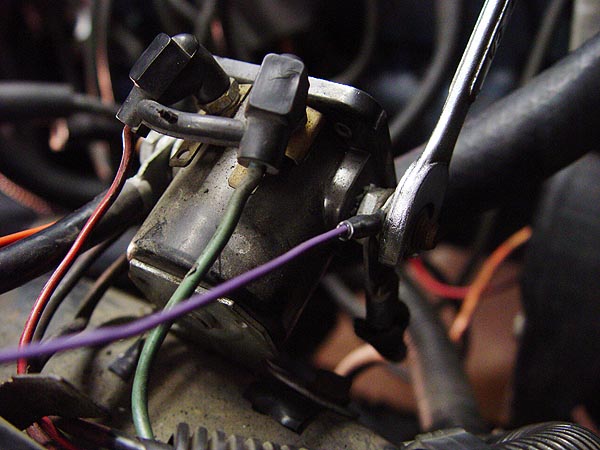
44. On the passenger side of the Jeep, grab
the orange and purple (these are labeled) wires and attach them
to the starter solenoid on fender well. The orange wire needs
to be hooked up to the positive or batter power terminal and
the purple to the opposite side as shown in the photo to the
left.
45. The remaining white wire needs to be hooked
up to the negative terminal on the ignition coil in order to
pick up tachometer signal. |
 |
46. Climb back under the driver side of your
Jeep and remove the speedometer cable connector from the transfer
case.
47. Now, attach the Howell TBI
speed sensor to the transfer case and then re-attach the speedometer
cable to it. Plug in the speed sensor to the wiring harness. |
|
|
|