 |
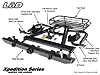
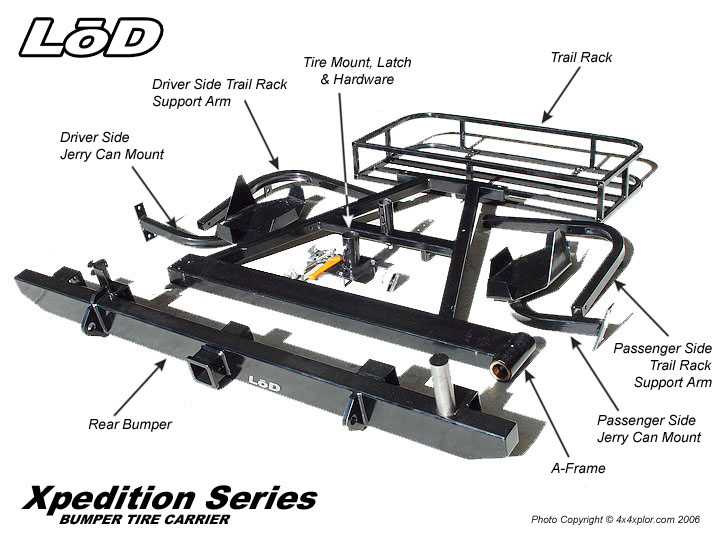
To begin the installation of your new LoD Xpedition Series Jeep Bumper/Tire-Carrier, open up your boxes and make sure you have the all the parts needed. If you are missing anything, now is the time to figure things out. DO NOT assemble the A-frame section onto the bumper at this time. |
 |
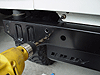
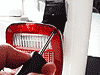
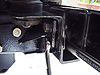
1. Remove your Jeep's rear bumper plastic end caps. To do this, you will need a T-30 Torx Bit to remove two bolts on top, two underneath and one attached to a flange behind the bumper itself.
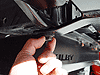
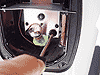
2. If you have a factory Jeep J-hook style tow hook, remove it using a 19mm and 18mm socket. Be sure to extract the metal tab with the nut welded on to it from inside your frame. |
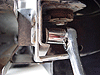 |
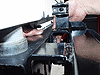
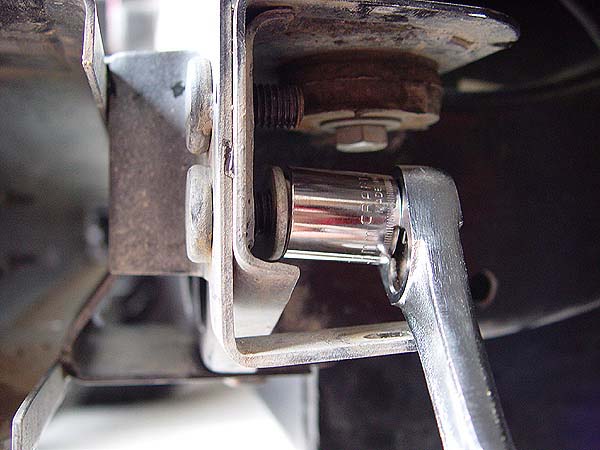
3. There are a total of 6 bolts securing your factory bumper to your Jeep. On either side, you will find two bolts located directly behind the rear cross member and one underneath attached to your frame rail. Using an 18mm socket, remove all 6 bolts but keep the two that were attached underneath the frame rail handy as they will be re-used. Remove your rear bumper, clean up and wipe down the rear cross member on your Jeep. |
 |
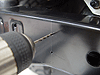
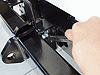
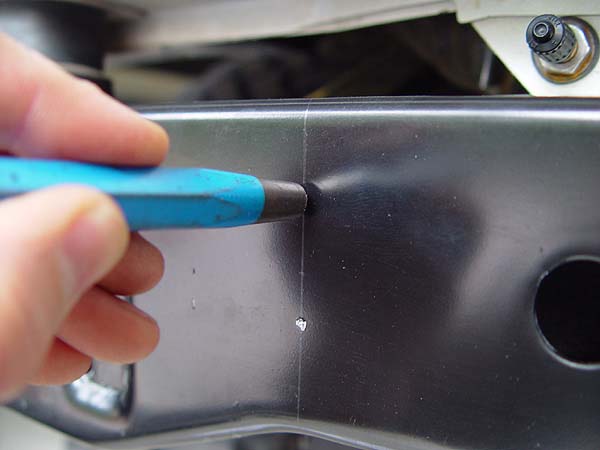
4. For reasons of strength, you will need to drill two sets of new mounting holes in your Jeep's rear cross member (This step is for 1998 and newer TJ's only - YJ's and 1997 TJ's do not require drilling as these hole already exist). These new holes will be located just inside the frame rails 32" apart center to center. Each set will require two vertically aligned 1/2" holes to be drilled 1-1/8" apart center to center. Temporarily attach just the new LoD bumper to the bottom of your Jeep's frame rails using the factory bolts. Using the bumper as a template, mark off the points where you need to drill your holes with a short pencil or grease pencil. Remove the bumper and then mark your drilling points with a center punch |
 |
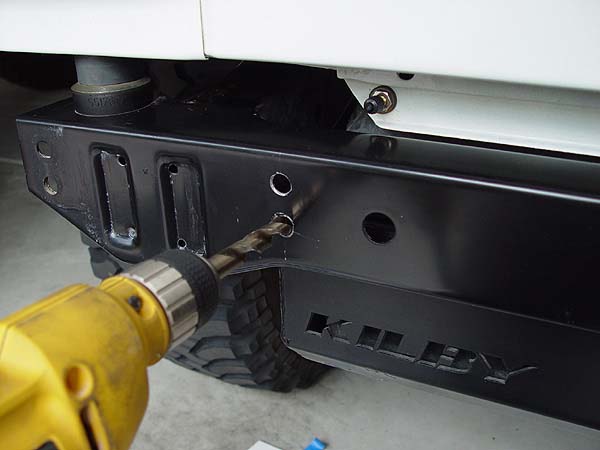
5. A 1/2" drill bit is quite large and can be difficult to get started right where you need it. So, to insure accuracy, I decided to drill 1/8" pilot holes first. These pilot hole will help guide the larger 1/2" bit or unibit to stay where it needs to be. Drill slowly and try not to push too hard on the rear cross member. If you punch through with all your weight behind the drill, you may end up drilling a hole through your Jeep's gas tank on the other side and that won't be good.
Clean up your holes with a round file or Dremel with a grinding bit. Touch up the bare metal with touch-up paint to prevent rusting. |
 |
6.
With the help of a friend, lift your new LoD Xpedition Series Bumper up to your Jeep's rear cross member and thread in the 2 factory bolts that attach the bottom brackets to the frame rails. Tighten these bolts only finger tight at this time as it will make it easier to get all the other bolts on. |
 |
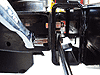
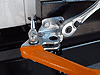
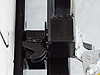
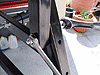
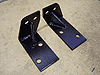
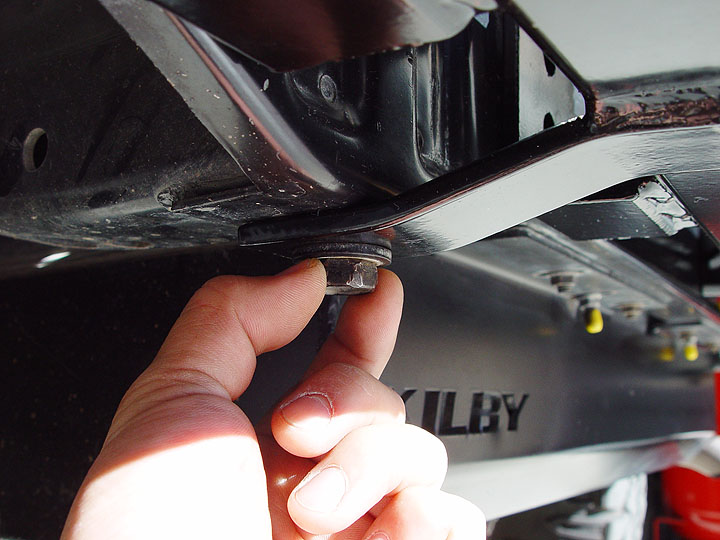
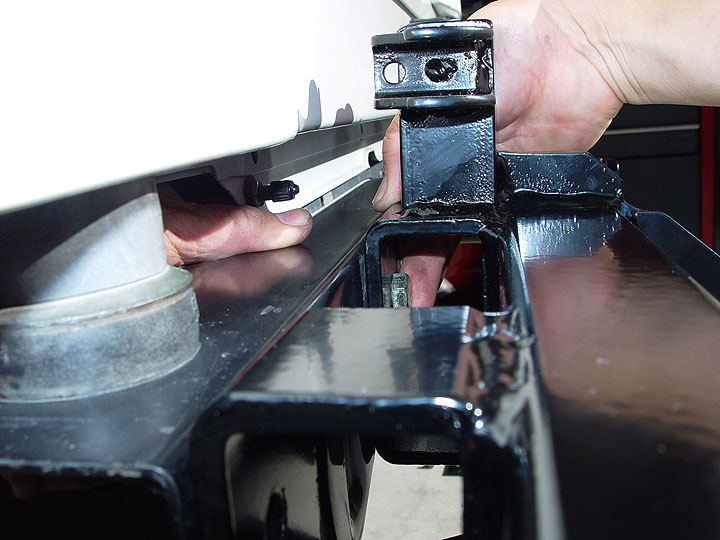
7. Take one of the LoD Xpedition Series Bumper inner mount backing plates with the 2 nuts welded on it and slip it behind your rear cross member on the driver side of your Jeep. Hold the mounting plate with the flush side up against the back of your Jeep's rear cross member where you just drilled the new holes and secure it in place only finger tight using the provided 7/16"x1" bolts. The space behind your cross member is very tight so be patient and take your time. Repeat step on the passenger side of your Jeep.
NOTE: If you are experiencing difficulties with this part of the installation, please refer to the Bumper Installation Tips notes for tips and alternate
ways of making this work out. |
 |
 |
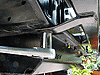 |
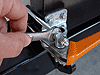
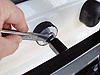
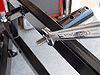
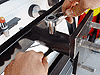
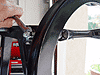
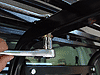
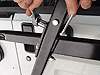
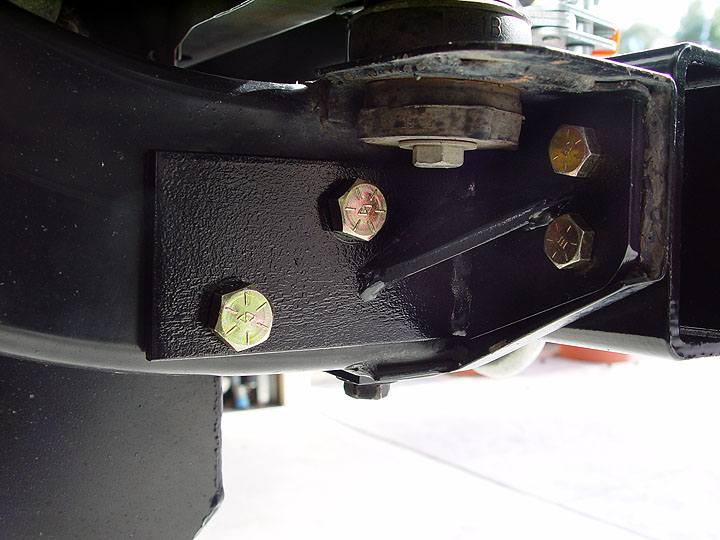
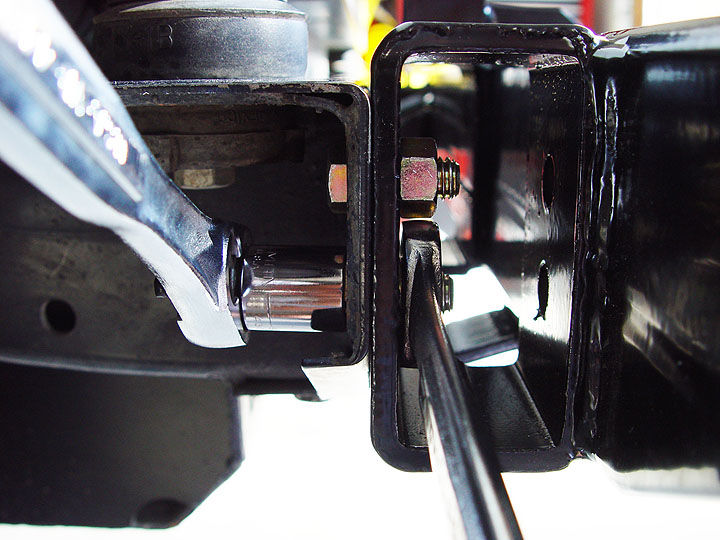
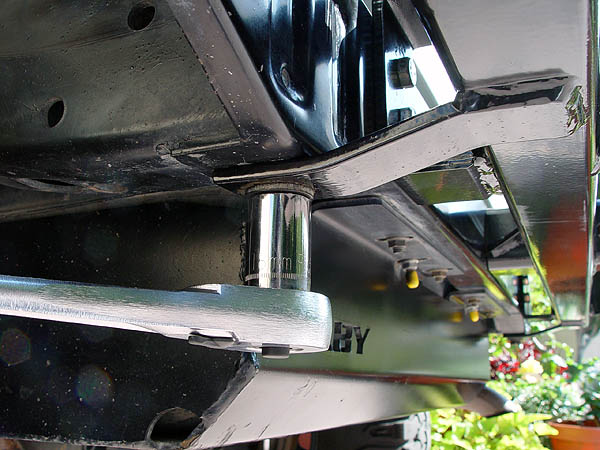
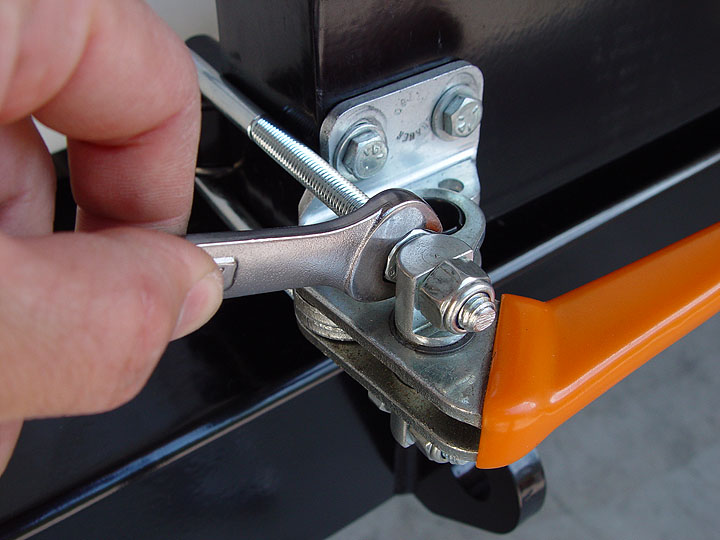
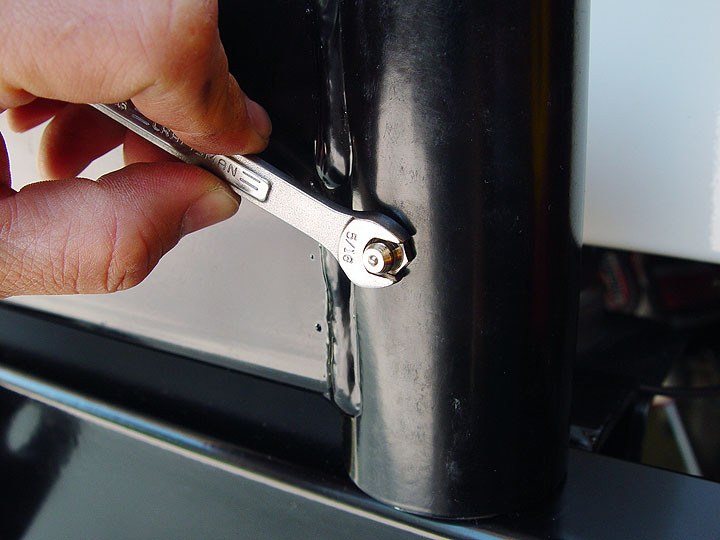
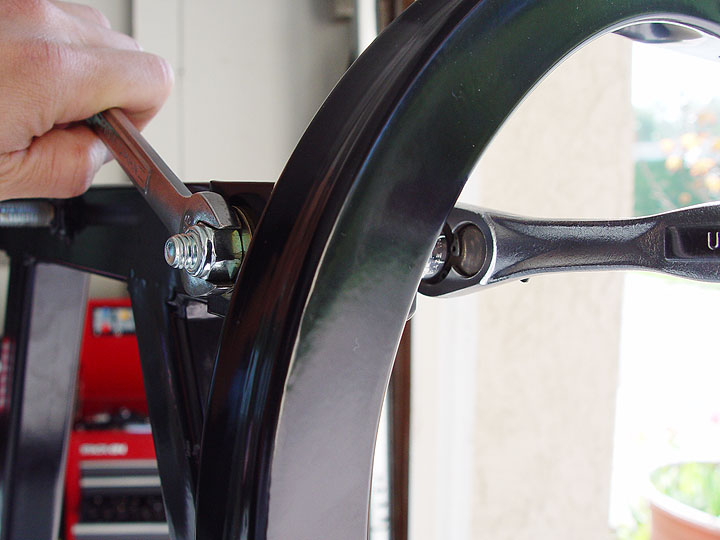
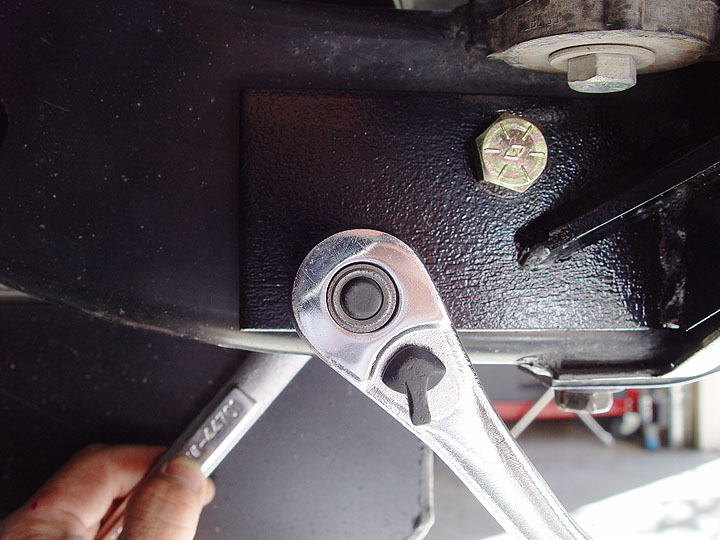
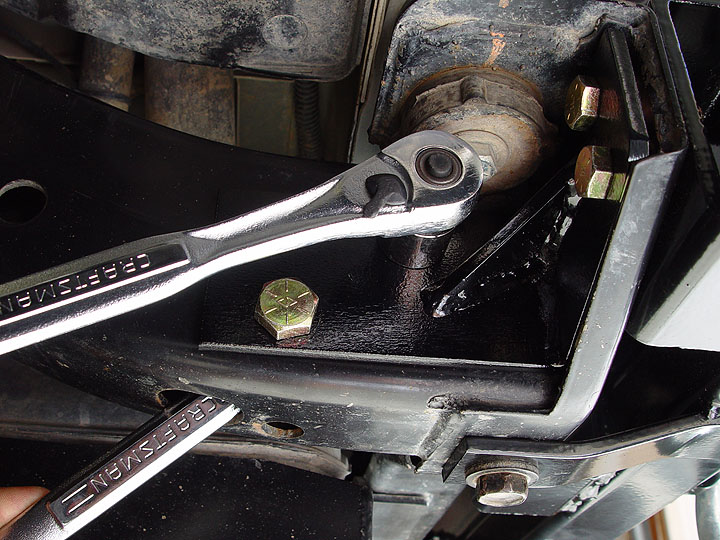
| 8. Using a 5/8" wrench, secure your LoD Xpedition Series Bumper to your Jeep's rear cross member by tightening up all 4 inner mounting bolts. |
9. Using a 5/8" socket and an 11/16" wrench, secure the LoD Xpedition Series Bumper outer mounting brackets to the factory holes on your Jeep's rear cross member using the provided 7/16"x1" bolts and nuts. |
10. Tighten the two bolts under your Jeep's frame rails at this time using an 18mm socket. |
 |
11. Open your tailgate and remove the screw securing the small plastic cover on the hinge side using a phillips screwdriver. Then, disconnect the two wires leads for your Jeep's 3rd brake light by pulling on them firmly one at a time. The wires are just plugged into the contacts so no cutting is necessary. From the outside of your Jeep's tailgate door, carefully pull each connector out one at a time. You may need to pull the rubber grommet out first in order to do this. If you do need to remove the rubber grommet, be sure to replace it once the wires have been extracted. Re-attach the plastic cover onto your tailgate door. |
 |
12. Now, remove the four 13mm bolts attaching your Jeep's 3rd brake light assembly to the factory tire carrier. Set aside your 3rd brake light and proceed to remove the five 13mm bolts securing tire carrier itself to your Jeep's tailgate. |
 |
 |
 |
| 13. Using a phillips head screwdriver, remove the 4 screws securing the lens cover of your Jeep's passenger side tail light housing. Then, remove the lens cover itself |
14. Using a phillips head screwdriver, remove the 3 screws securing the passenger side tail light housing to the body of your Jeep. You can just this dangling from its wiring harness for now. |
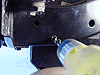
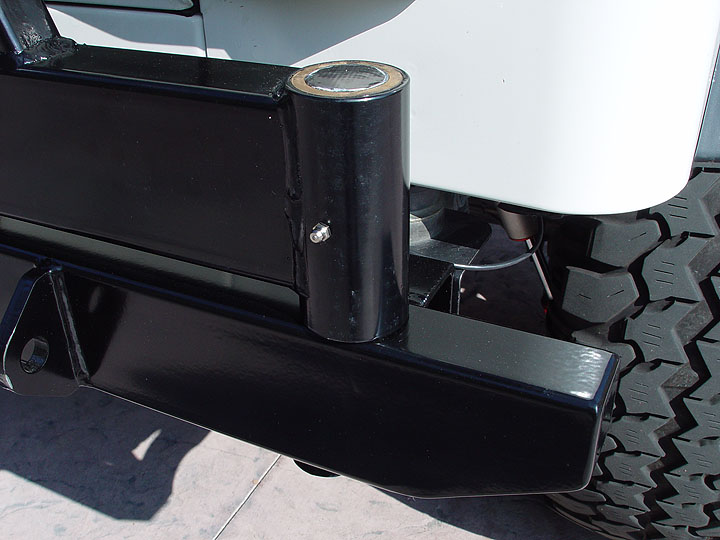
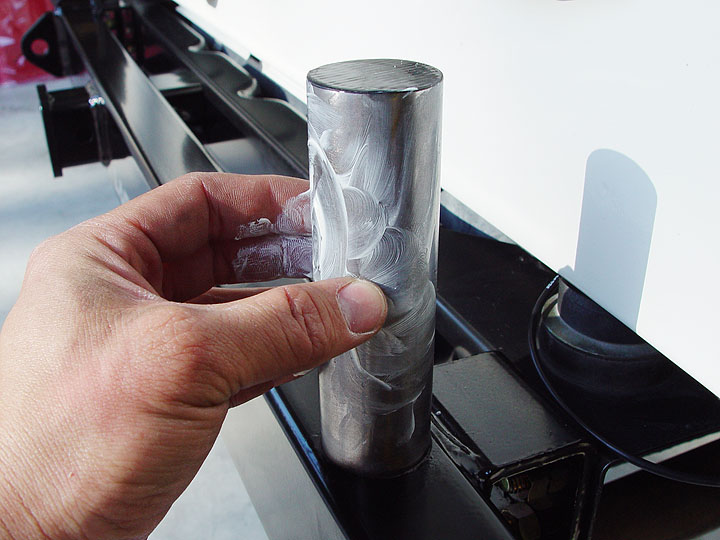
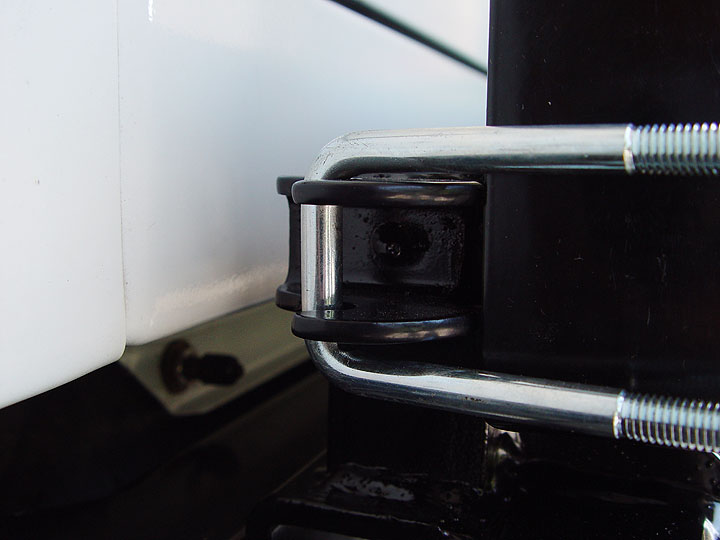
15. Apply some white lithium or gear/bearing grease to the LoD Xpedition Series hinge pin. This will allow the A-frame section of the bumper to go on with ease. |
 |
16. Hold the A-frame and align the hinge bushings over the hinge pin on the LoD Xpedition Series Bumper and carefully slide it on. It should go on pretty easily but if needed, tap it all the way on using a rubber mallet. Re-install your Jeep's passenger side tail light. |
 |
 |
 |
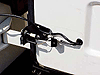
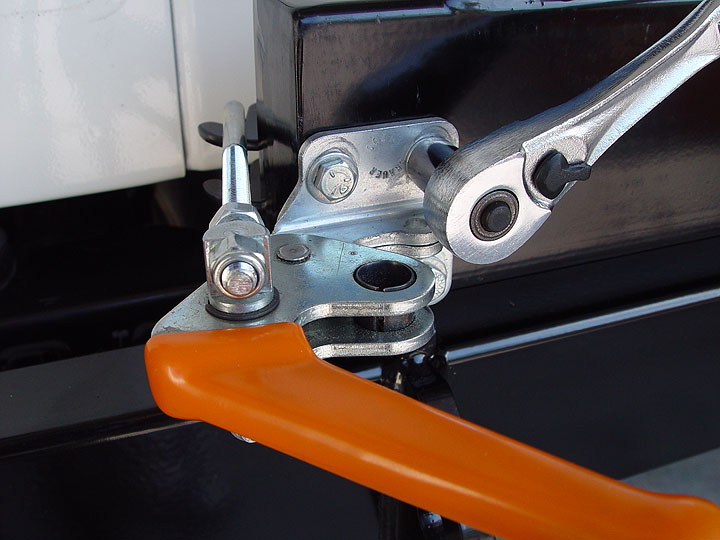
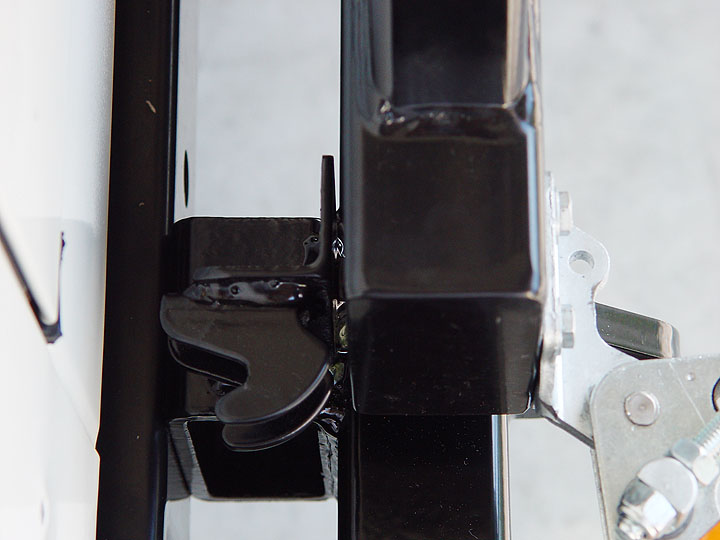
| 17. Attach the LoD Xpedition Series Bumper lever clamp latch to the A-frame using the 4 bolts provided with the latch. A 7/16" socket will be needed to do this. |
18. Make sure the squared U-bolt end of the latch lines up properly with the latch hooks on LoD Xpedition Series Bumper. If needed, loosen the 4 mounting bolts on the A-frame and make the necessary adjustments needed. |
19. Using a 1/2" wrench, adjust the length of the LoD Xpedition Series Bumper latch so that the A-frame sits tight and secure when locked into place. A good tight fit should require some effort to lock. You do not want it to open and close too easily. |
 |
 |
 |
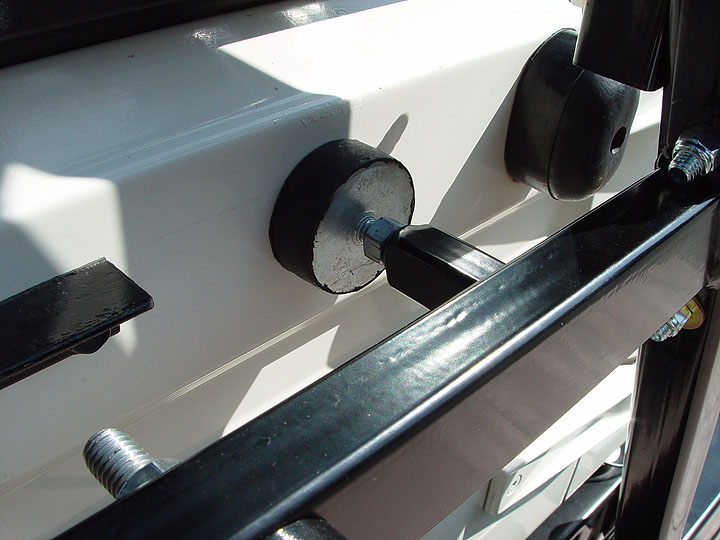
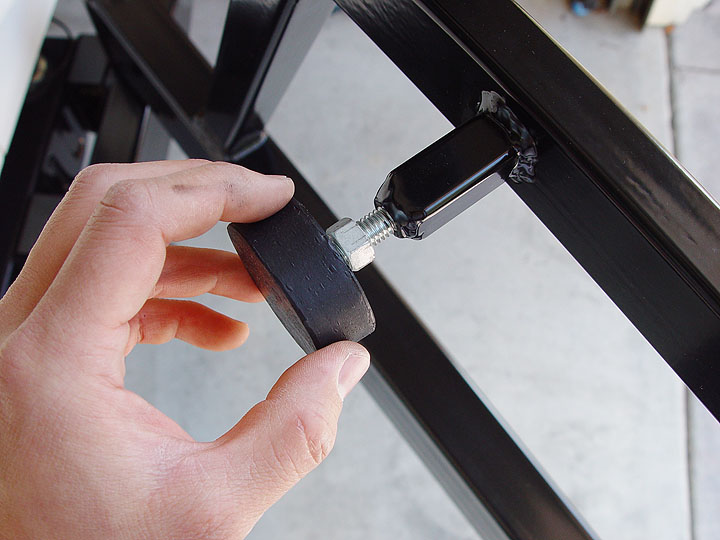
| 20. Thread the LoD Xpedition Series Bumper rubber isolator (or "Snubber") onto the A-frame by hand. |
21. Adjust the length of the Snubber so that when it makes contact with your Jeep's tail gate, there is still about a 1/4"-1/2" gap between the base of the A-frame and the backing plate on the LoD Xpedition Series Bumper. |
22. Secure the LoD Xpedition Series Bumper A-frame Snubber in place by tightening the nut against the post it's threaded onto using a 9/16" wrench. Watching the Snubber, close and latch the A-frame in place. A proper fit should cause the Snubber to squash up against your Jeep's tail gate and create a rattle free fit. |
 |
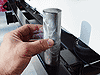
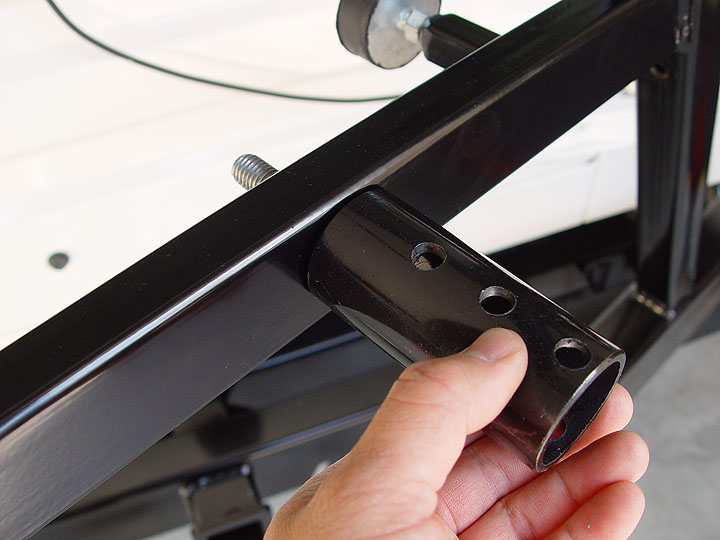
23. Install the spare tire mount tube by inserting the bolt end of it through the cross bar section of the LoD Xpedition Series Bumper A-frame. |
 |
24. Using a 3/4" wrench and the nut provided, secure the LoD Xpedition Series Bumper spare tire mount tube onto the A-frame. |
 |
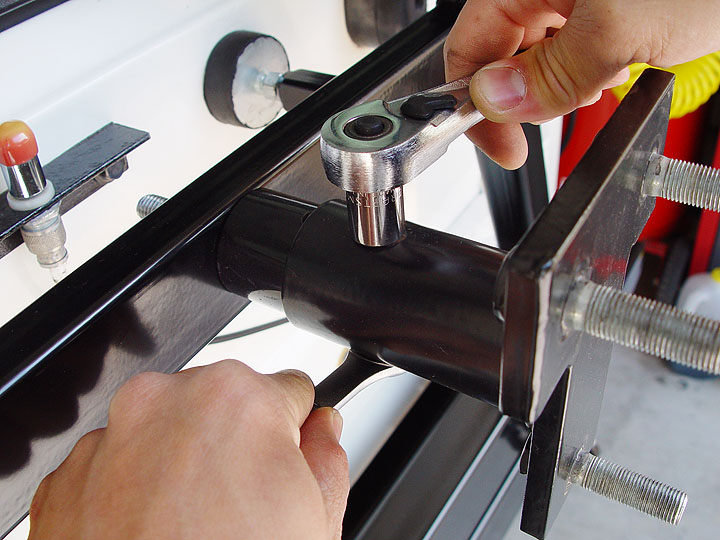
25. The spare tire mounting bracket that comes with the LoD Xpedition Series Bumper Tire Carrier is adjustable to accommodate wheels with different back spacing. Be sure to mount this bracket onto your A-frame so that when all is said and done, the rubber sidewalls of your spare tire presses firmly against it when secured in place with lug nuts. If it doesn't, relocate the mounting bracket back a hole or until a tight fit is achieved. A 1/2" socket and wrench will be needed to fasten the 5/16"x2-1/2" bracket bolt.
IT IS CRITICAL THAT YOUR SPARE TIRE MAKES FULL CONTACT AND PRESSES FIRMLY AGAINST THE A-FRAME. FAILURE TO DO SO WILL VOID YOUR WARRANTY |
 |
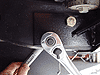
26. Using a 5/16" wrench, install the zerk grease nipple onto the hinge of your LoD Xpedition Series Bumper A-frame. |
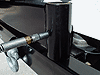 |
27. Attach a grease gun to the zerk nipple and fill up the LoD Xpedition Series Bumper hinge with white lithium or gear/bearing grease until you see a little start to squeeze out between the bushings. |
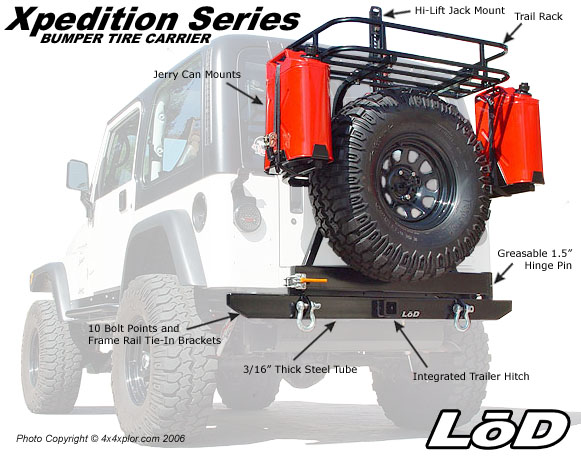
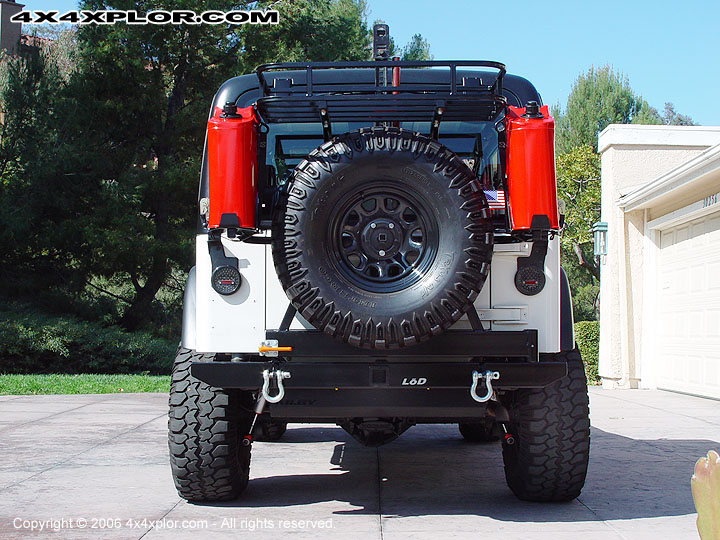
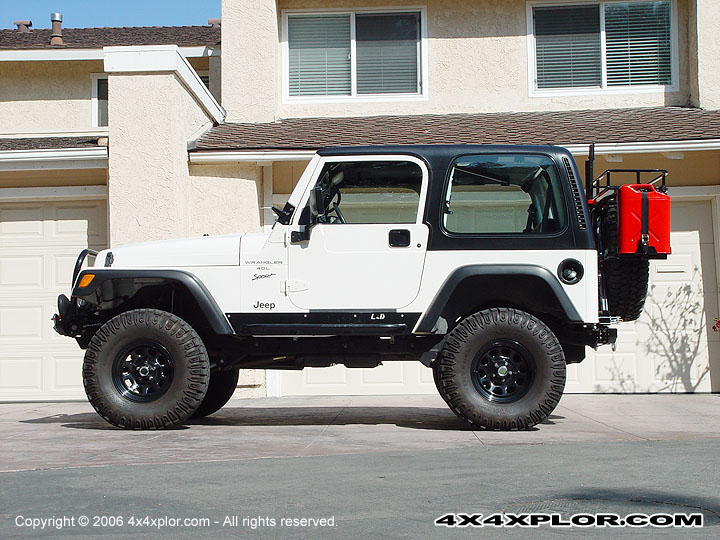
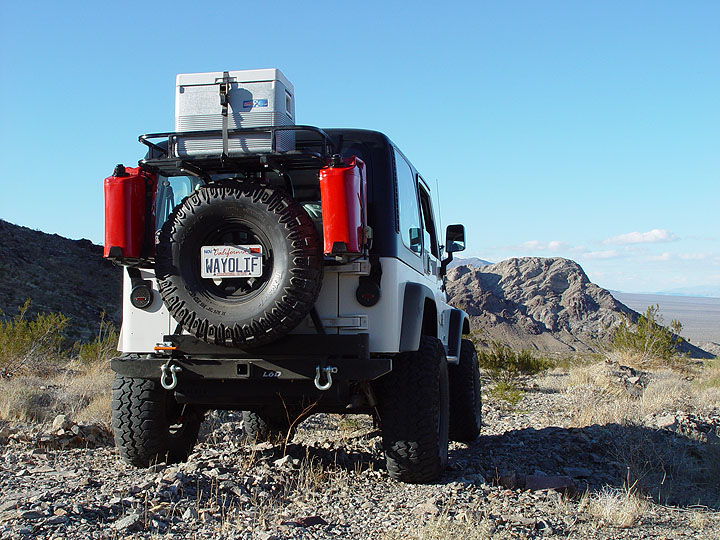
Trail Rack & Jerry Can Mounts
|
 |
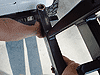
1. Using a 9/16" socket and wrench, secure the driver side trail rack support arm upper tab to the top of the LoD Xpedition Series Bumper A-frame using the 3/8"x2-1/2" bolt and corresponding nut provided. |
 |
2. Using a 9/16" socket and wrench, secure the driver side trail rack support arm lower mount to the middle of the LoD Xpedition Series Bumper A-frame using the 3/8"x3-1/2" bolt and corresponding nut provided. Repeat steps 1-2 on the passenger side. |
 |
3. Place your LoD Xpedition Series Bumper trail rack on top of the support arms so that the rounded corners are facing out. Then secure it in place using the four 3/8"x2" bolts and corresponding nuts provided. |
 |
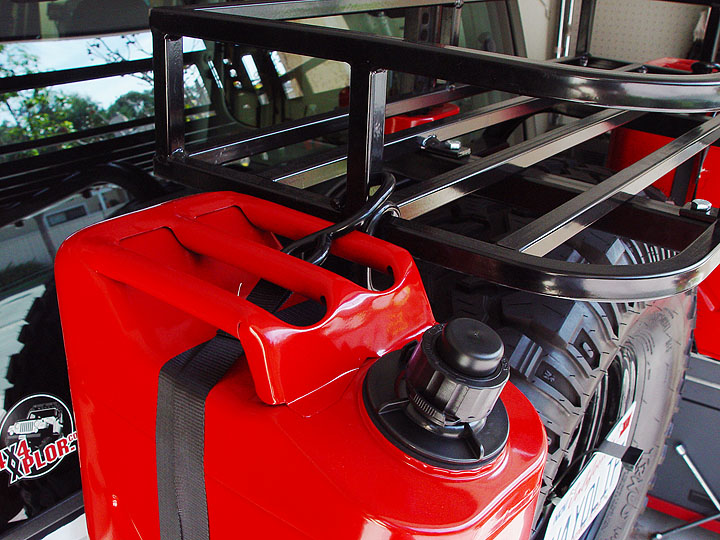
4. Using a 9/16" socket and wrench, attach the driver side Jerry can mount to the LoD Xpedition Series Bumper A-frame using two 3/8"x2-1/2" bolts and corresponding nuts provided. Repeat this step on the passenger side of your Jeep. |
Frame Rail Tie-In Brackets
|
 |
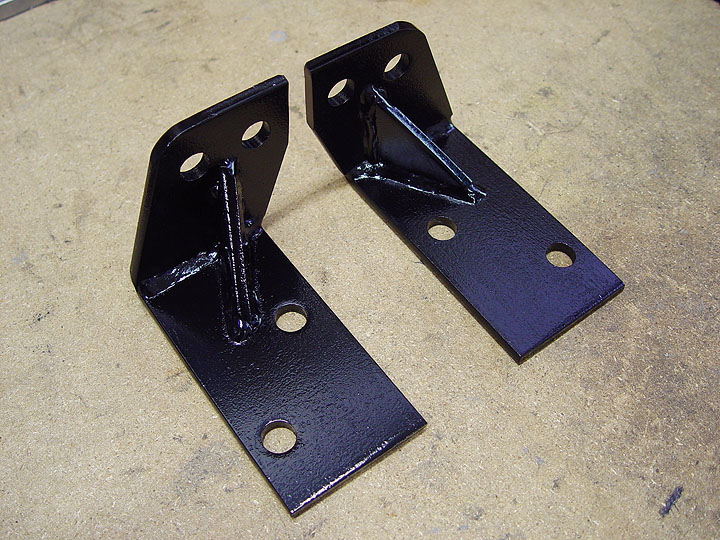
For added strength, LoD offers an optional pair of Heavy Duty Frame Rail Tie-In Brackets that connect your rear bumper directly to the frame rails using the factory holes in your Jeep's rear cross member and frame. |
 |
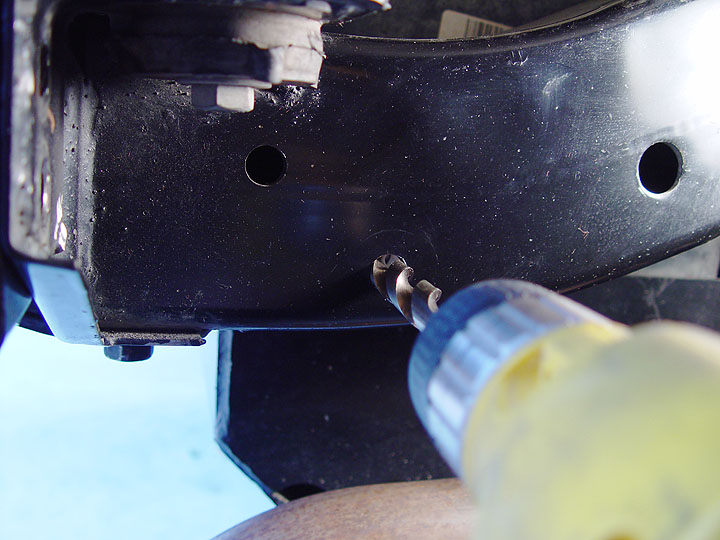
1. LoD recommends you attach the Frame Rail Tie-In Brackets using bolts that go complete ly through your frame. To do this, use the existing holes in your Jeep's frame rails as a guide as you drill through the opposite side of the frame wall using a 1/2" metal drilling bit. Make sure to place a block of wood in between your Jeep's frame rail and the side of your gas tank so that you don't accidentally drill through it. |
 |
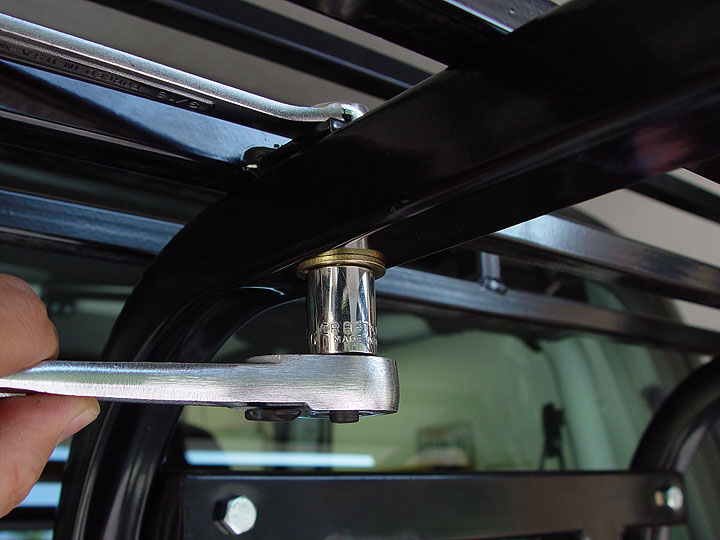
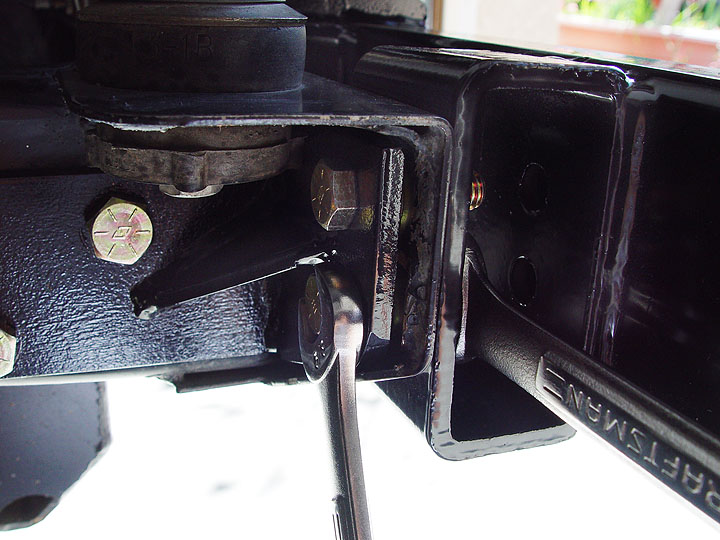
2. Using a 3/4" socket and wrench, secure the LoD Heavy Duty Frame Rail Tie-In Bracket to your frame using the 1/2"x 3-1/2" bolts and nuts provided. |
 |
3. Using a 5/8" and 11/16" wrench, secure the LoD Xpedition Series Bumper outer mounting brackets through your Jeep's rear cross member and onto the Frame Rail Tie-In Brackets using the provided 7/16"x1-1/2" bolts and nuts. |
 |
ALTERNATE MOUNTING INSTRUCTIONS:
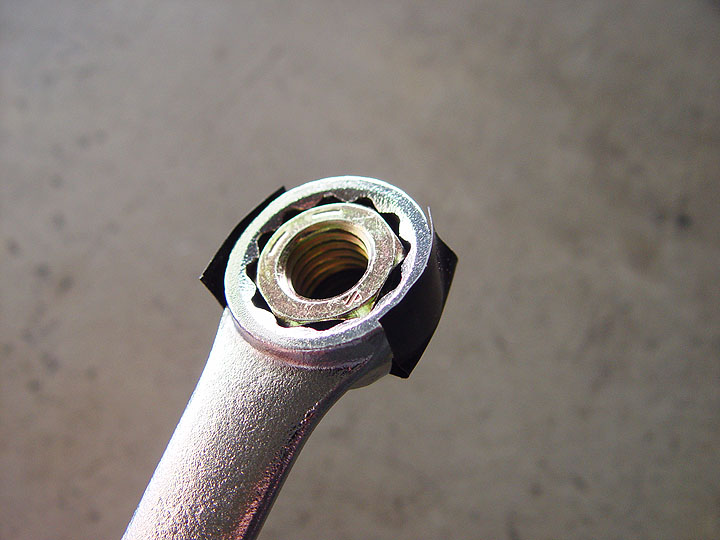
1. If you would rather not drill through your frame rail, simply place a 3/4" nut into the closed end of your wrench and hold it in place with a piece of electrical tape. |
 |
2. Slip the wrench with the nut attached to it up through the large hole in the bottom of your Jeep's frame rail and position it next to the hole in the side of the frame wall. This will allow you to hold the nut in place while you fasten the 1/2"x1" bolt to it. Repeat this step for all the other bolts. |
If you live in a state where a 3rd brake light is required, you will need to buy and/or make an aftermarket light. Here are a couple of links that should help you out:
• Tuna Can LED Write-Up
• ORO PlateLITE & Rock Hard License Plate Bracket
That should be it. Please email me with any questions you might have. Or, if you would like to purchase a LoD Xpedition Series Rear Bumper Tire-Carrier, simply click on the link below:
LOD XPEDITION SERIES JEEP BUMPER/TIRE-CARRIER |


