|
|
Heavy
Duty All Metal 3-Core Radiator
If
you own a Jeep TJ and don't already have a factory radiator that's
leaking, believe me it's only a matter of time until it does. I consider
myself lucky to have gotten about 85,000 miles out of mine, but I
know of guys who's radiators went bust at only 25,000 miles. In every
case, the failure occurs where the plastic top is clamped onto the
main body of the radiator. Over time, this seal works itself loose
and then leaks like a sieve. To top it off, because of this stupid plastic/metal design Jeep decided to use,
the leak cannot be repaired and a replacement will be needed.
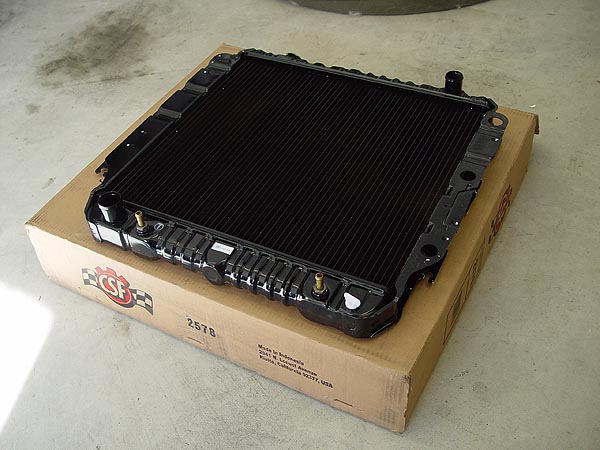
Fortunately for us, a brand new all metal heavy duty 3 core replacement
radiator can be had from Radiator
Barn for only $155 shipped to your door. This of course
is a direct fit replacement, comes with a FREE lifetime warranty and
comes equipped to work on manual and automatic transmissions. Installation
is easy and can be done in about an hour following this simple write-up.
What
You Need
•
CSF Heavy Duty All Metal 3 Core Radiator
• 1 - Gallon Coolant/Anti-Freeze or 2 - Gallons 50/50 Pre-Mix
• 1 - Gallon Distilled Water
• 10mm, 11mm, 1/16" Sockets
• Ratchet
• 3" Ratchet Extension
• Hose Clamp Pliers or Channel Locks
• 2 - 1-3/4" Stainless Steel Hose Clamps
• Large Bucket
• Rags
• 2 - 1 Gallon Milk Jug
Installation
1.
Park your Jeep on a level
surface, pop open your hood and let your engine cool before proceeding
with this install.
2. Carefully inspect your upper and
lower radiator hoses for any signs of crack or damage. If any is found,
go to your auto parts store and pick up replacements before continuing.
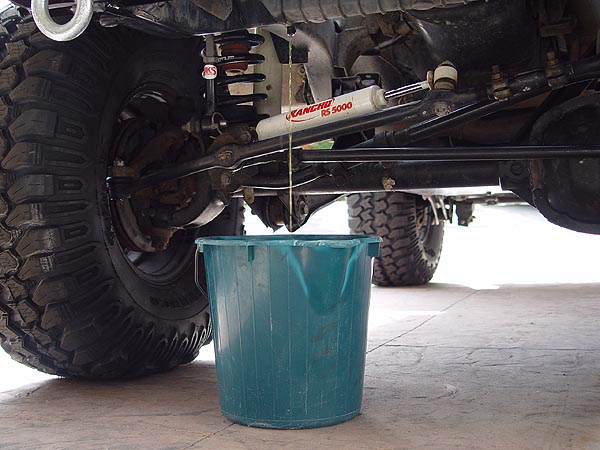
3. Place a large bucket
underneath your radiator drain valve which is located on the passenger
side of your Jeep. Open the drain
valve by twisting the knob by hand. Because you will not be needing
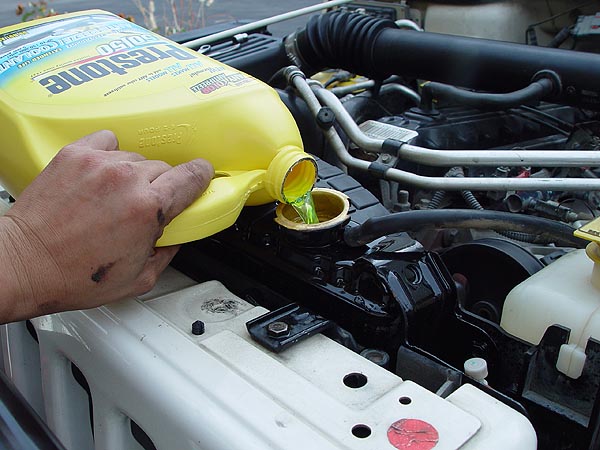
this radiator anymore, open the fill cap to allow the coolant/anti-freeze
to flow more rapidly.
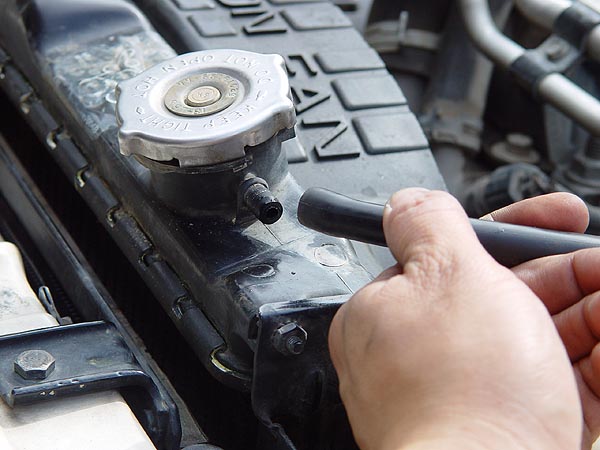
4. While your coolant/anti-freeze
is draining, remove the rubber hose attaching your overflow bottle
to the neck of your radiators fill cap.
5. Remove your Jeep's overflow
bottle from your radiators fan shroud by pushing on the round tab
midway down the bottle and pulling straight up. Place the bottle upright
somewhere it won't get knocked down.
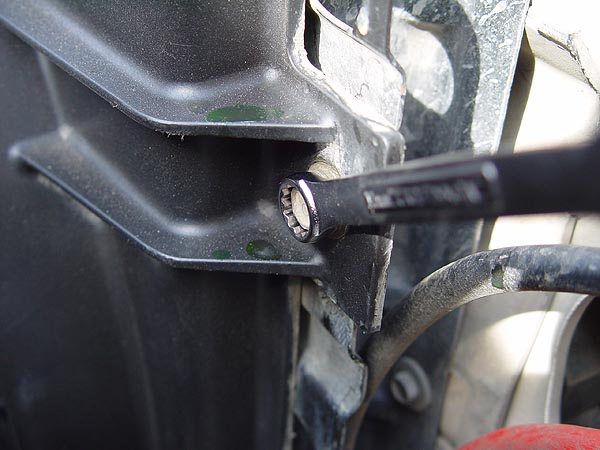
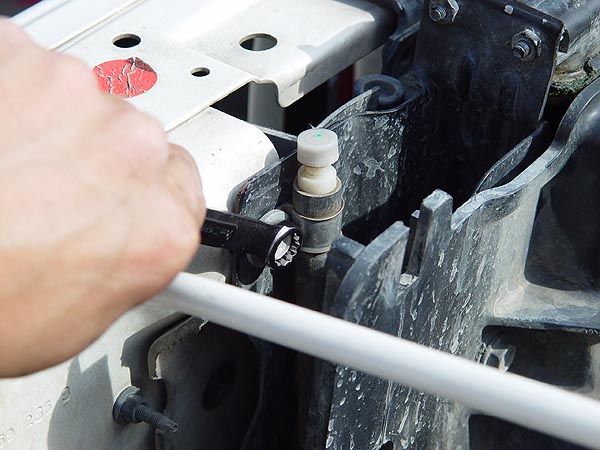
6. Using an 11mm socket
or wrench, remove the 4 bolts that attach your fan shroud to the radiator.
Start with the bottom ones first and then the top. Set your loose
fan shroud back on the fan blades and out of the way.
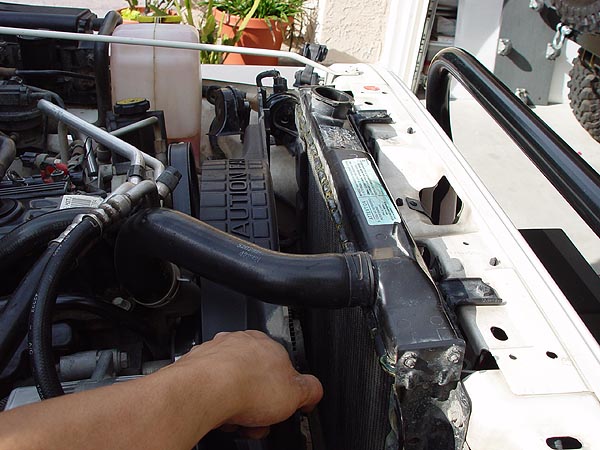
7. Now, using a pair
of hose clamp pliers or large channel locks, remove your upper hose
from your radiator.
8. Again, using hose
clamp pliers or channel locks, remove the lower hose from your radiator.
Some coolant/anti-freeze will most likely leak out here so be sure
to have a rag handy and keep your face out of the drip zone. (NOTE: If you have an automatic, remove the 2 hoses
going to the
automatic cooler at this time)
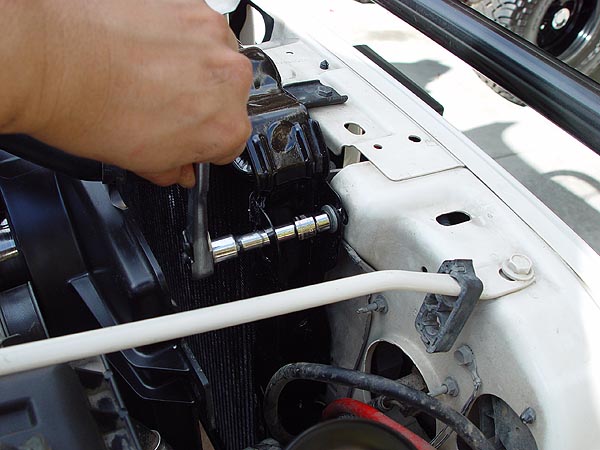
9. Using a 10mm socket
or wrench, proceed to remove the lower and middle bolts attaching
your radiator to the grill. If you are using a ratchet, a 3"
extension really comes in handy here. Remove the upper 2 bolts and
differential breather hose last. Remove your old radiator from your
engine compartment.
10. If you haven't already done so, remove your new
CSF radiator from it's box and then carefully slide it into place being
extra careful not to damage any of the fins by bumping into something.
11. Attach your differential breather hose as well
as the upper 2 radiator bolt to your grill. Then, proceed to attach
the other 4 bolts securing your new radiator in place.
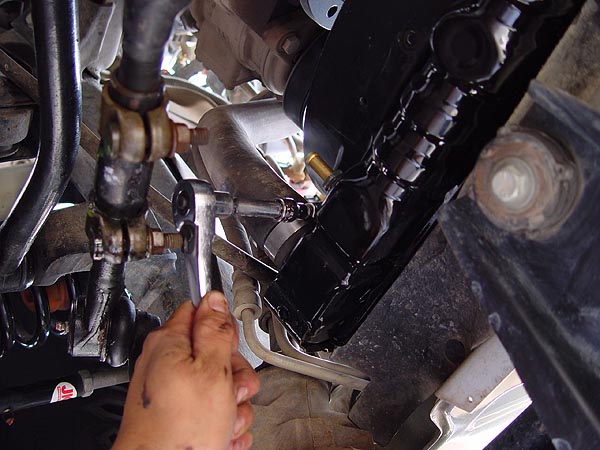
12. Climb under your Jeep and attach the lower hose
to your new radiator. I don't like the factory hose clamps so I replace
mine with standard stainless steel 1-3/4" screw on clamps. A
5/16" socket will make the task of fastening your clamp much
easier.
NOTE: If your hose was
in need of replacing, do it at this time.
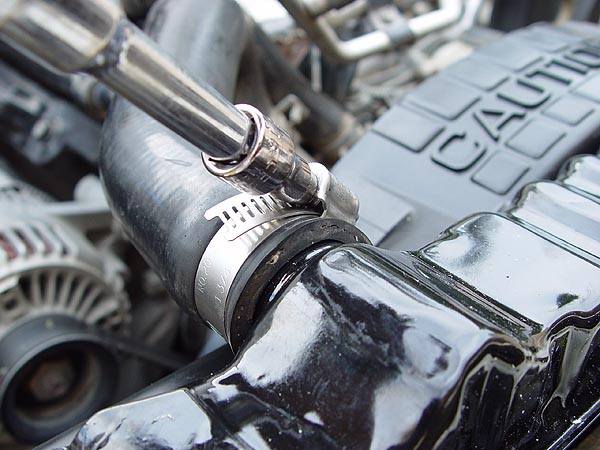
13. Now, get back up under your hood and attach the
upper hose to your new CSF radiator just like you did on the lower hose.
Again, I recommend replacing your factory hose clamps with a standard
stainless steel screw on type.
14. Re-attach your fan shroud to your new CSF radiator using
the 4 factory bolts you removed earlier
15. Slide your radiator overflow bottle back onto
the fan shroud and make sure it snaps into place. Attach the rubber
overflow bottle hose to the neck of the radiator fill cap.
16. Fill your radiator up with a 50/50 mix of coolant/anti-freeze.
If you are doing your own mixing, make sure to use distilled water.
Once your radiator is full, make sure to fill your overflow bottle
to the "Full" mark and cap both.
17 - Automatic Transmission Only: Hook up your transmission
cooler hoses to the two nipples located on the base of your new CSF radiator.
18. Start your engine and let it warm up to operating
temperature (210° F). Check for leaks and make adjustments as
needed. Turn off your engine, let it cool again and add more coolant/anti-freeze
to your overflow bottle as needed.
19. Pour your coolant/anti-freeze into 1-gallon milk
jugs and take them into your local auto parts store for recycling.
That should be it. Your Jeep now has a good solid all metal radiator
that should last a long, long time. Please let me know if you have
any other questions.
|
|
|