|
|
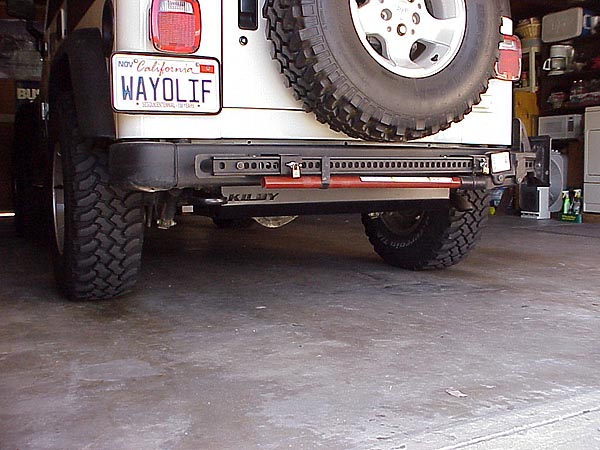
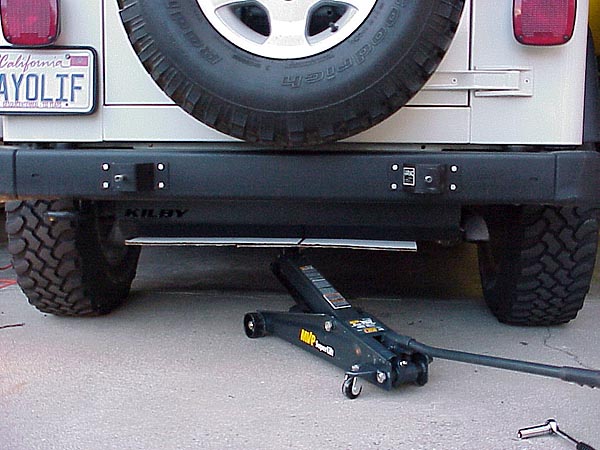
Kilby
Jeep Gastank Skidplate
When
you think of the word beefy, a Kilby Gastank Skidplate should come
to mind because this thing is it! If you are like me, you've wheeled
your Jeep over one too many obstacles that you probably shouldn't
have and smacked the crap out of the piece of tin-foil holding your
tank.... Not good! Well, the Kilby skid is the solution and should
be one of the first mods you do to your rig. No point having an awesome
lift and big tires if you're stranded on a trail with a ruptured gas
tank. Above and beyond the great protection this skid offers (believe
me, I've tested it too), the design of it will also give you a bonus
1" of ground clearance too! This skid can be purchased directly
from Kilby Enterprises,
costs only $225 and is easy to install. This is a must have for your
Jeep.
What
You Will Need
•
Deep well and short 1/2" sockets
• 12" long Ratchet Extension
• Ratchet
• Phillips and Flathead screwdrivers
• Floor Jack
• Hammer
• Shop rags
• Wire Cutters
• A Friend
Installation
1.
Drive your Jeep around until you have virtually no gas left in the
tank. Every gallon left in is a significant amount of sloshing weight
you don't want to deal with.
2. Park your Jeep on a level surface.
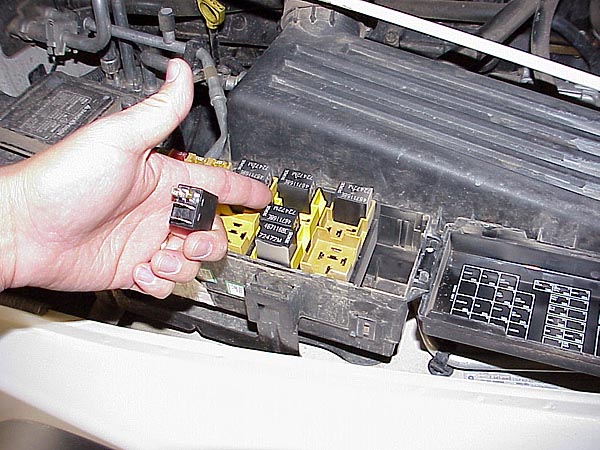
3. You will need to release the pressure in your
fuel system. To do this, remove your fuel cap and then pull your fuel
pump relay from the PDC as shown in the pic to the left. Start and
run your engine until it stalls. Attempt to restart your engine until
it will no longer run. Turn off your ignition and then disconnect
the negative battery cable.
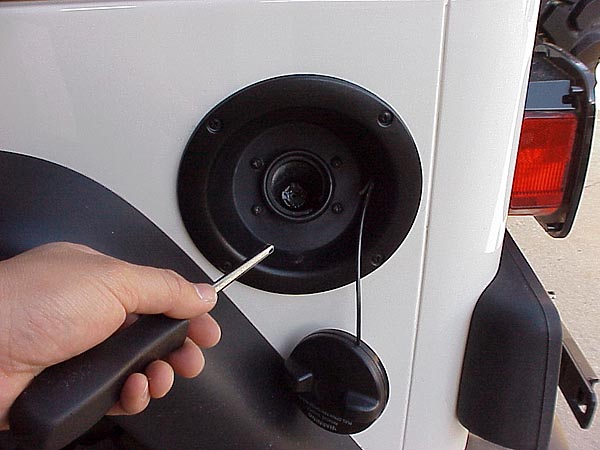
4. Remove your gas cap and the bezel attaching it
to the tub. There are 8 screws holding this in place.
5. Put the gas cap back on to keep crap out of the
tank.
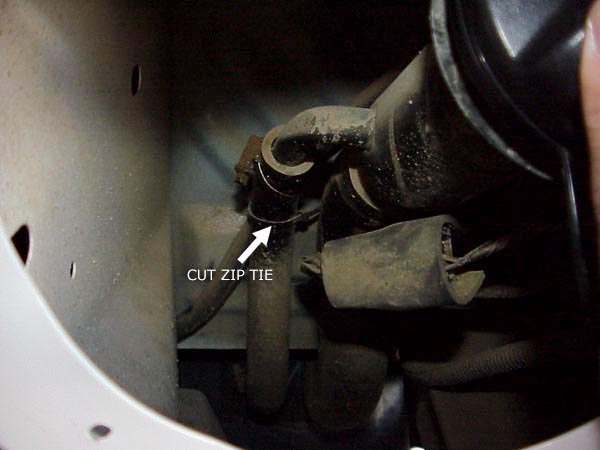
6. Push the filler hose out of the way the best you
can, locate and then cut the zip-tie holding the axle vent tube to
the filler hose.
7. The directions that came with my skid notes the
removal of "the ground strap attached to the top of the drivers
side shock mount. You can access this between the frame and the body."
My 2000 TJ did not have any such strap and so I ignored this step.
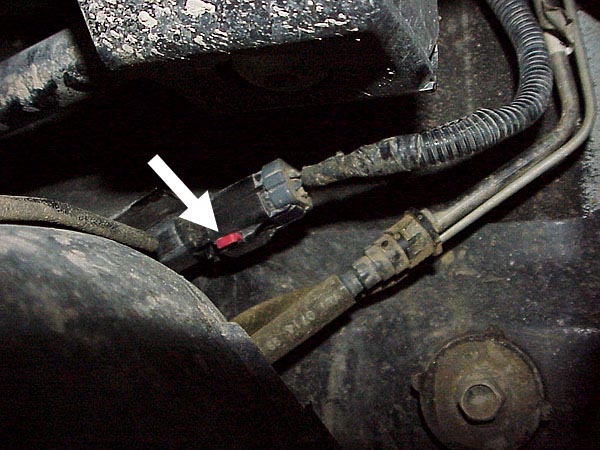
8. Climb underneath your Jeep on the driverside and
then locate the electrical connector at the front left corner of the
gas tank (see pic on the left). Now disconnect it by sliding the red
clip to the side then separate the two connectors.
9. Just below the electrical connector is the EVAP
hose. Disconnect it by twisting and pulling carefully on it. Pay special
care not to bend the steel tube.
10. The next step requires
you to disconnect the high pressure line. Make sure you are not directly
under the connection when you disconnect this line.
11. Using your fingers and pinching the two
plastic tabs together, disconnect the high pressure line by separating
the connection. The plastic tabs can be easily damaged or broken so
no matter how much of a pain it is to do, DO
NOT tools to do this part of the job.
12. Now, slide your floor jack under the center of
your factory skidplate and crank it up until it touches the surface
of the skid but not lift your Jeep up into the air. This is done to
support the weight of the tank.
13. Remove the 3 nuts attaching the factory skidplate
underneath your tub and then the 4 rear nuts that holding it to the
rear cross member. Do not remove the 2 strap nuts at this time.
14. With the help of a friend, slowly lower your
tank assembly while guiding the filler hoses around the frame. (NOTE: On 1997 model TJ's there should be a ground strap that is attached to the driverside frame rail which will need to be disconnected at this time.)
15. Before you start swapping everything out, do
yourself a favor and do a trial fit first. With your new Kilby skidplate
empty, lift it up into into place and check the fit. Some TJ owners
may have to bend the front stand-alone mount toward the rear of the
Jeep to allow the stud to line up correctly. If an adjustment is necessary,
use a hammer to slightly bend the mount approx. 1/4"-1/2".
Be sure to do another test fit.
16. Remove the 2 nuts holding the tank straps in
place using a 1/2" socket. Make a note of the placement of the
fuel lines and disconnect the drivers side vent hose that is connected
to the roll-over valve. Now, lift up the two straps being careful
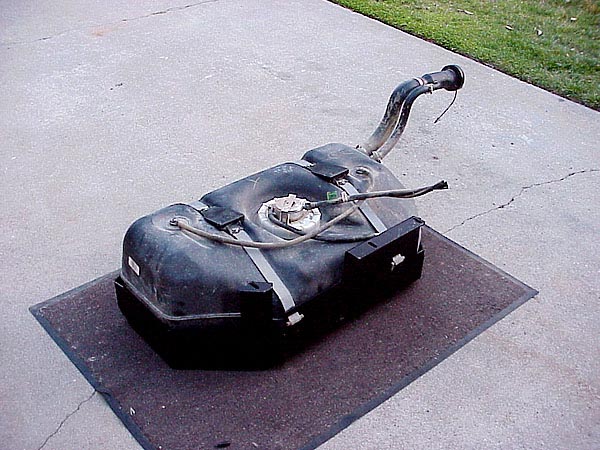
not to bend them and then pull the gas tank out of the factory skid
plate.
17. Slip the two straps into the Kilby skid holding
them straight up and then place the gas tank into the skid. Insert
the strap studs into the holes and then tighten the nuts. Make sure
you DO NOT over tighten these nuts! Due to the new
shape of your skid plate, you will not have to thread the nuts as
far up the stud as the factory skid setup was. Only tighten them just
enough to secure the tank and to keep it from moving. Re-attach the
vent hose for the roll-over valve.
18. Raise the Kilby skid with gas tank in it into
your Jeep while guiding the filler hoses between the frame and body.
When you get close to the top, tilt the skid backward to allow the
front mount to clear the track bar and then lift it a bit higher.
Once the front mount is clear, reposition the skid and continue to
lift. Be careful that you don't pinch the 2 hoses or connector while
lifting it.
19. Loosely thread on the 7 skid plate nuts and then
slide the Kilby skid as far back as you'd like. You will need to torque
the 7 nuts to 141 inch lbs.
20. Remove your floor jack. Re-connect the high
pressure hose by sliding the 2 fittings together until a click is
heard. Then, re-connect the EVAP hose and electrical connector. Make
sure you slide the red clip into place.
21. Zip tie your axle vent hose back on to the filler
hose.
22. Reinstall the fuel filler bezel and then reconnect
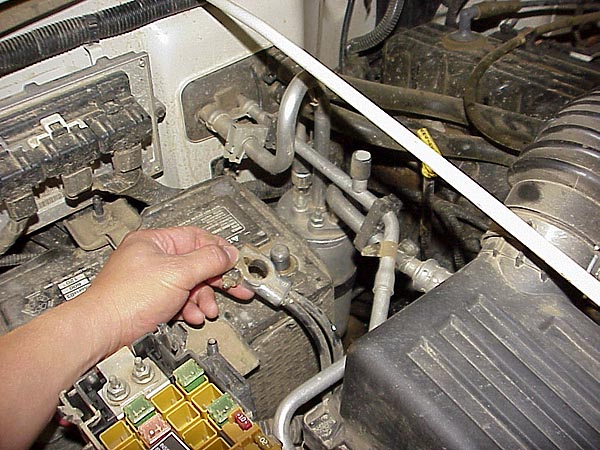
your batteries negative lead.
23. Start up your engine and check for any fuel leaks.
That should be it! Please let me know if you have any questions. |
| |
|
|