|
|
Kargo
Master Congo Cage
& Bushman Steel Jeep Roof Rack
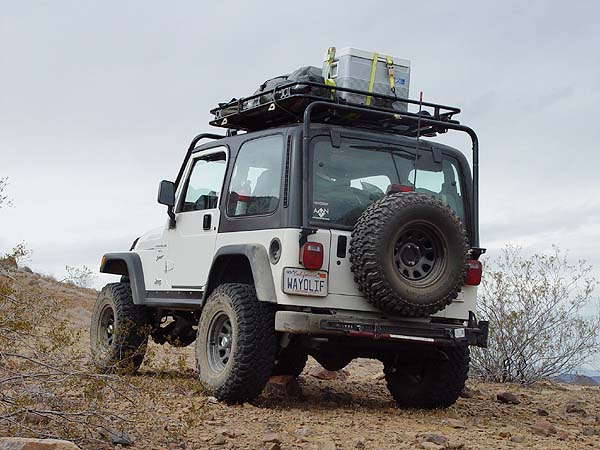
If
you enjoy exploring the great out door like my family does, the space
available in a Jeep gets quickly filled up. The solution, get a roof-rack!
For months I had debated over which rack to get and seriously considered
the Top-5 and Garvin setup but ultimately went with Kargo Master.
Why you ask? Well, in a nutshell it was the best built rack I had
seen in person and I felt it was one of the most reasonably priced
rack at $564 delivered to my door from Quadratec (Price purchased in 02/02). This rack is amazingly stout, capable
of safely carrying 500 lbs., it is easy to assemble, has a great powder
coat finish and can easily be tilted back for top removal. It also
has two cross-member mounting positions, one high for soft-tops and
a lower setting for hard-tops or no top. In all, I am extremely happy
with this purchase and would highly recommend it to anyone interested.
What
You Need
•
Ratchet & Basic Socket Set (up to 3/4")
• Basic Wrench Set (up to 3/4")
• Torx Bit Set
• Allen Wrench Set
• Hand Drill
• 5/16" Cobalt or Titanium Drill Bit
• Center Punch
• Flat File
• Touch-up Paint
Installation
1.
Remove any top you have on your Jeep.
2. Open up the boxes,
layout all the parts and separate all the bolts, washers, etc.
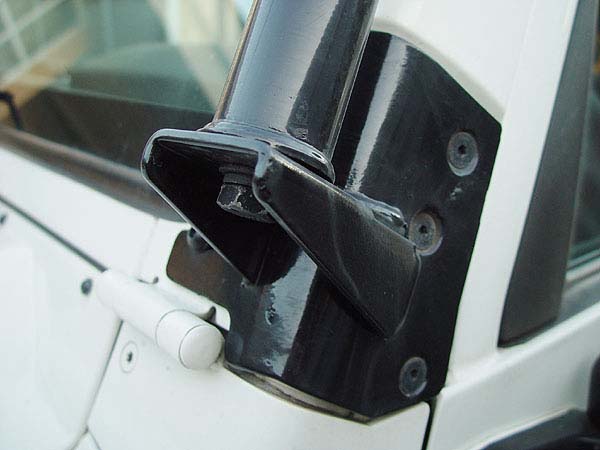
3. Working on one side
at a time, remove the windshield hinge plate torx bolts and then attach
the Front Leg Mount Plates over it using the new allen bolts supplied
with the kit. Take note that the Allen bolt used for the front of
the plate is a button head with lock washer.
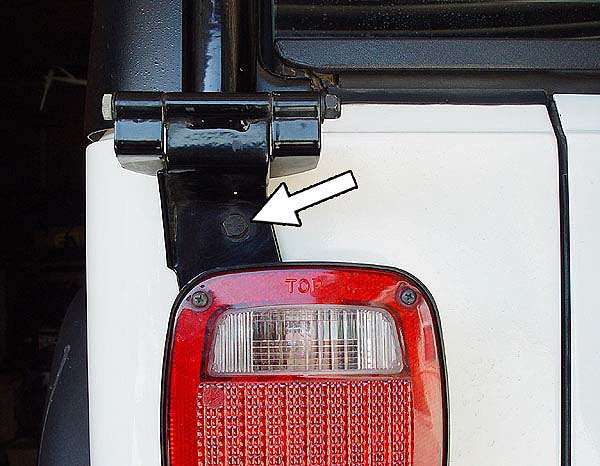
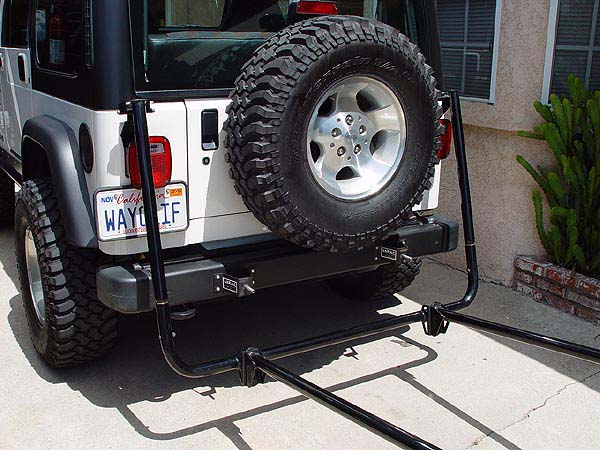
4. Remove the tail lights
and then loosely attach the Rear Leg Mounting Plates so that you can
mark off where you need to drill the upper support hole.
5. Using a center punch, lightly tap the marks
you made on your tub with a hammer and then drill a hole using a 5/16"
Colbat or Titanium drill bit. To help prevent any corrosion, I applied
some touch-up paint to the edges of the hole I drilled before proceeding.
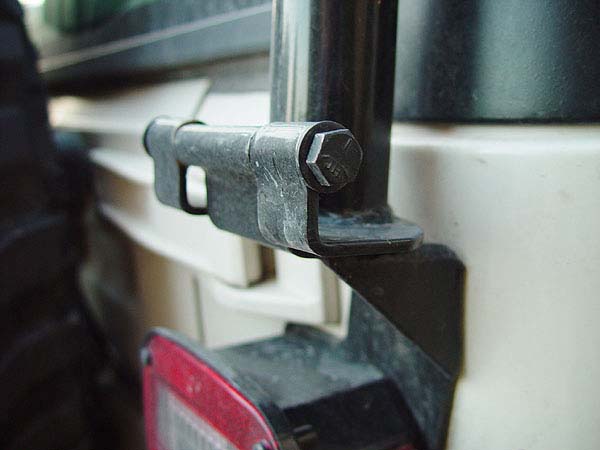
6. Attach the Rear Leg
Mounting Plates with the bolt, flat washer and nyloc nut supplied.
Then attach the tail lights on top of the mount plates and subsequently
the tub using the supplied thread cutting screws, lock washers and
flat washers. DO NOT RE-USE the factory screws.
7. Now to start on the
cage. Assemble the Front 'U' Bar (wider one of the two supplied) to
the Front Legs and then loosly attach it to the Front Mounting Plates
using the hardware supplied. Your kit should come with some Teflon
Lube and this should be applied to the tappered ends of the Front
Legs while assembling.
8. Assemble the Rear
'U' Bar to the Rear Legs using the Teflon Lube again and the hardware
supplied. It's difficult to tell but there is a right and a left leg
so double check to make sure you are assembling things correctly.
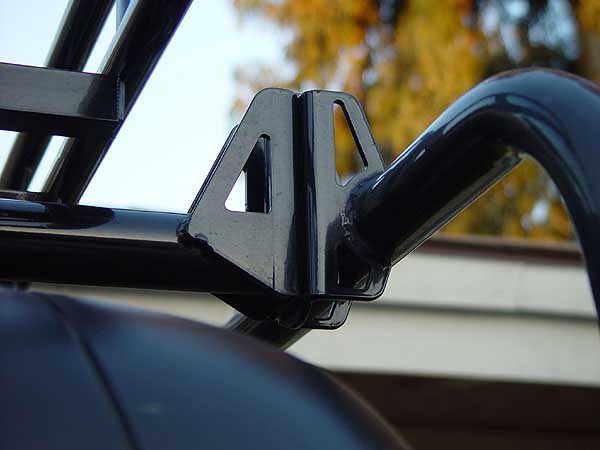
9.
Place the assembled rear section of the cage on top of the
Rear Mounting Plates. The Powder Coating on my cage was pretty thick
and this prevented the hinges from sliding together. To fix this,
I used a Flat File to remove some of the excess Powder Coating until
things came together. Now bolt the rear hinges using the hardware
supplied.
10. Attach the Top Cross
Tubes to the U-Bar Brackets using the hardware supplied. If you have
a hardtop or no top, Install these in the LOW position and in the
HIGH position if you have a softop. This can be done by yourself but
an extra set of hands really makes this part a little easier to do.
11. Go around and make
sure all your bolts are on nice and tight. This cage should not rattle
at all when driving around town or on the trail. If it does, you most
likely need to crank down the bolts securing the U-Bars to the Legs
more.
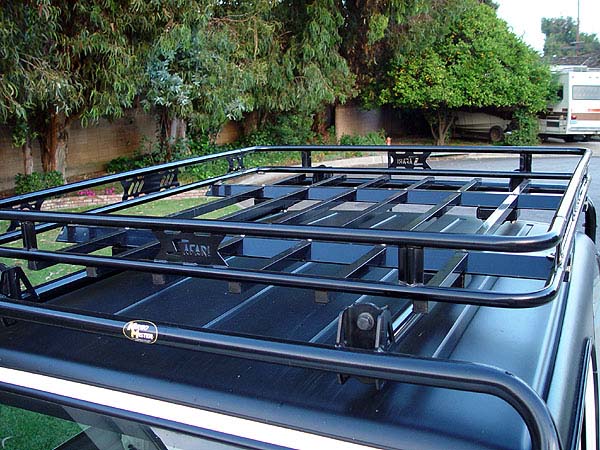
Basket Installation
1.
If you bought yourself a 52"x60" Bushman Steel
Rack like I did, this part of the installation will take you the longest
to do. To start, open up your boxes and lay everything out. There
are a lot of nuts and bolts and separating this out will really speed
things along.
2. Take the side Basket
Tubes, apply some Teflon Lube to the tappered ends and assemble using
the hardware supplied. Set this aside for now.
3. Lay the Cross Members
on the ground making sure the slopped ends are both facing the same
direction and then insert the Floor Tubes through them.
4. Align the the holes on the
Cross Members with the ones on the Floor Tubes and fasten them with
the button head bolts supplied.
5. Insert the Plastic
Tube Ends and then lightly tap with a hammer until they are firmly
against the edge of the tube.
6. Place the assembled
Basket Tubes on top of the Floor Tubes and attach it to the Cross
Members using the carriage bolts supplied.
7. Now, attach the Cross
Tube Mounting Plates to the Clamp Plates inside the Basket Cross Members.
This is kind of a PITA to do so be patient and take your time.
8. Unless you are strong,
get some help and place your assembled basket on top of the Congo
Cage Cross Tubes and fasten it using the Mounting Clamp Straps.
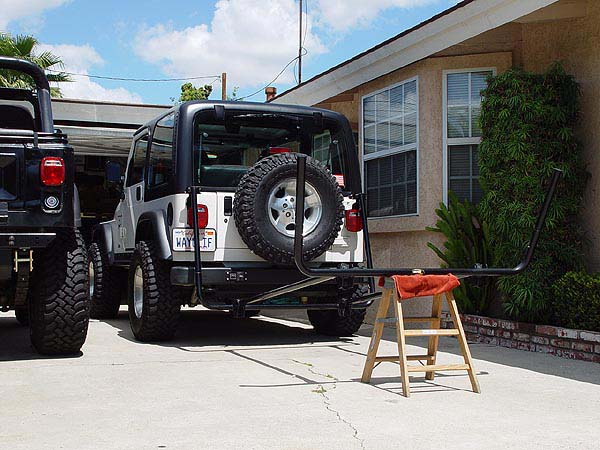
Tilting
Back for Hardtop Removal
I don't have a softtop for my TJ so I don't know if you can lower
the top without tilting back the cage. However, I can tell you that
tilting back the cage is super easy and can be done in minutes by
yourself.
1. Using a 3/4"
Socket, remove the two front bolts secuing the cage to the Front Mounting
Plates.
2. From the back, grab
the cage and tilt back. To protect the powder coating on the cage,
I use a step stool with a towel on it to rest it on. Total time to
do, 5mins top.
That should be it! This rack was purchased from Quadratec
and it took about a week to get. If you have any questions, please
feel free to contact me by e-mail
|
|
|