|
|
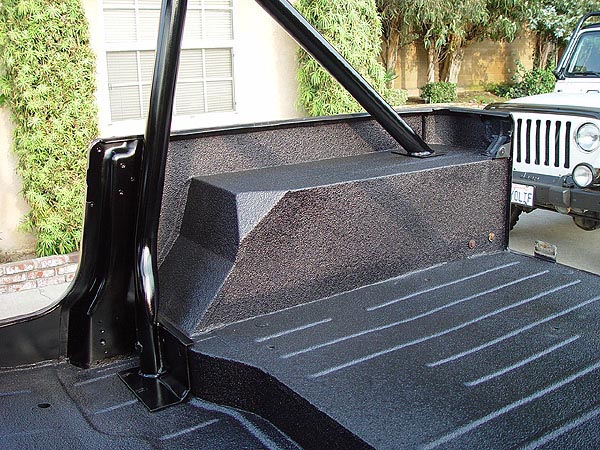
Herculining
The Tub of Your Jeep
Well
this has got to be one of the best mods I've done to my CJ. Unlike
installing something useful like a new transmission mount or something
like that, Herculining your tub will make your Jeep look like new
(at least on the inside anyway) which is always a good thing especially
when you're trying to show off :) In truth, there are a lot of beneficial
reasons to do this to your Jeep. First and foremost, it will give
you a reason to fix all the rust on your floor boards and provide
it with a tough grippy finish. It will also help dampen road noise,
absorb heat from underneath the tub, can be hosed off and is a great
(make that better) alternative to carpeting.
What
You Will Need
•
1 gallon Herculiner Kit
• Xylene
• Scotch Brite Pads
• 2" Blue Masking Tape
• Roll of Plastic Tarp
• Drill Paint Mixer
• Disposable Painters Coveralls
• Chemical Resistant Gloves
• Respirator with Chemical Inhibitors
• Undercoating Gun
• Standard Tools & Torx Bits
Installation
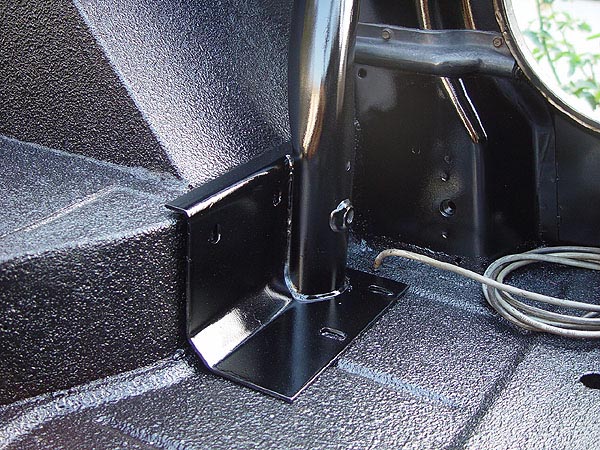
1.
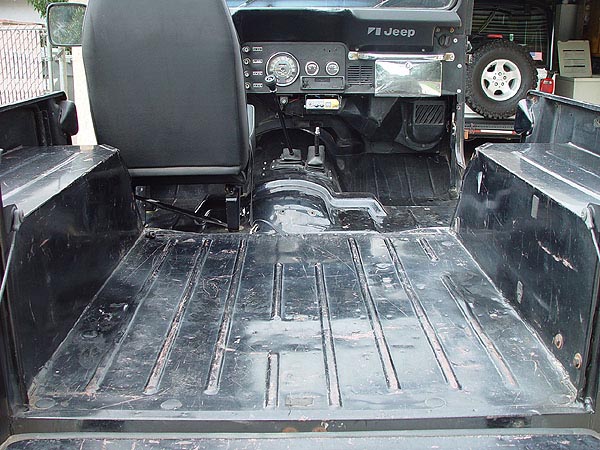
Remove everything in your tub that you don't want permanently covered
in Herculiner. This should include your seats, seat belts and roll
bar. At least that's what I did.
2. Vacuume and wash
the inside of your tub using soap and water. Be sure to dry all surfaces
before continuing. I also took this time to fix some rust that I found
underneath the rollbar plates buy grinding it out and then treating
the infected area with some POR15.
3. Using Scotch Brite
pads, thoroughly scourer all painted surfaces that you intended to
Herculine. You don't need to scourer until you see metal but just
make sure the paint is no longer shiney. Wipe off all the dust with
a tack cloth.
4. Wearing your gloves
and respirator, rub Xylene on all the surfaces to be Herculined (Xylene
is some serious toxic stuff so be sure to do this in a well ventilated
area). Let dry and then with a clean dry cloth, wipe off any residue
left behind. Your painted surfaces should now look pretty dull.
5. Now for the fun and
longest part of the job. Mask everything off and plug all hole that
will need bolts going through them again. For this, I just took small
wads of masking tape and screwed them in by hand. Be sure to also
wrap your shifters, brake, clutch and gas pedals.
6. To prevent overspray
getting all over your Jeep, be sure to wrap all surfaces not to be
Herculined from bumper to bumper. I also removed my tailgate and tranny
cover at this time.
8. With everything masked
off, covered and ready to go, put on your coveralls and open the can
of Herculiner. Now this kit will come with a paint can opener but
as you will soon find out, the thing is completely uselsess. This
thing is a real PITA to open and I wound up using a flat head screwdriver
and a heck of a lot of effort.
9. Once open, mix the
Herculiner using a drill mixer until all the particles are free from
the bottom and dispersed throughout the can.
10. I decided to spray
my tub as opposed to rolling it and would highly recommend it to anyone
thinking about doing this job. The finish will be consistent, level
and look professional. Having said that, without thinning the Herculiner,
I poured some into a sports bottle (my undercoating gun did not come
with a bottle), set the compressor to 40psi and proceeded to spray
my tub. Lay down a light even coat about 10-12 inches from the surface
being sprayed. Be sure not to go too heavy as the Herculiner will
just puddle up, take forever to dry and ultimately give you a smooth
texture as opposed to a grippy surface.
11. Depending on temperature
and humidity, wait about 20min-1 hour or until the Herculiner is tacky
(more dry than wet) before laying down a second coat. Repeat this
process and lay down a third coat. When all is said and done, I still
had about a quart left in the can.
12. Wait a minimum of
12 hours before you take apart all the masking and re-assemble your
Jeep. That's it!
Herculiner
Revisited -
1 Year Later
I have had a lot
of people ask me how my Herculiner has held up over time and whether
or not I would still recommend it. Well, it has been just about a
year since I applied it to the tub of my CJ and here is what I can
tell you.
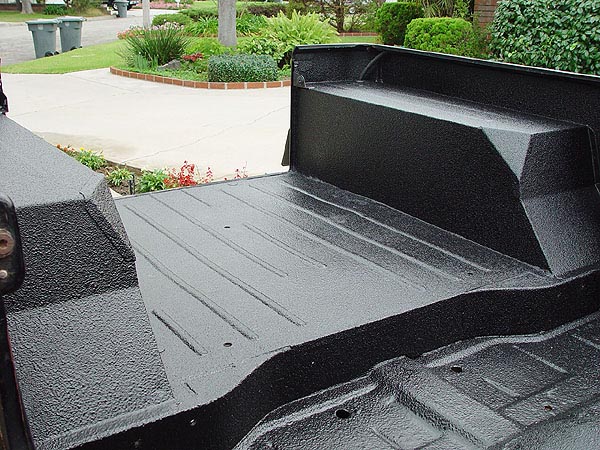
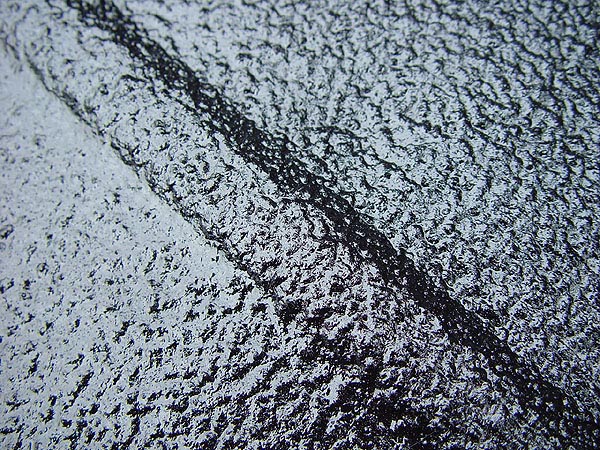
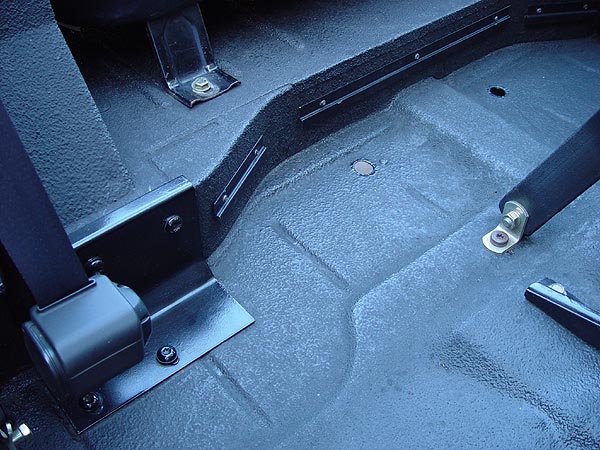
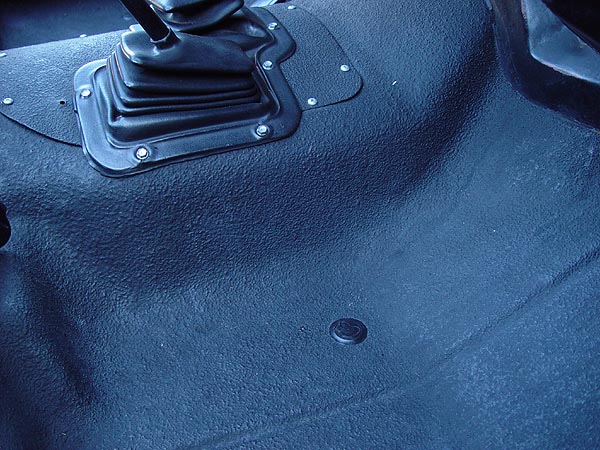
Unless you spray on some kind of UV protectant, the shinny black color
of your Herculiner will fade to a dull gray especially if you ride
topless as much as I do. This dulling and gray color does not bother
me as it is at least uniform and has not effected the durability of
the surface.
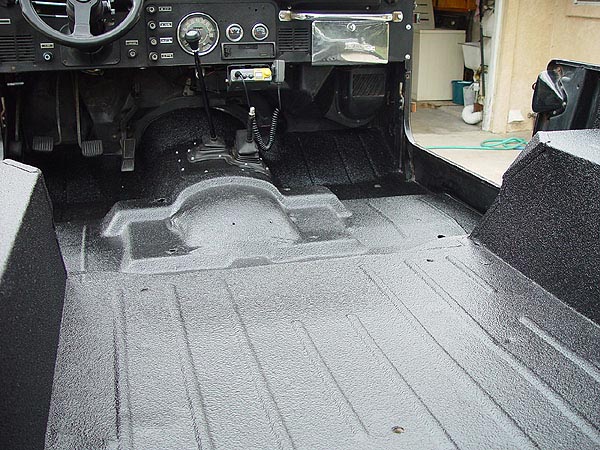
Another question I have been asked a lot is how difficult is it to
clean Herculiner? Well, considering that all you need to do is pull
the drain plugs in your tub and hose it out, I don't think it's too
hard at all. Using a spray nozzle with a force full stream, you can
really do a good job getting the crap out.
So, would I still recommend this mod? Of course! Click on the pics
to the left to see what my tub looks like after a year of use and
being in the sun. |
|
|