|
|
What
You will Need
• Performance
Friction Brakes-0477.20
• ProStop Brake Rotors-5396G
• 1/2" Socket
• Standard Ratchet
• Torque Wrench
• Large C-Clamp
• Piece of Scrap Metal
• Floor Jack
• Jack Stands (optional)
• Carburetor Cleaner
• Brake Cleaner
• Brake Caliper Lube
• DOT3 Brake Fluid
• Brake Bleeder Kit (nylon hose & jar)
• Brake Bleeding Wrench
• Rags
• Zip Ties
Where to Buy
I bought my Performance Friction Brake Pads from my local Autozone .
I also chose to get the carbon metallic pads and they cost me about
$40 for the set.
As far as rotors go, I originally bought a set of Raybestos from
Kragen but while I was installing them realized that they measured
3-3/16" which are too deep for a Jeep TJ. Needless to say,
I took them back and because they did not have the correct 3-1/16"
size in stock, I went to my local PepBoys and got a set of ProStop
rotors instead. Oh, did I mention that the ProStop's were about
$40 cheaper too!!
|
|
|
|
Jeep
TJ Front Disc Brake Pads
& Rotor Replacement
When it's time
to service your Jeep's front disc brakes, do yourself a favor and
do it yourself. This is an extremely easy maintenance job that anyone
can do and the money you save can be forwarded to fun stuff!
With over 100,000 miles on my Jeep's odometer, this is the second
time I've had to change out my brake pads and the first time to replace
my rotors. In the past few thousand miles before servicing my brakes,
I had noticed a pulsating sensation when braking which usually means
one or both rotors are warped. Instead of trying to have them turned
(can be done at Autozone for cheap), I decided it was just a good
time to replace them with a new set.
For a set of Performance Friction brake pads and new ProStop rotors,
my total out of pocket cost was just a little over $100. This could
be done for less but I figure this is my Jeep and a few extra dollars
will only do good :)
Installation
 |
Here's a pic of the new Performance Friction Brake Pads. Yes,
these brake pads are a bit pricey but let me tell you that it's
not just because of their fancy packaging. These are my second
set and they really do a great job of stopping my Jeep. |
 |
1. To begin this maintenance project, park
your Jeep on a level surface, engage your emergency brake, loosen
the lug nuts on the passenger side front wheel, lift up your
Jeep from the axle (close to the lower control arm mount) with
a floor jack and then completely remove your wheel and set it
aside.
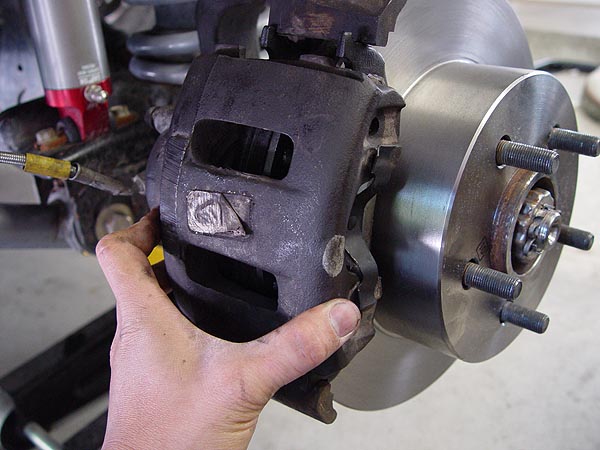
2. Next, remove the 2 bolts securing your disc
brake caliper using a 1/2" socket. Then, grabbing the top
of the caliper, pull it away and completely off the rotor. For
now, go ahead and set the caliper on top of your lower control
arm and zip tie it on so that it doesn't accidentally fall and
break something. |
|
3. If
this is the first time removing your rotor for service or replacement,
you will need to first remove a couple of retaining clips securing
it in place. These clips are attached to the wheel studs, look
like brass washers and will require a small flathead screwdriver
and/or needle nose pliers to remove. Once off, you can throw
them away as the will not be reused.
4 . With
the retaining clips removed, your rotor should come off the
axle with little effort. If your rotor does not come off easily,
tap the outside edges all around with a hammer while working
it free with your other hand. |
 |
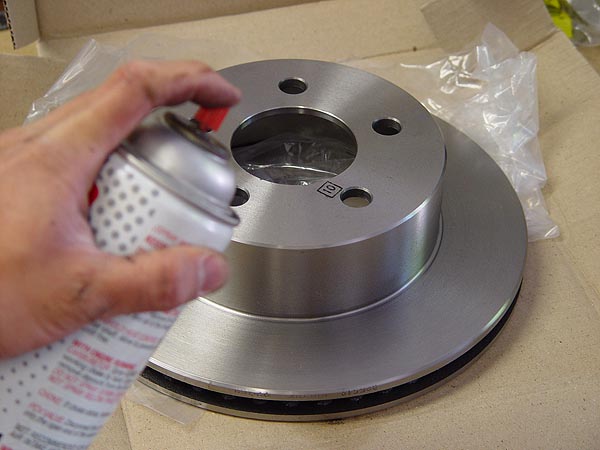
5. Back at your work bench, remove your new
Brake Rotors from their box and then clean off the protective
film on them using carburetor cleaner. Just spray them down
and then wipe them up with a clean rag or paper towels. Make
sure to clean both sides. |
 |
6. With your new brake rotors all cleaned
up, you can now install one onto your axle. The fit will most
likely be a bit loose right now but it's nothing to be concerned
about. Once your wheels are back on, they will be mounted on
nice and tight. |
|
7. Back to your brake caliper, remove the
old brake pad from the caliper piston by pushing it out towards
the opposite pad. This brake pad is held in place by a couple
of clips and it will simply snap out with a little effort. |
 |
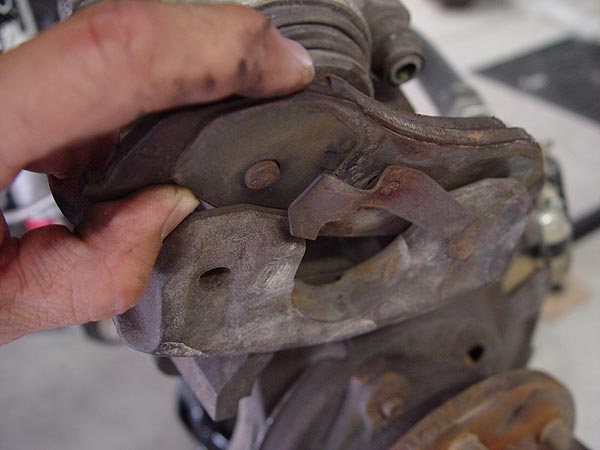
8. To remove the outside break pad, you will
need to pry it away and lift it up from the caliper one side
at a time as shown in the pic to the left. You should be able
to do this with your hands but if it's on there good, you can
use a flat head screwdriver to help pry it off. |
|
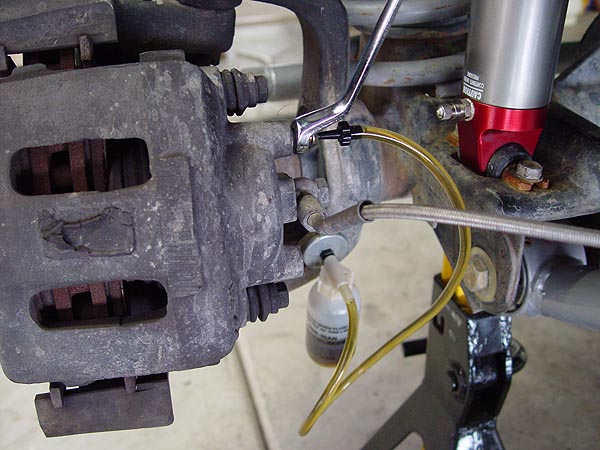
9. Before you proceed any further, you will
need to bleed off some of your brake fluid. To do this, attach
a brake bleeder wrench to the driver side bleeder valve and
then connect your brake bleeding kit to it. If you do not have
a brake bleeder kit, you can affix a nylon hose to the valve
itself and then pop the opposite end in to a small jar. Pop
open your hood, crack open the bleeder valve and proceed to
pump your brake pedal until your brake fluid level reaches the
"low" mark. Be sure to check your master cylinder
level often as you do not want to let it run dry. Once enough
fluid has been bled off, close the bleeder valve. Click below
to see my complete
Brake Bleeding Write-Up |
|
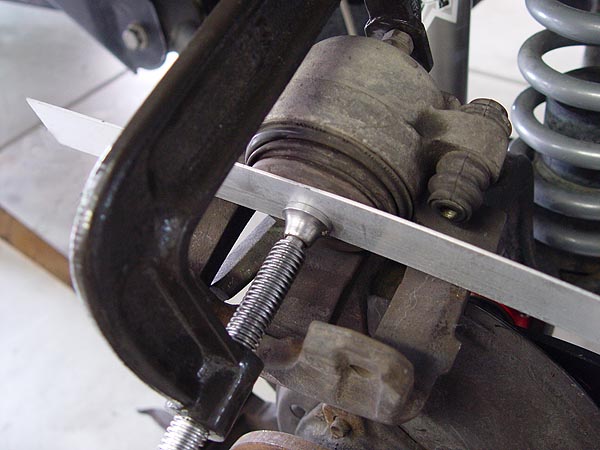
10. Now, place a piece
of scrap metal over your brake caliper piston and then place
a large C-clamp over it and the back side of the caliper as
shown in the pic to the left. Slowly compress the C-clamp so
that the caliper piston is forced all the way back inside. If
you take a look at your master cylinder now, it should be back
at about full. |
 |
11.
Clean up your break caliper by liberally spraying it down with
a can of brake cleaner. This will make quite a mess so you might
want to place some newspaper below to prevent staining the ground.
Wipe up the rest of the black mess with a rag. |

|
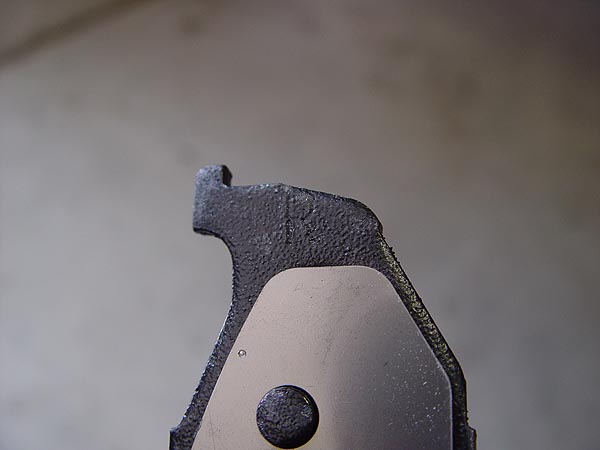
12.
If you look carefully at your new Performance Friction brake
pads, you will see that 2 of them have been stamped with the
letter "R" on them indicating they need to go on the
right side of your Jeep.
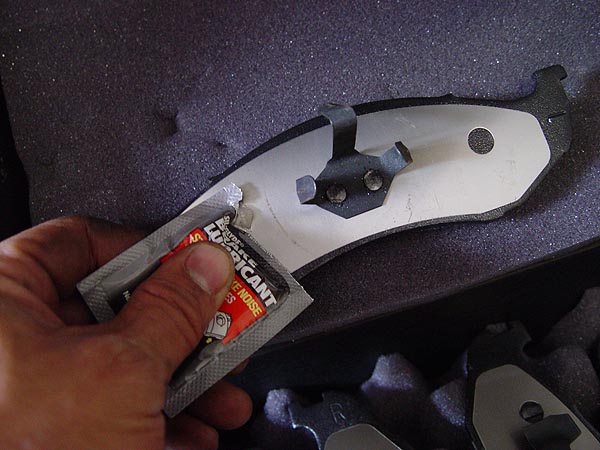
13. Apply a thin coat of squeal stop or brake
lube to the entire back side of your new Performance Friction
brake pads. You'll also want to apply some lube on all the points
of the pad that will make contact on the caliper but make sure
not to get any on the pad side itself. Believe me, you'll want
to do this step as it works wonders on keeping your brakes nice
and quite. |
 |
14. If you look at the base of your brake
caliper, you should notice that the brake pads are notched.
Use these notches to guide your break caliper back onto the
rotor. Also, make sure that the rubber caliper bolt boots are
in the recessed position or else they will get in the way during
installation. |
 |
14.
Now, apply a generous amount of brake lube to the caliper bolts
and then fasten your caliper in place. These bolts only need
to be tightened to 11 ft. lbs. of torque so make sure not to
over do it.
15. Re-attach your wheel, lower your Jeep back
onto the ground and then tighten your lug nuts to 95 ft. lbs.
of torque. |
| |
16. Repeat steps 1-15 on the driver side
of your Jeep and don't forget to bleed your brakes again before
compressing your brake caliper piston. |
| |
17. Time to break in your new Performance
Friction brake pads. To do this, you will need to drive your
Jeep about 30-40 mph and then slam on the brakes in the attempt
to stop quickly. You will need to do this about 10 times in
a row and then let your brakes cool off for about 5-10 minutes.
Repeat this process another 10 times and then you're done. Throughout
this process, you should notice your braking performance go
from virtually non-responsive to amazing. Depending on where
you do this, you will also get a lot of people looking at you
funny and hold their nose :-)
That's it. Please let me know if you have any questions. |
|
|
|