|
|
|
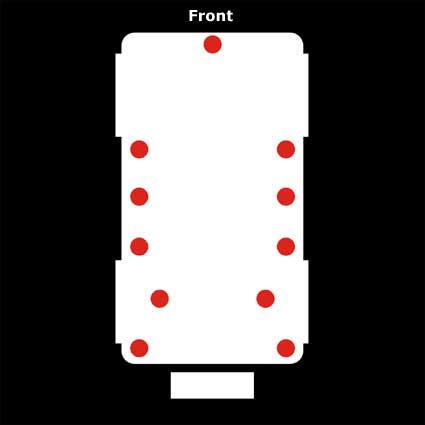
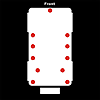
Here
is a diagram of where all your body mounts are located. |
 |
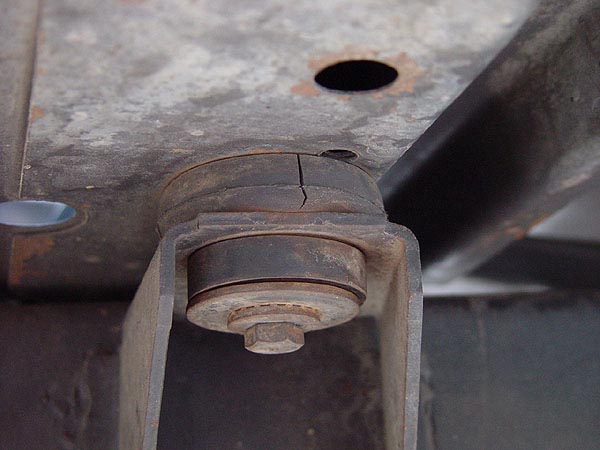
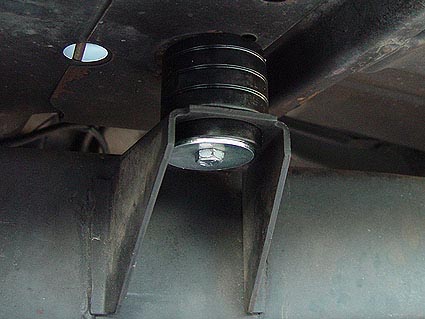
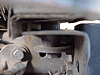
| This
is a pic of one of the existing and best condition factory rubber
mounts on my CJ. |
 |
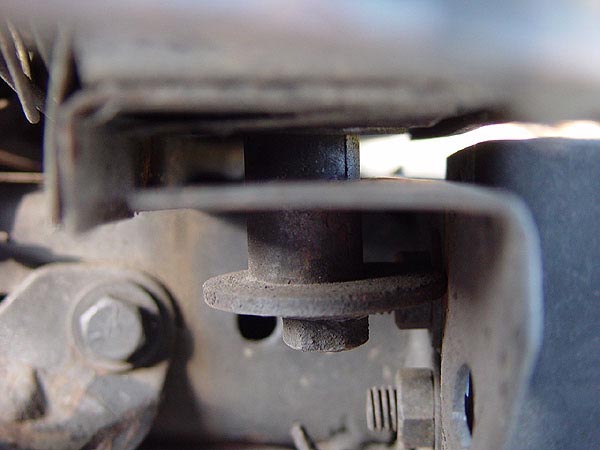
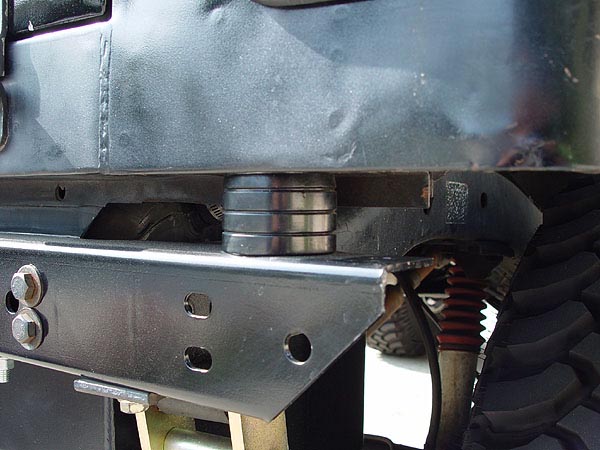
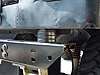
| Here
you can see the body mount that attaches to the rear crossmember
on the driver side is completely gone. |
 |
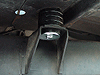
| Pic
of the new BL from the rear passenger side corner. |
 |
| Pic
of the new BL along side of the tub. |
 |
|
Daystar
1" Body Lift
(1976-1986 Jeep CJ7)
By
the time this old CJ made it into my hands, the factory rubber body
mounts were all rotten, cracked, falling apart or worse.... non-existant!!
Driving it around, the entire tub would bounce and clang with every
bump I hit, large or small. Needless to say, all of them needed to
be replaced and I decided now was as good a time as any to give my
Jeep a 1" body lift while I was at it. That's why I decided to
get a Daystar 1" kit as the polyurethane mounts they provide
completely replace the existing factory mounts.
What
You Will Need
•
Daystar 1" Body Lift Kit
• Hi-Lift Jack or bottle Jack with concrete blocks
• 2x4 piece of wood
• PB Blaster
• Standard Socket Set
• Socket Extension
Installation
1.
If you live in an area where rust is just a part of automotive life,
be sure to hit all the body mount with a good amount of PB Blaster
a day before you start this project.
2. Start your body lift
by parking your Jeep on level ground and block your wheels just to
make sure nothing moves. It is very important that the ground is level.
3. If your CJ has one,
unbolt your radiator fan shroud and let it hang loose.
4. Loosen but DO
NOT remove all the body mount bolts. There are 11 total:
(1) up front, (3) on each side of the tub, (2) between the rear tires
just in front of the gastank next to the shocks and (2) located at
the rear corners of your Jeep.
5. At this point, I
went through all my bolts, washers, pucks, etc. and sorted them out.
I then placed them around my Jeep where each part would go so that
I wouldn't need to leave my tub in the air while I went looking for
what I needed.
6. Now, start removing
all the body mount bolts on the driver side only and then jack up
your tub ever so slightly using a 2x4 piece of wood between the edge
of your tub and the jack. I used a Hi-Lift but if you don't have one,
you can use the bottle jack that comes with your Jeep but you will
most likely need to use a concrete block to help you out. It is very
important to jack VERY SLOWLY (especially when using a Hi-Lift) and
just enough to remove the existing rubber mounts and install your
new taller mounts. Be sure that you assemble/install the new mounts
exactly as is described and shown in the instructions provided by
Daystar. Thread in the bolts by hand but do not tighten these bolts
all the way at this time.
7. Repeat step 6 on
the passenger side and then be sure to install the new puck up front.
The two body mounts underneath the tub can be a bit tricky to reach
and a 12" socket extension comes in real handy here.
8. Tighten all your
body mount bolts
9. If you have a fan
shroud, you will need to lower it by an inch before you re-install
it or else it will be in contact with your fan blades. The best and
easiest way to do this is to just drill new holes 1" above the
existing ones and use them to mount it back onto the radiator.
That should be it! This is a very simple to do mod and I did it completely
by myself in about 45 min. Please let me know if you have any questions. |
|
|