|
|
Performance
Accessories 1" Body Lift
(1997-2004 Jeep Wrangler TJ)
If
you are looking for just a little more space between your fenders
and your tires (especially if you just got bigger tires), a cheap
and simple mod you can do is add a 1" body lift. With just a
1"BL, you won't need to extend your gas filler hose, make adjustments
to brake lines, A/C or anything. The only thing you MUST do after
installing a BL is lower your radiator fan shroud. There's a whole
host of reasons why you shouldn't do anything more than 1" but
in my humble opinion, anything more than 1" just looks ugly.
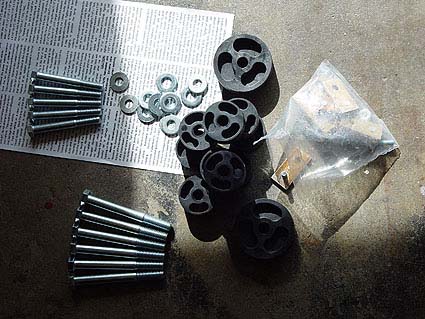
Anyway, I decided to get a Performance Accessories 1"BL as it
came highly recommended, was very complete as you can see in the photo
above and it was dirt cheap . I did not buy or install 1" Motor
Mounts as I was a bit cash strapped at the time (just bought new 32x11.50
BFG M/T KM's) and just used the radiator relocation brackets supplied
with the kit to lower the fan shroud.
What
You Will Need
•
1" Body Lift Kit
• Hi-Lift Jack or bottle Jack with concrete blocks
• 2x4 piece of wood
• PB Blaster
• Standard Socket Set
• Socket Extension
• Torque Wrench
Installation
1.
If you live in an area where rust is just a part of automotive life,
be sure to hit all the body mount with a good amount of PB Blaster
a day before you start this project.
2. Start your body lift
by parking your Jeep on level ground and block your wheels just to
make sure nothing moves. It is very important that the ground is level.
3. Pop your hood and
remove your radiator overflow bottle.
4. Unbolt your radiator
fan shroud and let it hang loose.
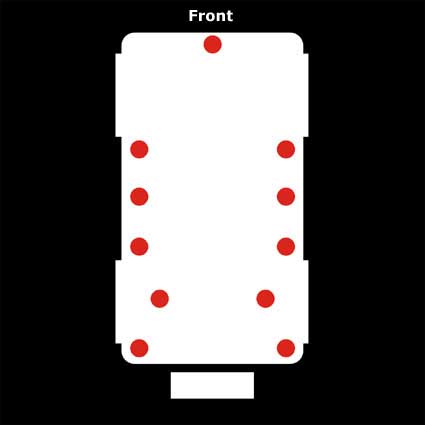
5. Loosen but DO NOT
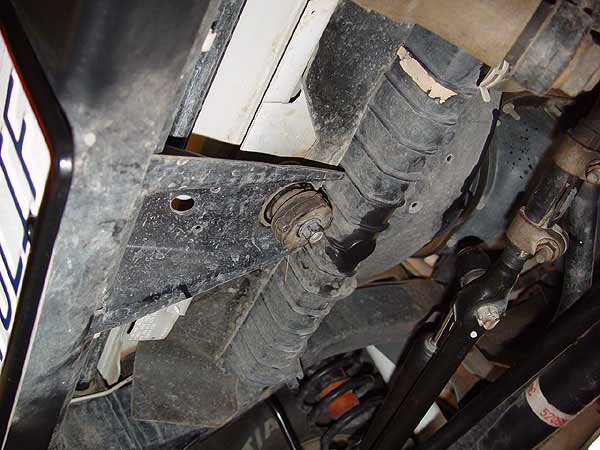
remove all the body mount bolts. There are 11 total: (1) up front,
(3) on each side of the tub, (2) between the rear tires just in front
of the gastank next to the shocks and (2) located at the rear corners
of your Jeep.
6. At this point, I
went through all my bolts, washers, pucks, etc. and sorted them out.
I then placed them around my Jeep where each part would go so that
I wouldn't need to leave my tub in the air while I went looking for
what I needed.
7. Now, start removing
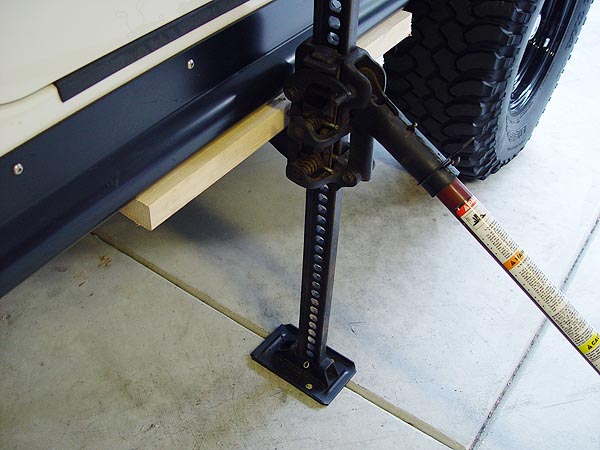
all the body mount bolts on the driver side only and then jack up
your tub ever so slightly using a 2x4 piece of wood between the edge
of your tub and the jack. I used a Hi-Lift but if you don't have one,
you can use the bottle jack that comes with your Jeep but you will
most likely need to use a concrete block to help you out. It is very
important to jack VERY SLOWLY (especially when using a Hi-Lift) and
just enough to slide in your new pucks on top of the factory rubber
mounts and then thread in the bolts by hand. Do not tighten these
bolts all the way at this time.
8. Repeat step 7 on
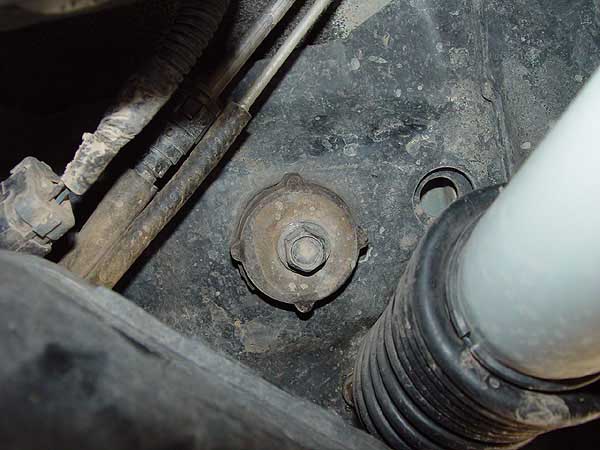
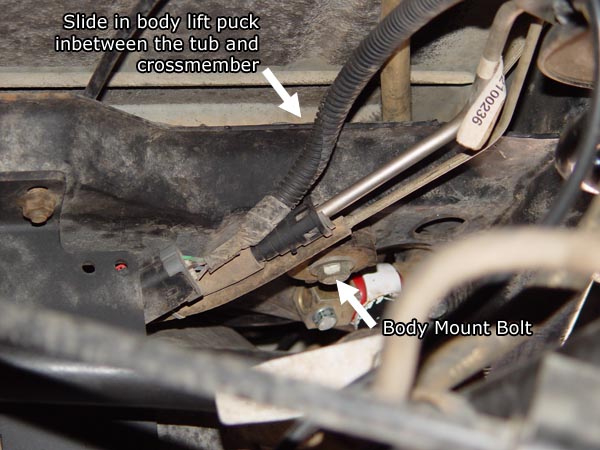
the passenger side and then be sure to install the new puck up front.
The two body mounts underneath the tub (where the 3"DIA pucks
go) can be a bit tricky to reach and a 12" socket extension comes
in real handy here.
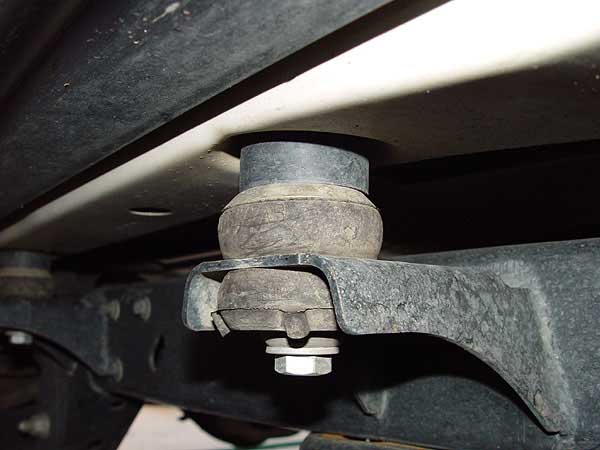
9. Tighten all your
body mount bolts to 35 ft. lbs. of torque or until the OEM rubber
pucks start to bulge a bit.
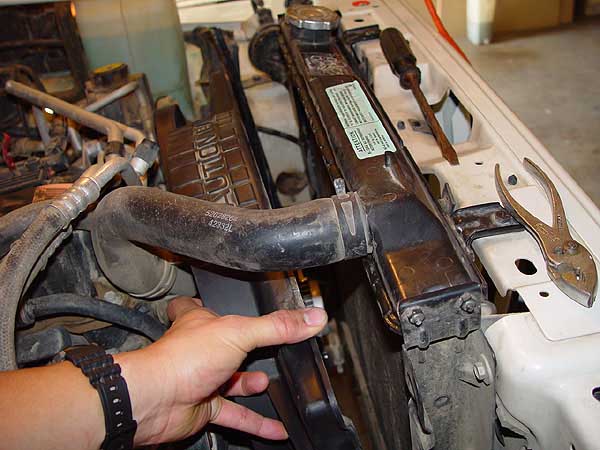
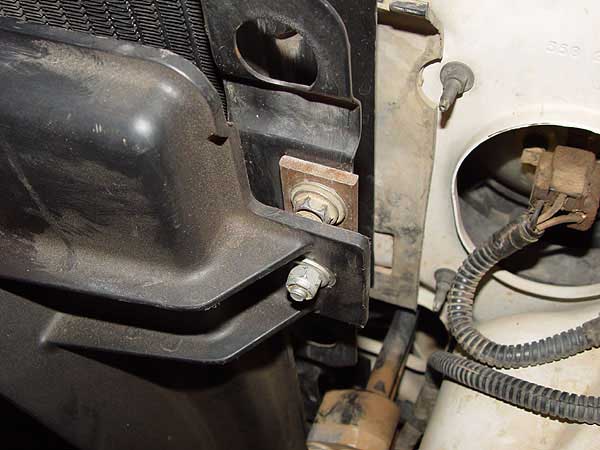
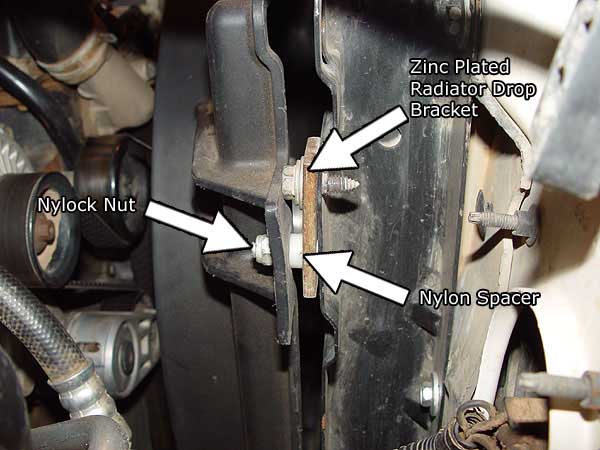
10. Re-install your
fan shroud using the radiator relocation brackets supplied with this
kit to effectively lower it by 1". This is very important to
do if you do not want to trash your fan. See the last two Images on
the right to get a better understanding of how this is done. Working
space is very limited but can be done. Just take your time and be
patient. You will also notice that I went ahead and got some nylock
nuts and 1/4" nylon spacers to prevent bending the plastic shroud
and any premature loosing of the nuts.
11. Re-install your
radiator overflow bottle.
12. Now, time to install
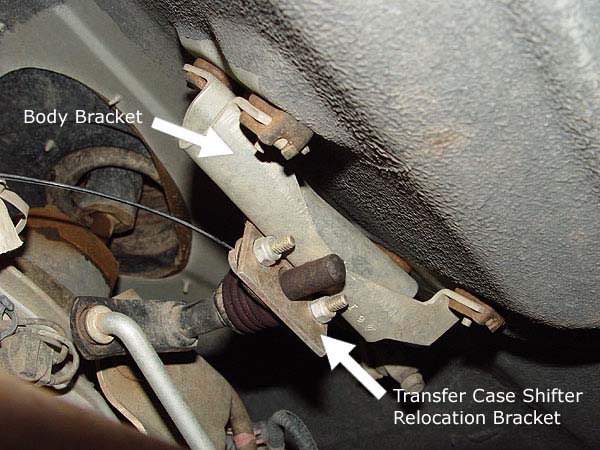
the T-case shifter relocation bracket. If you crawl under your jeep
and look up underneath your skidplate, you should see the shifter
linkage attached to a bracket on your tub. Start off by unscrewing
the two bolts holding the bronze bushing/retainer and gasket to the
body bracket.
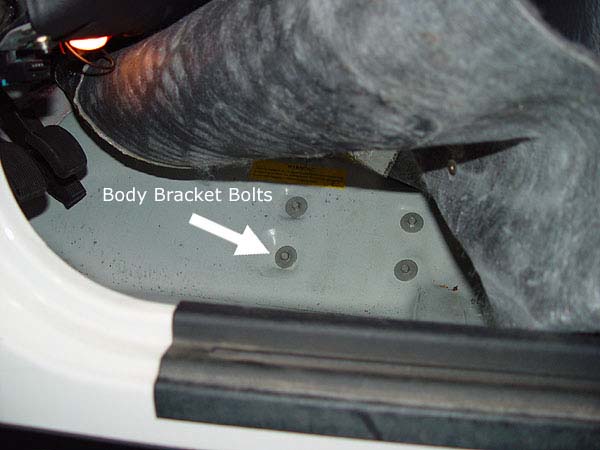
13. Next, lift up your
carpeting on the driverside of your Jeep and you should see 4 bolts
on the transmission hump. Unscrew these bolts and then climb back
underneath your Jeep and then separate your body bracket from the
torque shaft, bushing and gasket.
14. Bolt on the relocation
bracket to the body bracket. Slip the rubber gasket through the hole
on relocation bracket and then screw on the bolts that hold the bushing
to it.
15. Back underneath
your Jeep, slip the torque shaft back through the bushing and gasket
and then re-install the body bracket to the tub. A friend is always
good to have here as it helps to have someone holding the bracket
up against the tub as you bolt it back on from the inside.
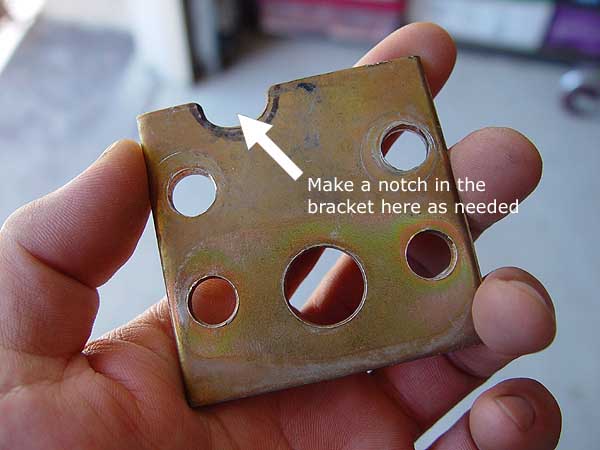
Addendum: In some cases,
a knocking may develop under the driverside floor when accelerating
or going over bumps. This is caused by one of the T-case shifter link
end tapping against the relocation bracket as it giggles under these
conditons. To fix this problem, you will need to remove the bracket
and grind a notch (red dotted line on the diagram to the left) where
the impact point is occuring (shown as red "x" on diagram
to the left). After a period of time, this point will be very visible
on the bracket. Also, you will need to make sure that the rubber gasket
that holds the torque shaft is not damaged or torn. A damaged gasket
will allow the torque shaft to protrude through it and cause excessive
giggling, which will also cause the knocking.
That should be it! This is a very simple to do mod and I did it completely
by myself in about 45 min. Please let me know if you have any questions.
 |
|
|
|