 |
What You Will Need
• RE2" Budget Boost (Part #RE7030)
• 13,15,18,19mm Socket & Wrench
• 1/2",9/16" Socket & Wrench
• Torx T-55 Bit
• Standard Ratchet
• 3" & 12" Ratchet Extension (optional)
• Torque Wrench
• Jack stands (2 min - 4 prefered)
• 2.5 Ton Floor Jack (21" or higher)
• Wheel Chocks
• PB Blaster
• White Lithium Grease
• Bench Vice
• File or grinder
• Hammer |
|
|
|
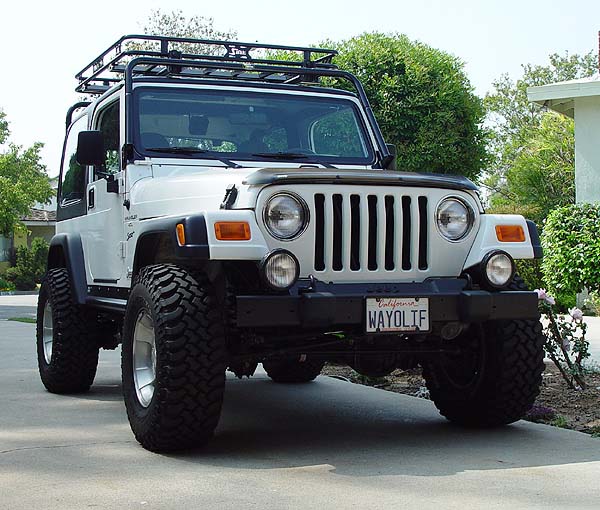
| This
is what my Jeep looked like right after installing this lift and sitting
on 31x10.50's. |
 |
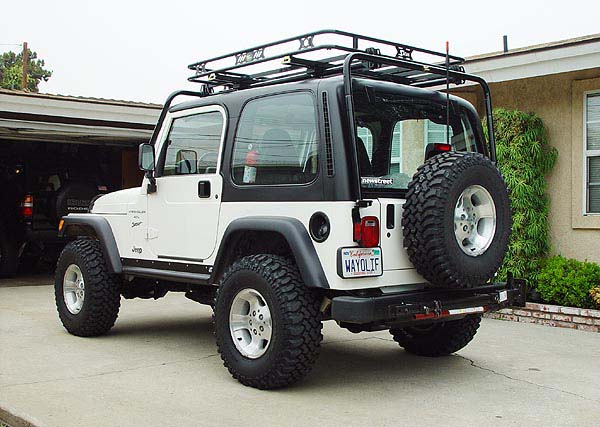
| This
pic is what it looked after installing a 1" body lift and sitting
on 32x11.50's. |
 |
| Here
another shot from the rear. |
|
|
Jeep TJ Rubicon Express (RE BB)
2" Budget Boost Installation Write-Up
As amazing as a bone stock Jeep Wrangler TJ is on the trail, there come a time (usually sooner than later) when every Jeep owner gets the bug to go higher. After all, the higher you go, the bigger tires you can stuff underneath and the more ground clearance you will get. But what happens when you get the "bigger is better" bug and you don't have a lot of cash to spend? Well, at about $200 (shipped to your door) for 2" coil spacers, Doetsch Tech shocks and rear bumpstop extensions, just about anybody can afford to get a Rubicon Express Budget Boost. It's cheap, easy to install and ultimately what I had been running on my Jeep for about 2 years and loved.
Installation
|
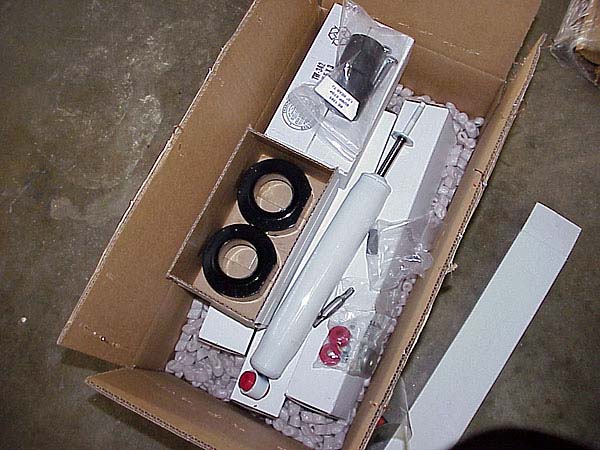
 |
To the left is a pic of all the stuff you will get with your Rubicon Express Budget Boost.
1. If the bottom of your Jeep looks anything like mine does, take the time and give it a good hose down before you do anything. If you live in a state that salts their roads, it would be a good idea to do this a few days in advance and then spray all the bolts you will be working on (i.e. shocks mounts, swaybar links, etc.) with a good dose of PB Blaster.
2. Be sure to park your Jeep on a flat, level surface like a driveway before you do anything. Make sure you're in gear and the e-brake has been applied.
3. Chock your front wheels and then just crack loose your rear lug nuts so that it will be easier to remove once your Jeep is in the air. |
 |
4. Starting at the back, disconnect your rear swaybar links on both sides of your Jeep using a 15mm and 18mm socket and wrench as indicated by the arrow in the pic to the left. You just need to remove the bottom bolt and not the entire link.
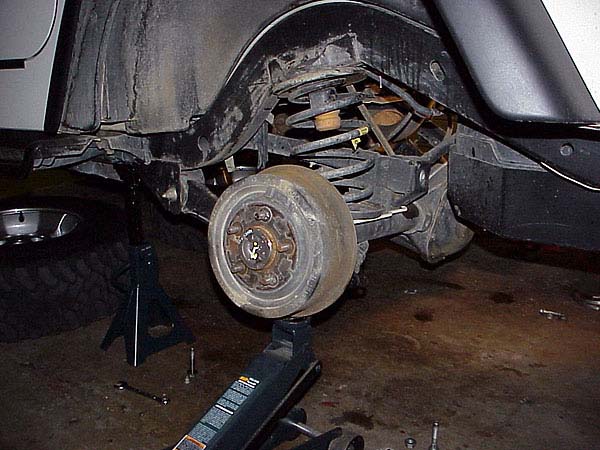
5. Jack up the rear of your Jeep from the differential enough for you to remove your tires and then lower it back onto jack stands. Make sure your stands are placed underneath your frame rails just in front of your rear lower control arm mounts and leave your floor jack holding up your axle.
6. Now, place your wheels in front of the jack stands underneath the frame rails for added protection.
7. Remove your rear shocks from the axle using a 15mm and 18mm socket and wrench. The upper mounts will require a 13mm socket to remove and a long 12" ratchet extension will help out. With the shocks removed, lower your floor jack so that your axle hangs at a full droop. |
|
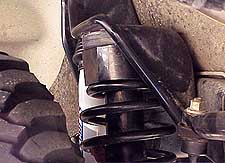
8. Reposition your floor jack under the driverside of your axle and then carefully jack it up as shown in the pic to the left. This action will force the passenger side of your axle to drop and allow you remove the spring with little effort (fig 3). Be sure to go slow and make sure none of your brake lines are put under too much stress.
9. Remove your spring and then the rubber bumpstop by firmly grabbing it and then working it back and forth until it comes out. |
 |
10. Inside the bumpstop retaining cup, you will notice a bolt holding it in place. Remove this bolt using a deep 15mm socket or standard socket with a 3" ratchet extension. Replace this bolt with the longer one supplied by Rubicon Express. Place the new bumpstop extension over the new bolt, then the spacer over the extension as show in the pic to the left. Re-attach everything to the upper spring perch.
11. Slip the spring back into place (some people have found it easier to install the rubber bumpstop after slipping on the spring) and then lower your floor jack so that your axle is hanging again. Repeat steps 7 - 10 on the opposite side. |
 |
12. Now comes the fun part. As I'm sure you've already noticed, the new shocks do not come with the bar pins installed through the bushings. Unfortunately, they can be a bit difficult to push through too. Here's what you will need to do. First, place the bar pin in a bench vice, lube it and the shock bushing well with white lithium grease. Then, place the shock bushing over the bar pin, work it around the pin a bit and then push down forcefully with one hand while rotating the entire shock back and forth with your other hand. The bar pin should slip through with ease. While you are at it, go ahead and install the bar pins on your front shocks too.
13. Your rear shocks should have come with two metal sleaves. Slide these into the bottom bushings and then install your new rear shocks. The upper shock mount bolts need to be torqued to 23 ft. lbs. The lower shock mount bolts need to be torqued to 70 ft. lbs. Re-attach your wheels, remove the jack stands, lower your vehicle and torque down your lug nuts to 90 ft. lbs. Then re-attach your rear swaybar links and torque them down to 40 ft. lbs. Your rear end is now lifted! |
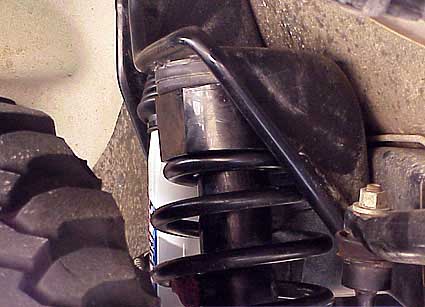
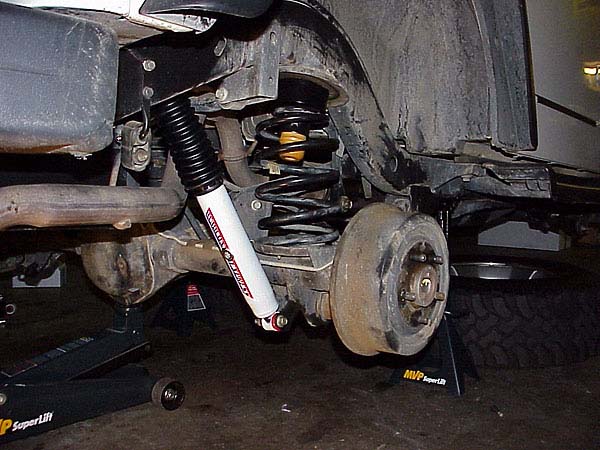
 |
This is what your rear suspension should look like when done. |
 |
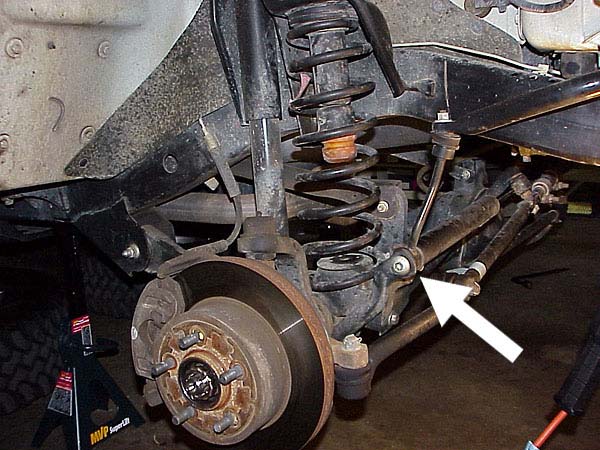
14. Okay, on to the front end. Chock your rear wheels and then crack loose your lug nuts.
15. Disconnect your front swaybar links on both sides of your Jeep using a T-55 Torx Bit as indicated by the arrow in the pic to the left. Once again, you just need to remove the bolt and not the entire link.
16. Again, jack up your Jeep from the axle, remove your wheels and then carefully lower it back down on to jack stands placed just behind the lower control arm mounts.
17. As before, be sure to place your wheels behind your jack stands underneath the frame rails for added protection.
18. Remove your front shocks using a 13mm deep socket and wrench on the axle. As you will see, these shocks mount a bit different on top as they are secured by a stud welded to the shock. You will need a 9/16" wrench and a small crescent wrench or pliers to hold things in place while removing these nuts..
19. Remove the retainer holding down the spring on the driver side using a 13mm socket. Most TJ's will not have a retainer on the passenger side.... but I have heard of some 1997 and Canadian models do.
20. As before, start jacking up the axle from the driver side carefully until your can remove the spring on the passenger side. Be sure you pay close attention to your brake lines
21. There are no bumpstop extensions for the front so just pull out the rubber bumpstop, unbolt the retainer, leave the existing rubber spring isolator where it is and install your new Rubicon Express 2" coil spacer over it.
22. Re-install the bumpstop retaining cup and then your spring. It is quite difficult to do the fronts with the rubber bumpstop on so install it after the spring is back in place.
23. Lower your axle and repeat steps 18 - 22.
24. Install your new shocks. The lower shock mount bolts require 250 in. lbs. of torque (NOTE: that was 250 INCH pound) and the upper stud will require 17 ft. lbs. of torque. Re-attach your wheels, remove the jack stands, lower your vehicle, torque down your lug nuts to 90 ft. lbs. and then re-attach your front swaybar links. Torque these bolts to 70 ft. lbs. |
 |
This is what your front suspension should look like when done. |
25. Be sure to get a
front end alignment after finishing this job as your toe will need
to be set and steering wheel centered. For information on how to do
this yourself, click on the link below:
BASIC FRONT END ALIGNMENT
It is rare, but if you are now experiencing some drive line vibrations,
click on the link below to see how to eliminate them with a budget
transfer case skid plate drop:
TRANSFER CASE SKID PLATE DROP WRITE-UP
Congratulations, you are now 2" higher!!
Help Support 4x4xplor.com
If you have found this write-up to be helpful to you, I would be grateful if you could please let Rubicon Express and/or the vendor you purchased your Budget Boost from know. Thanks!
If you have any questions, please don't hesitate to contact me by
e-mail.
Thank You,
Eddie (wayoflife) |
RUBICON
EXPRESS 2" BUDGET BOOST FAQ's
Q.
How do you like your Rubicon Express BB?
A. In my humble opinion,
the RE 2"BB is one of the best investments I've made. At
$199 for a set of 2" spacers, awesome DT3000 shocks and
rear bumpstop extensions, this kit is a steal of a deal. This
is a great setup if you plan on running 31x10.50s.
Q. My Jeep is
a daily driver and wanted to know how this lift effects the
ride?
A. Like almost
everyone I know who has Doestch DT3000's, I think you will find
that these shocks ride as good if not better than the factory
set.
Q. Can you run
32x11.50's with just the BB?
A. Yes, but if
you do any wheeling, I wouldn't recommend it without the addition
of a 1" Body Lift. Performance Accessories sells a very
complete kit for about $69 and although it's a good idea to
do a Motor Mount lift at the same time, it is not necessary
and I elected not to. With the addition of a body lift, you
can flex disconnected without any rubbing... at least I don't
anyway.
Q.
Why aren't there any bumpstop extensions for the front included
with the BB kit?
A.
front springs are taller, have more coils and are heavy duty
because they need to support the weight of the engine. if you
will notice, rear springs are shorter, have fewer coils and
are softer because they provivde a more comfortable ride. the
problem with this is that the can be over compressed (squeezed
together so much so that they do not return to their original
shape) on the trail when at a full flex. with just a 2"
lift, your front coils will be just fine.
Q.
Will I get vibes after installing the BB?
A. Every Jeep
is different. Having said that, I have heard most of the people
who do end up with vibes also have a Dana44 rear end. Just so
you know, I have a Dana44 and did not get any vibes and most
everyone I know who installed a BB didn't either. If you do
get vibes, it can be fixed easily by dropping
your T-case a bit using a few washers. Dana44's
are more prone to vibes after a lift but I didn't have any. |
|
|
|